Instagram Integration
🔹 Before App Installation
Pre-Installation Checklist
Complete these steps before proceeding with the installation.
📸 Instagram Integration
ℹ️ Note: Leave these fields blank if you don't want to use Instagram now. You can configure it later.
Option 1: Set Up Later
Run this command on your server when ready:
INSTAGRAM_APP_ID='your_instagram_app_id' \
INSTAGRAM_APP_SECRET='your_instagram_app_secret' \
INSTAGRAM_CONFIGURATION_ID='your_instagram_config_id' \
INSTAGRAM_VERIFY_TOKEN='your_instagram_verify_token'
Option 2: Set Up Now
Follow the configuration instructions below.
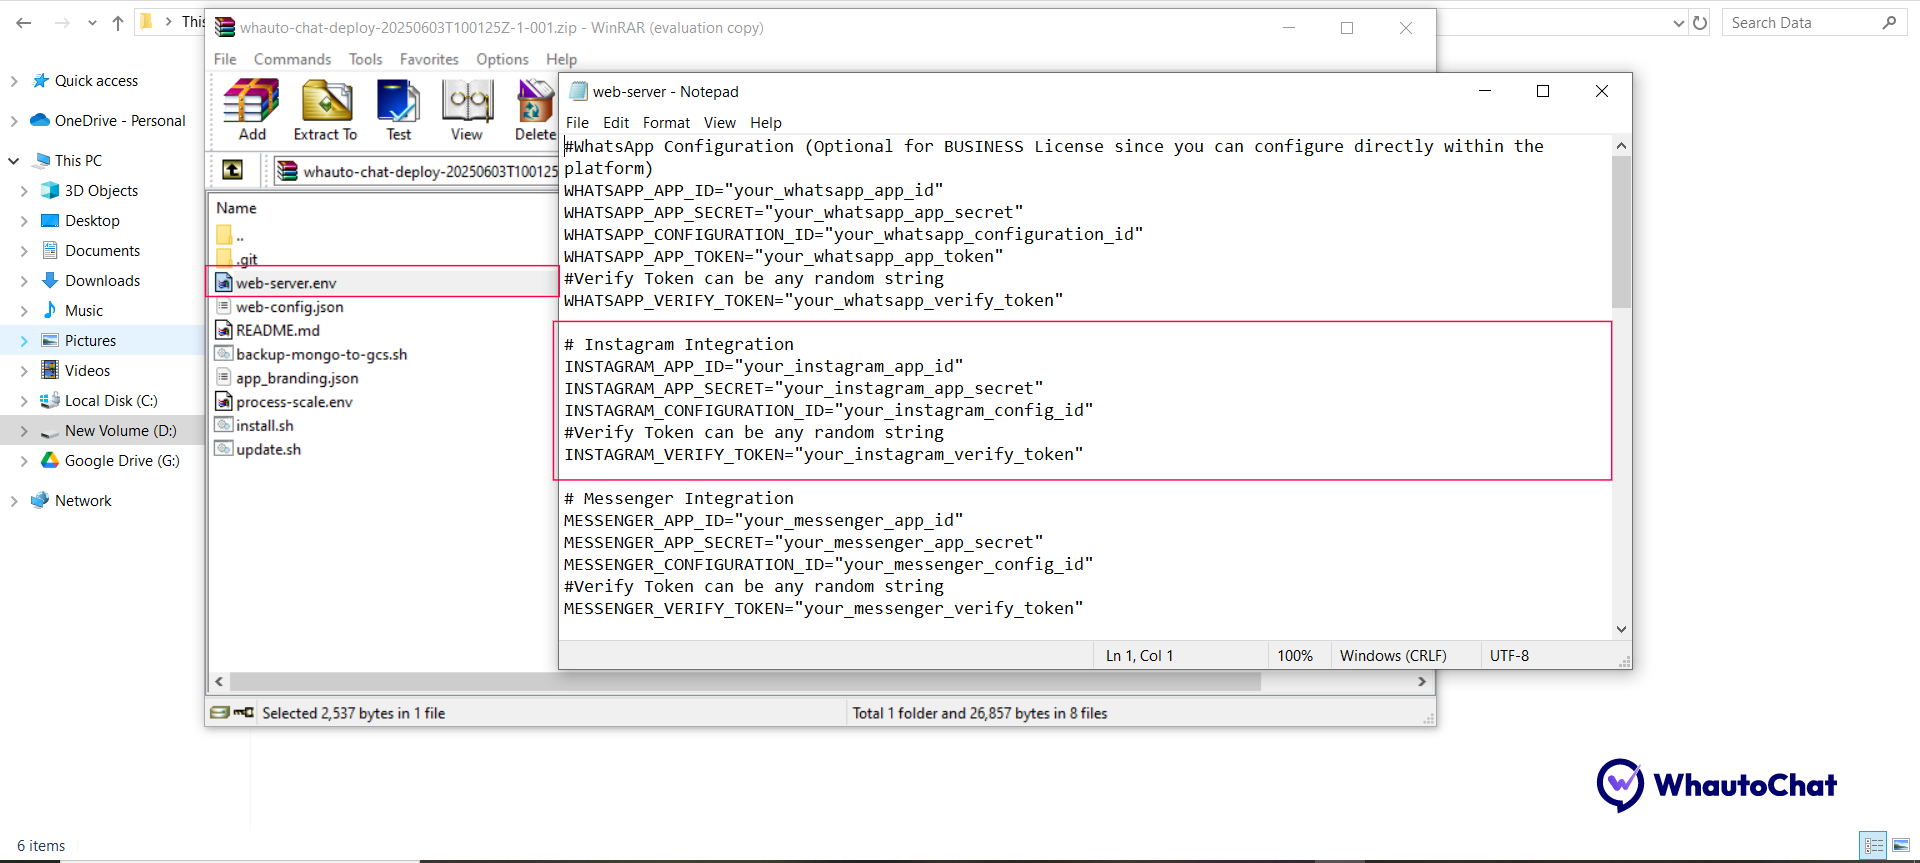
🔧 Step 1: Locate Configuration File
- Open the
web-server.envfile in the installation folder provided by WhautoChat. - Update the following Instagram integration settings:
# Instagram Integration
INSTAGRAM_APP_ID="your_instagram_app_id"
INSTAGRAM_APP_SECRET="your_instagram_app_secret"
INSTAGRAM_CONFIGURATION_ID="your_instagram_configuration_id"
INSTAGRAM_VERIFY_TOKEN="your_instagram_verify_token"  # Any random string
🧩 Step 2: Create a Meta Business Portfolio
⏩ Skip this step if you already have a Meta Business Suite account.
- Go to business.facebook.com
- Log in with your Facebook account
- Create a Meta Business Suite account to generate your business portfolio
👨💻 Step 3: Create a Facebook Developer App
⏩ Already have a Meta App for WhatsApp or Messenger? Skip to Step 4.
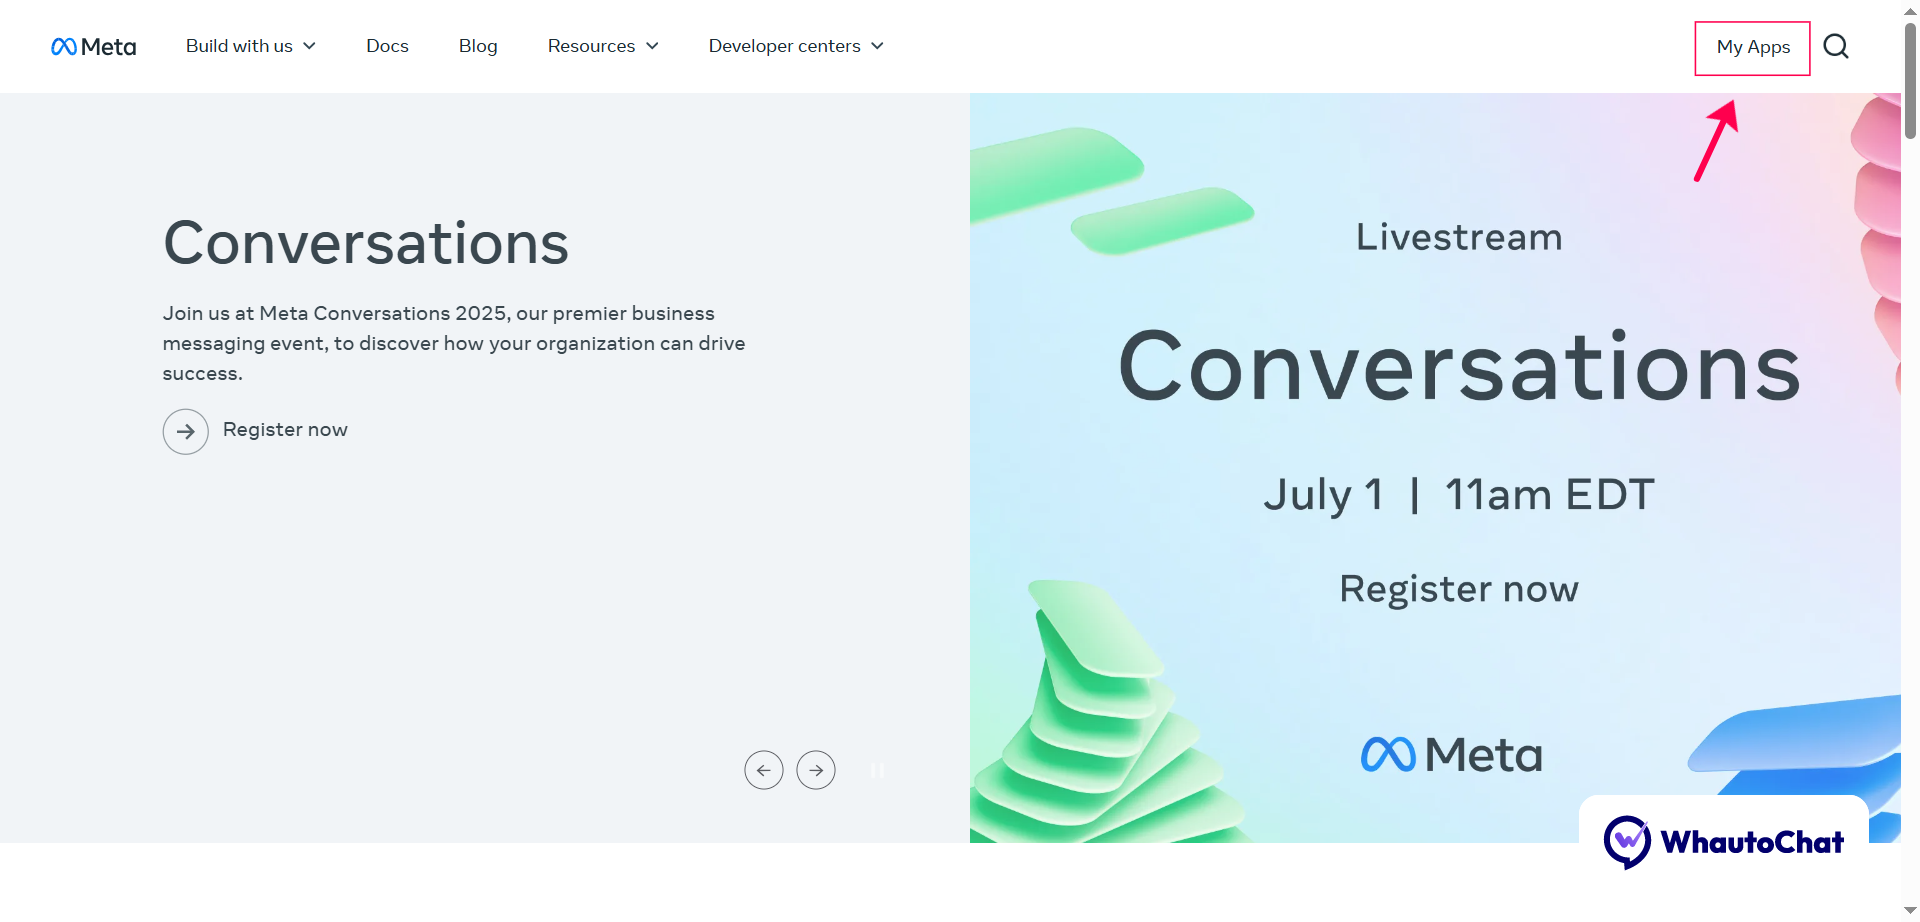
- Go to Facebook Developers
- Log in or sign up for a Developer account
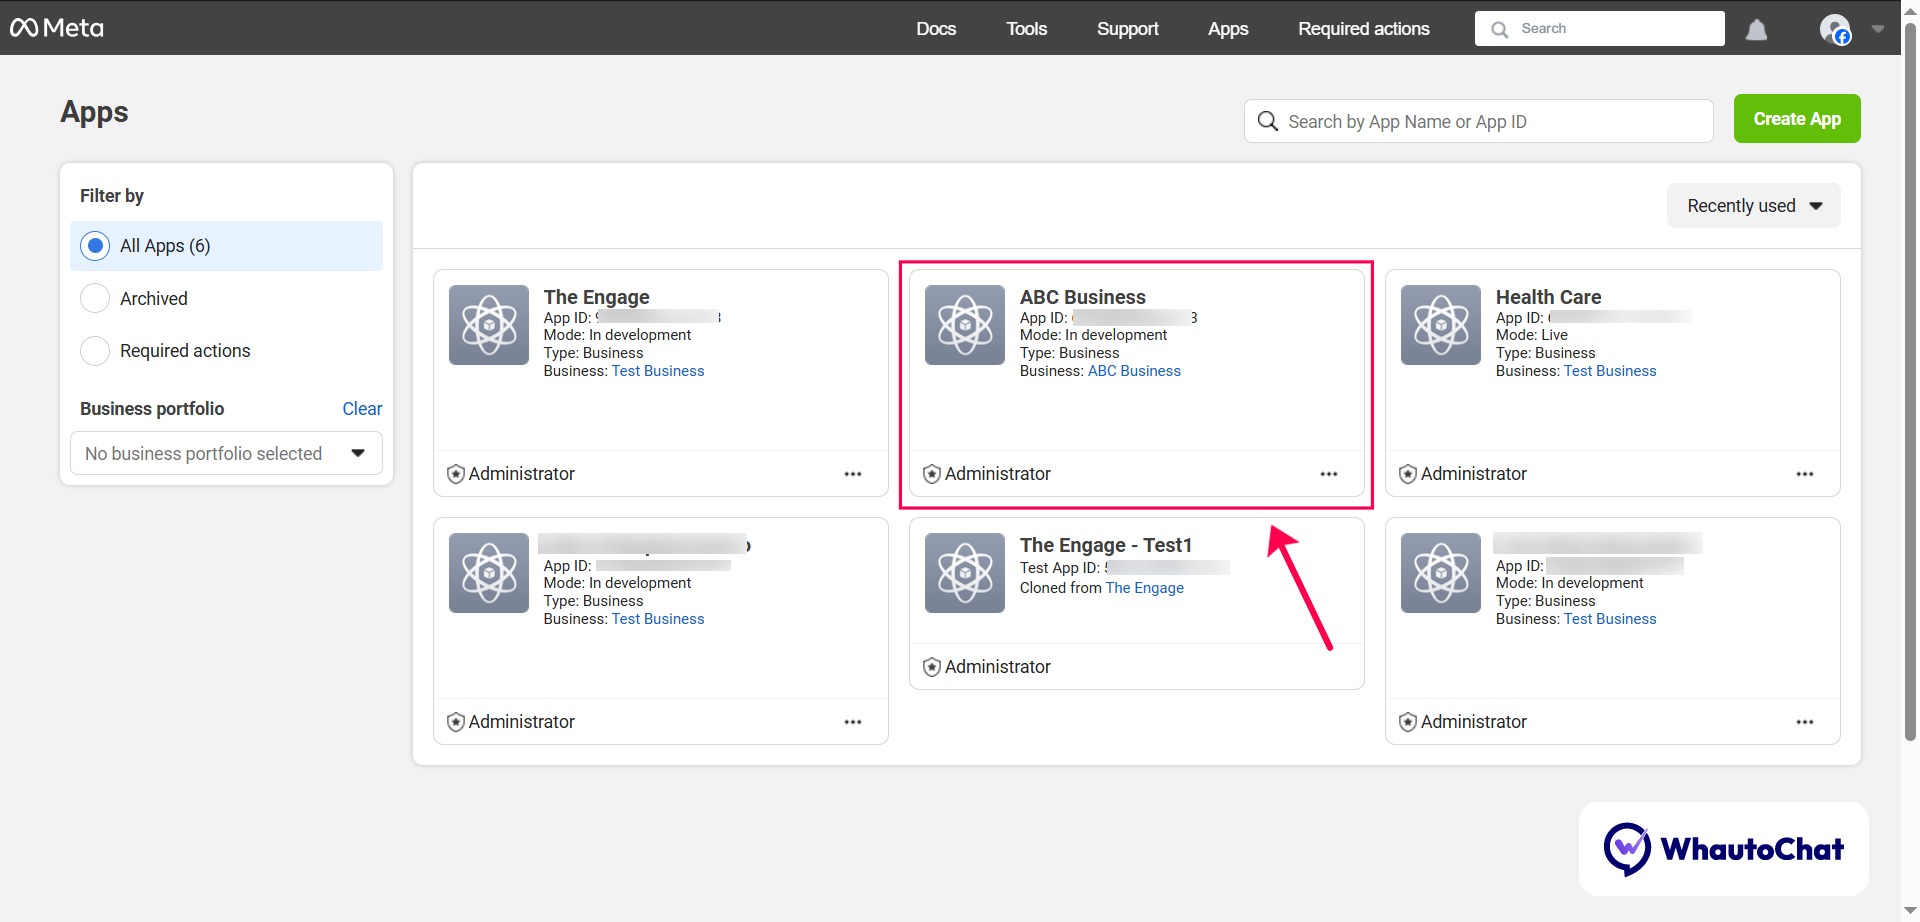
- Click "My Apps" in the top-right corner, then "Create App"
- In the dialog, click the Create App button (top right)
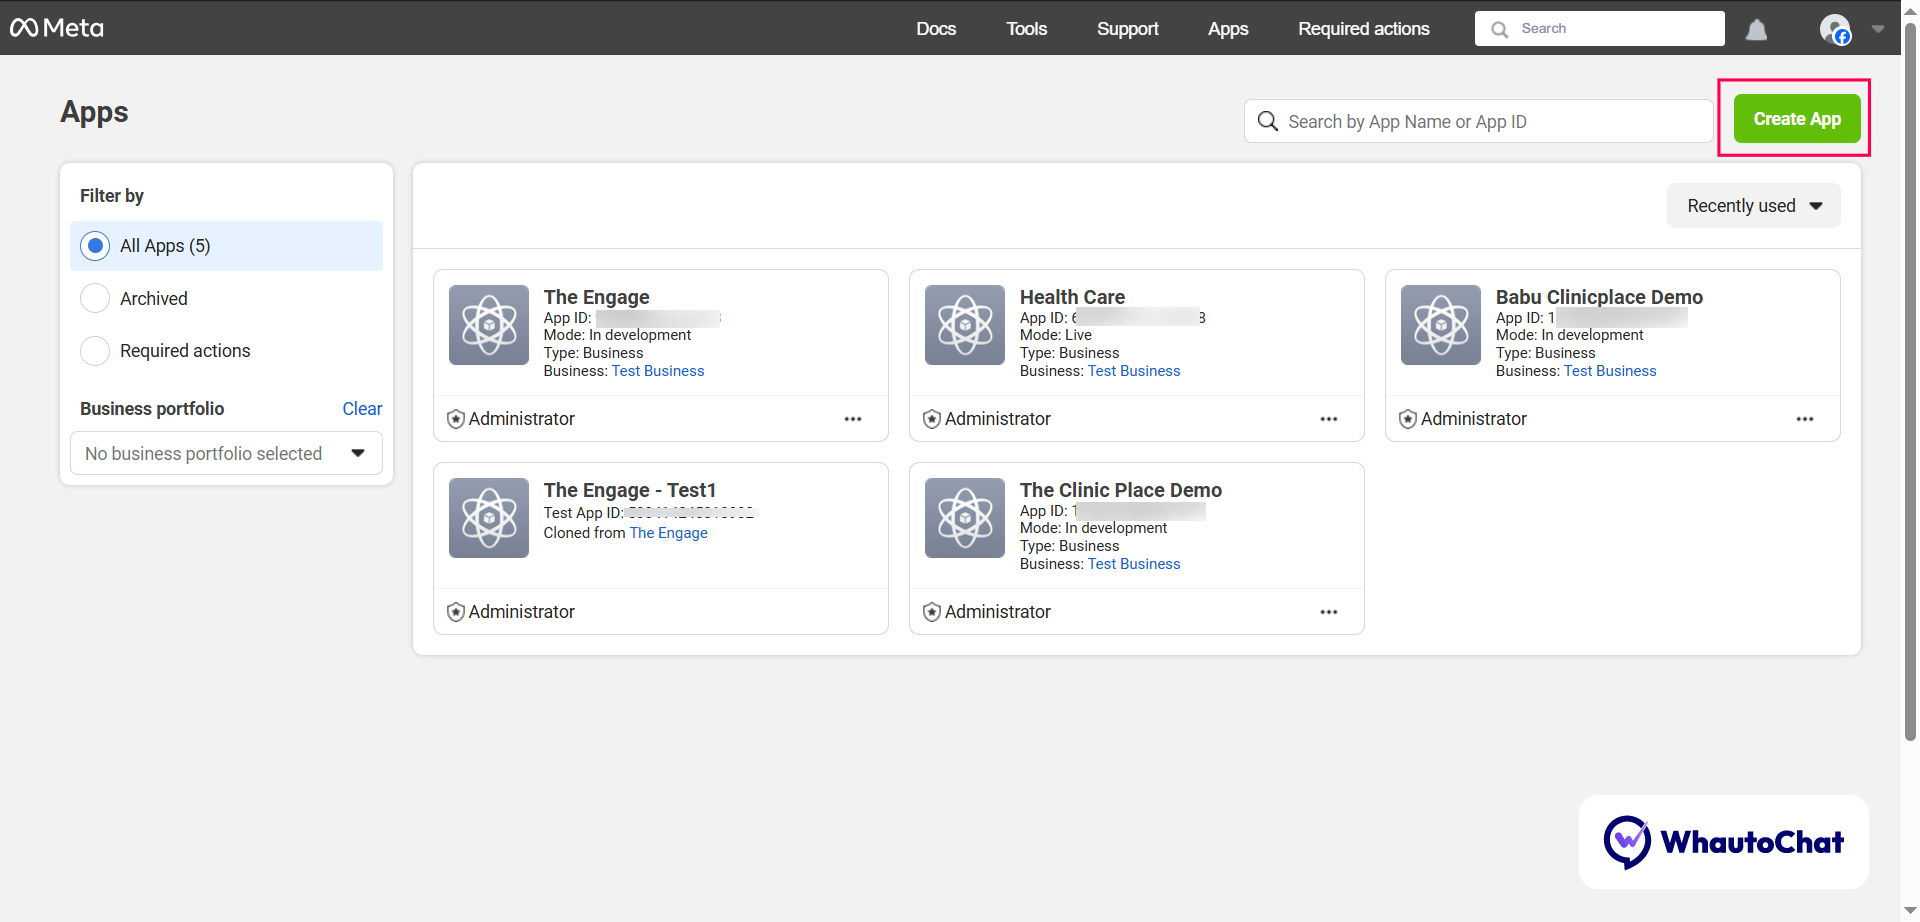
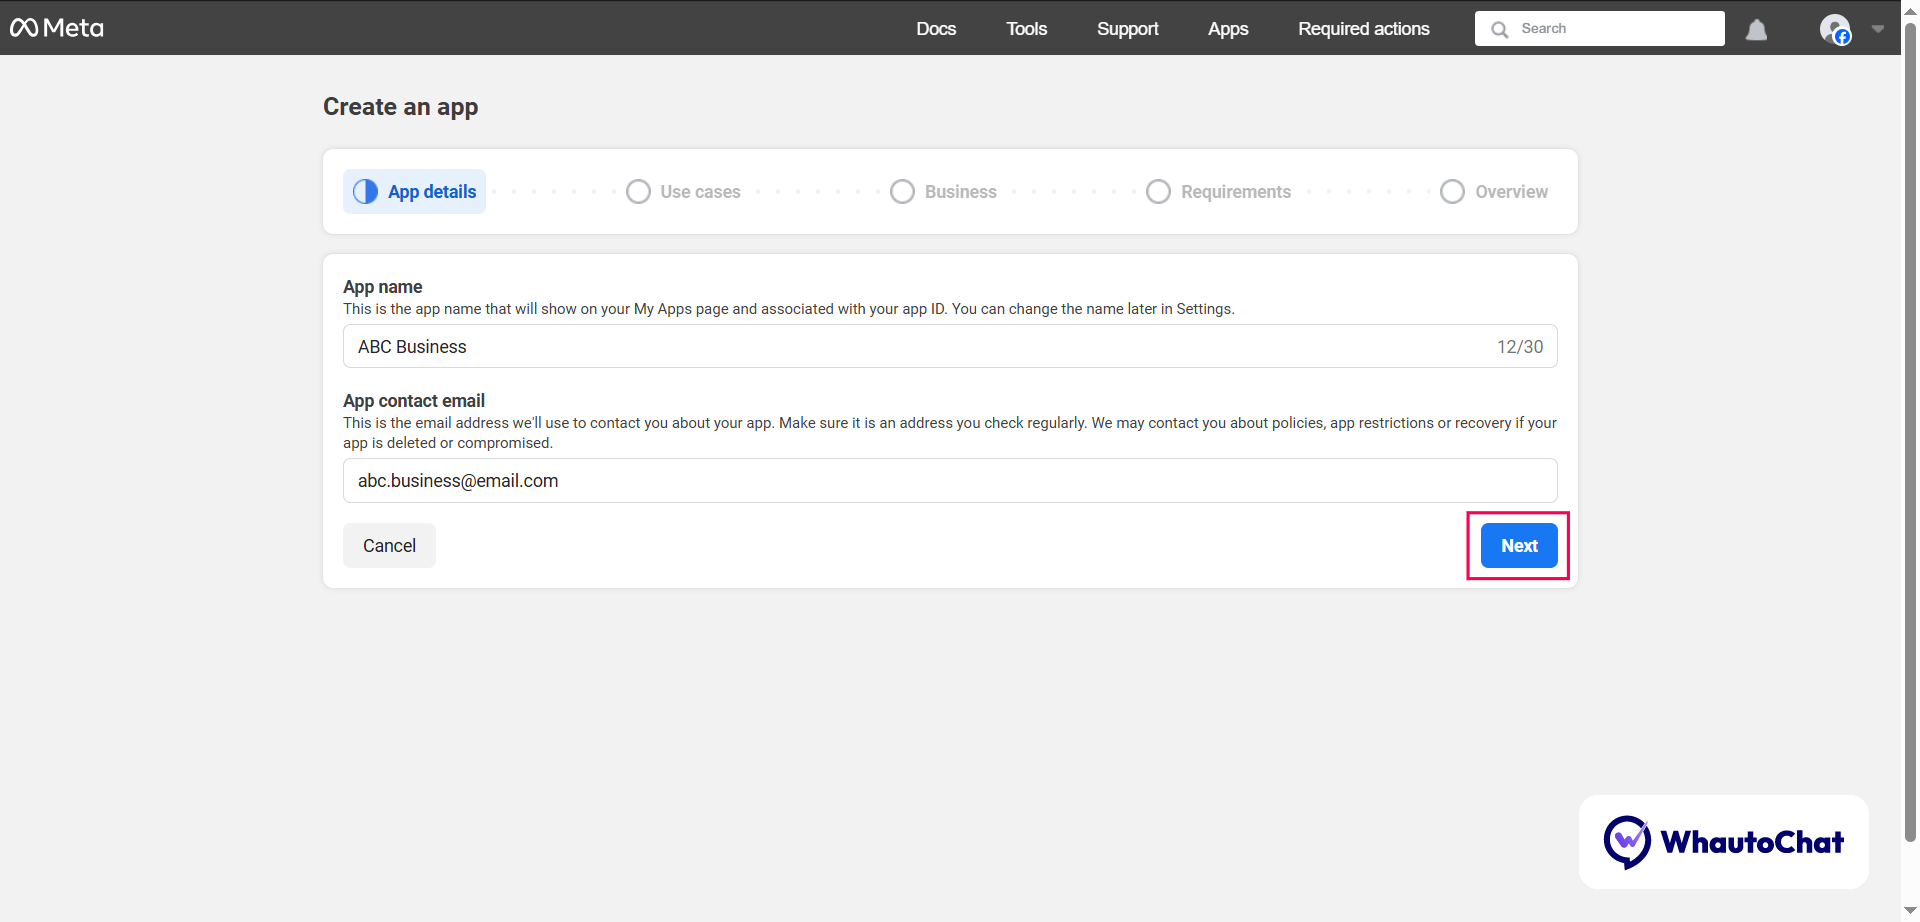
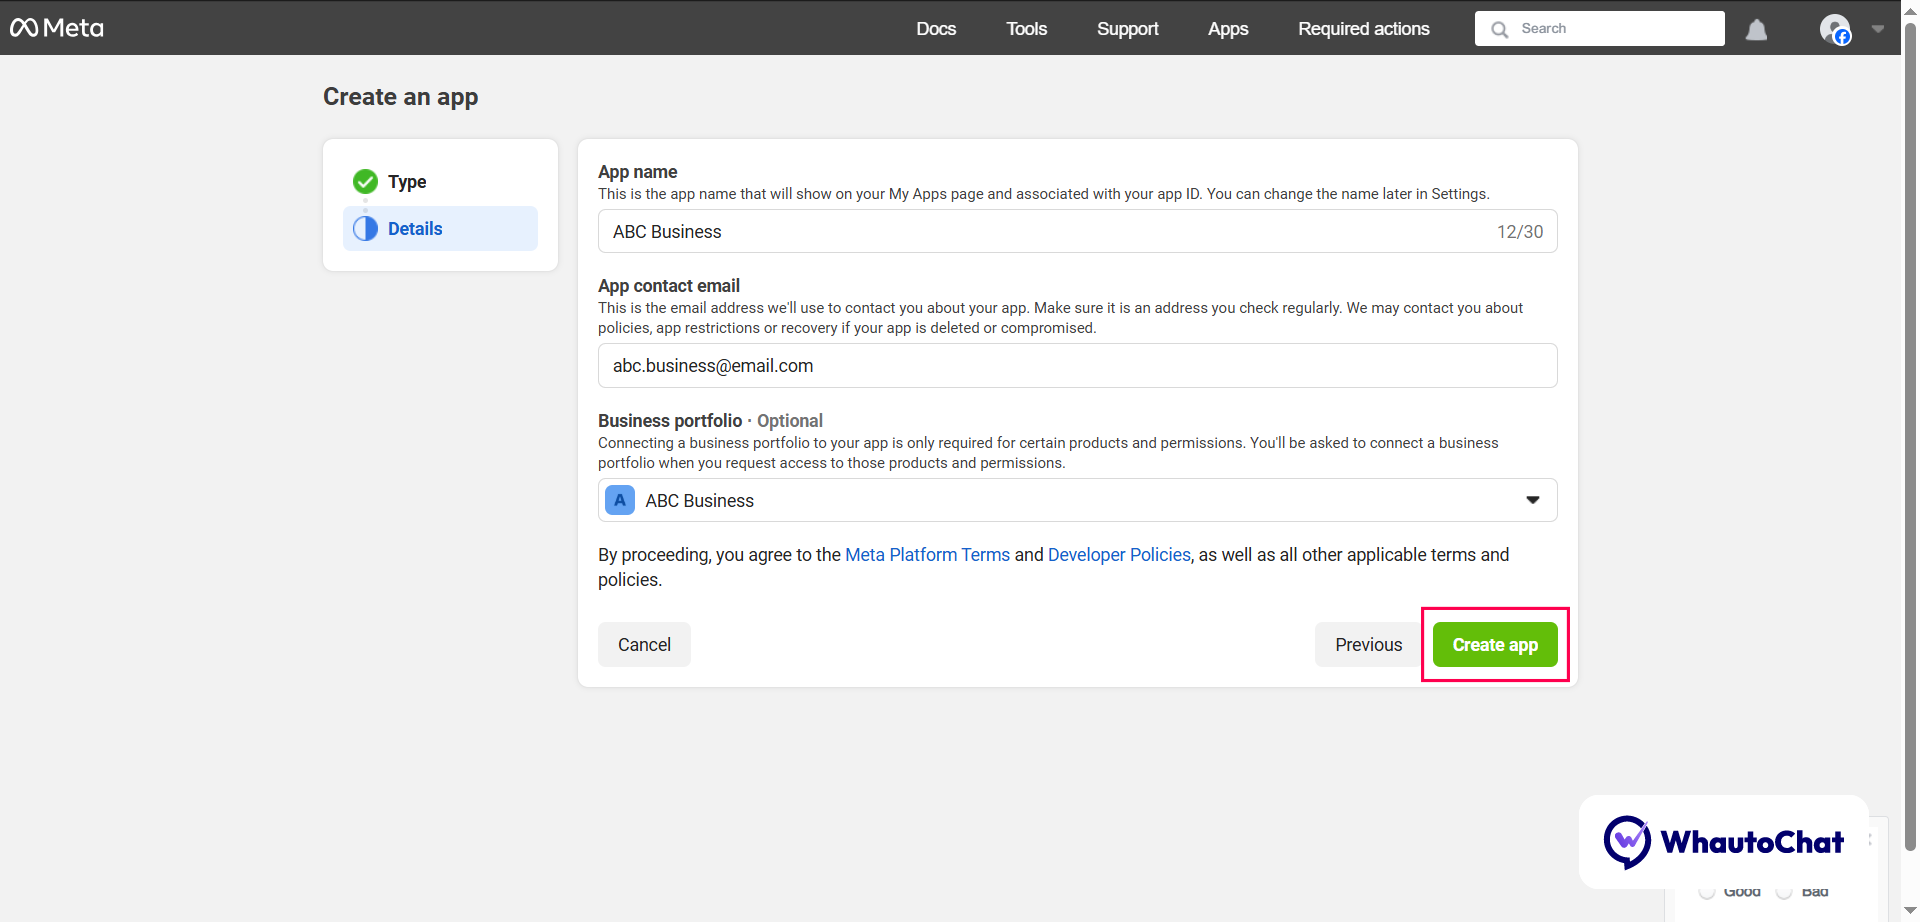
- Enter the app details:
- App Name (e.g., "ABC Business")
- App Contact Email
- Click Next
- Under "Use Cases", select Other → Click Next
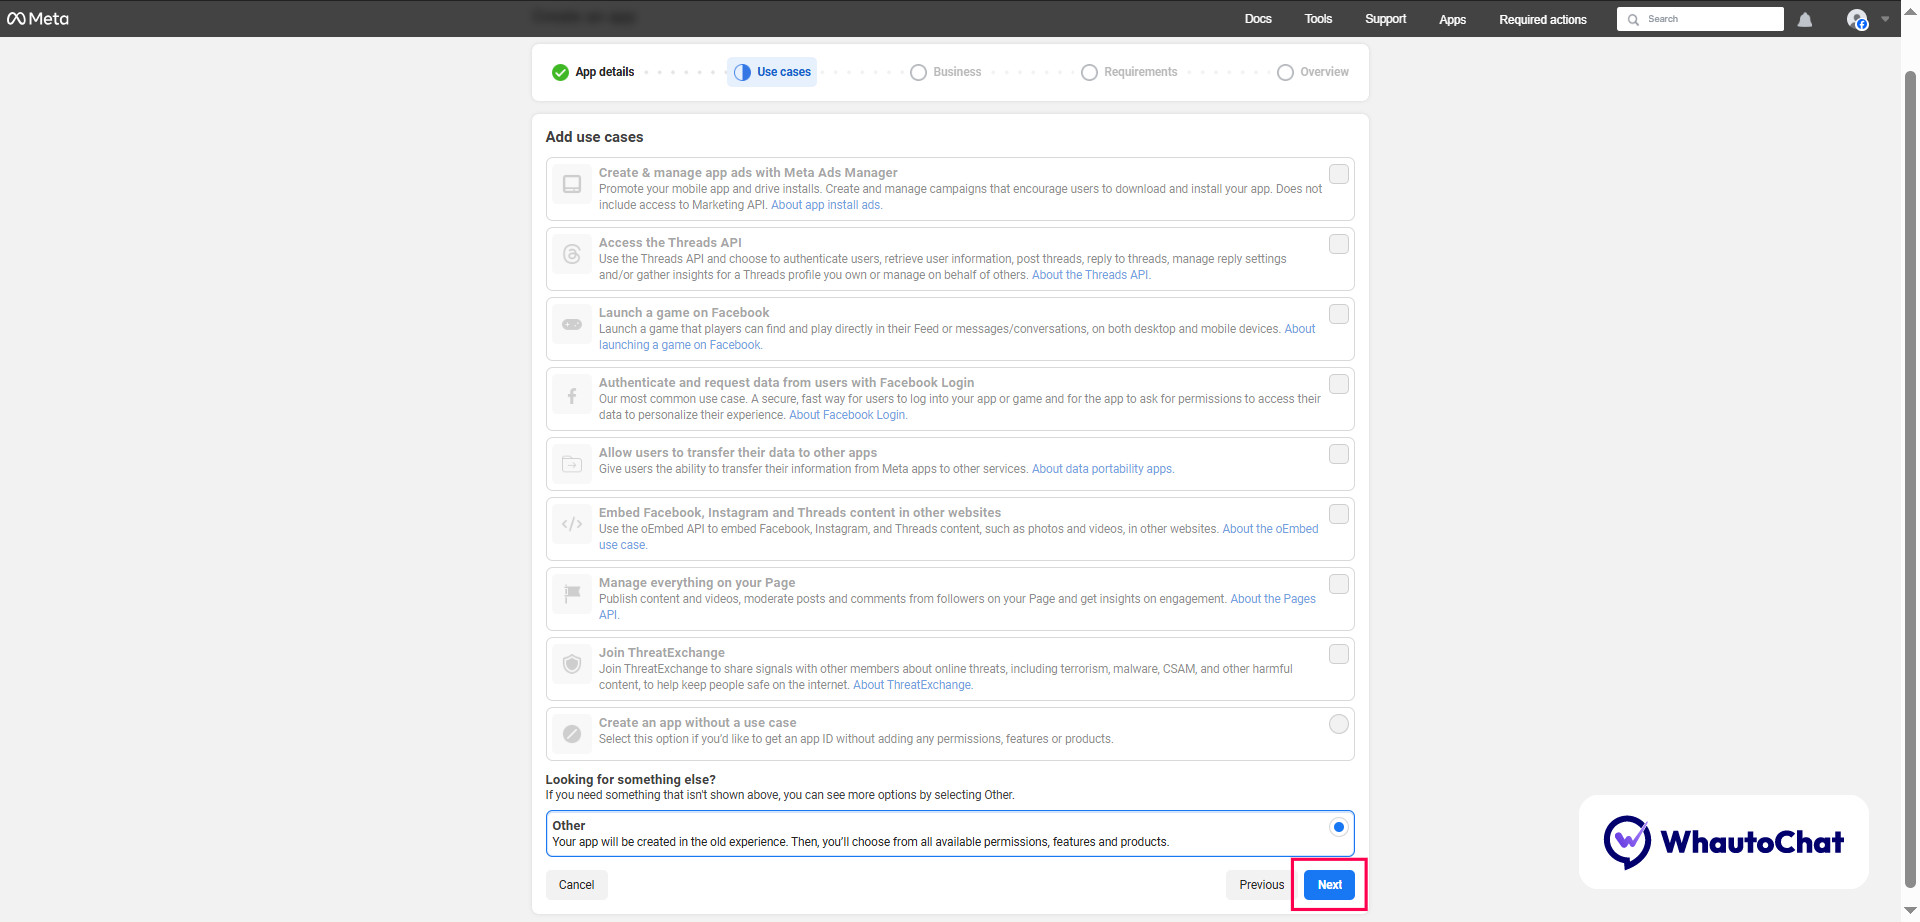
- Choose Business as the App Type → Click Next
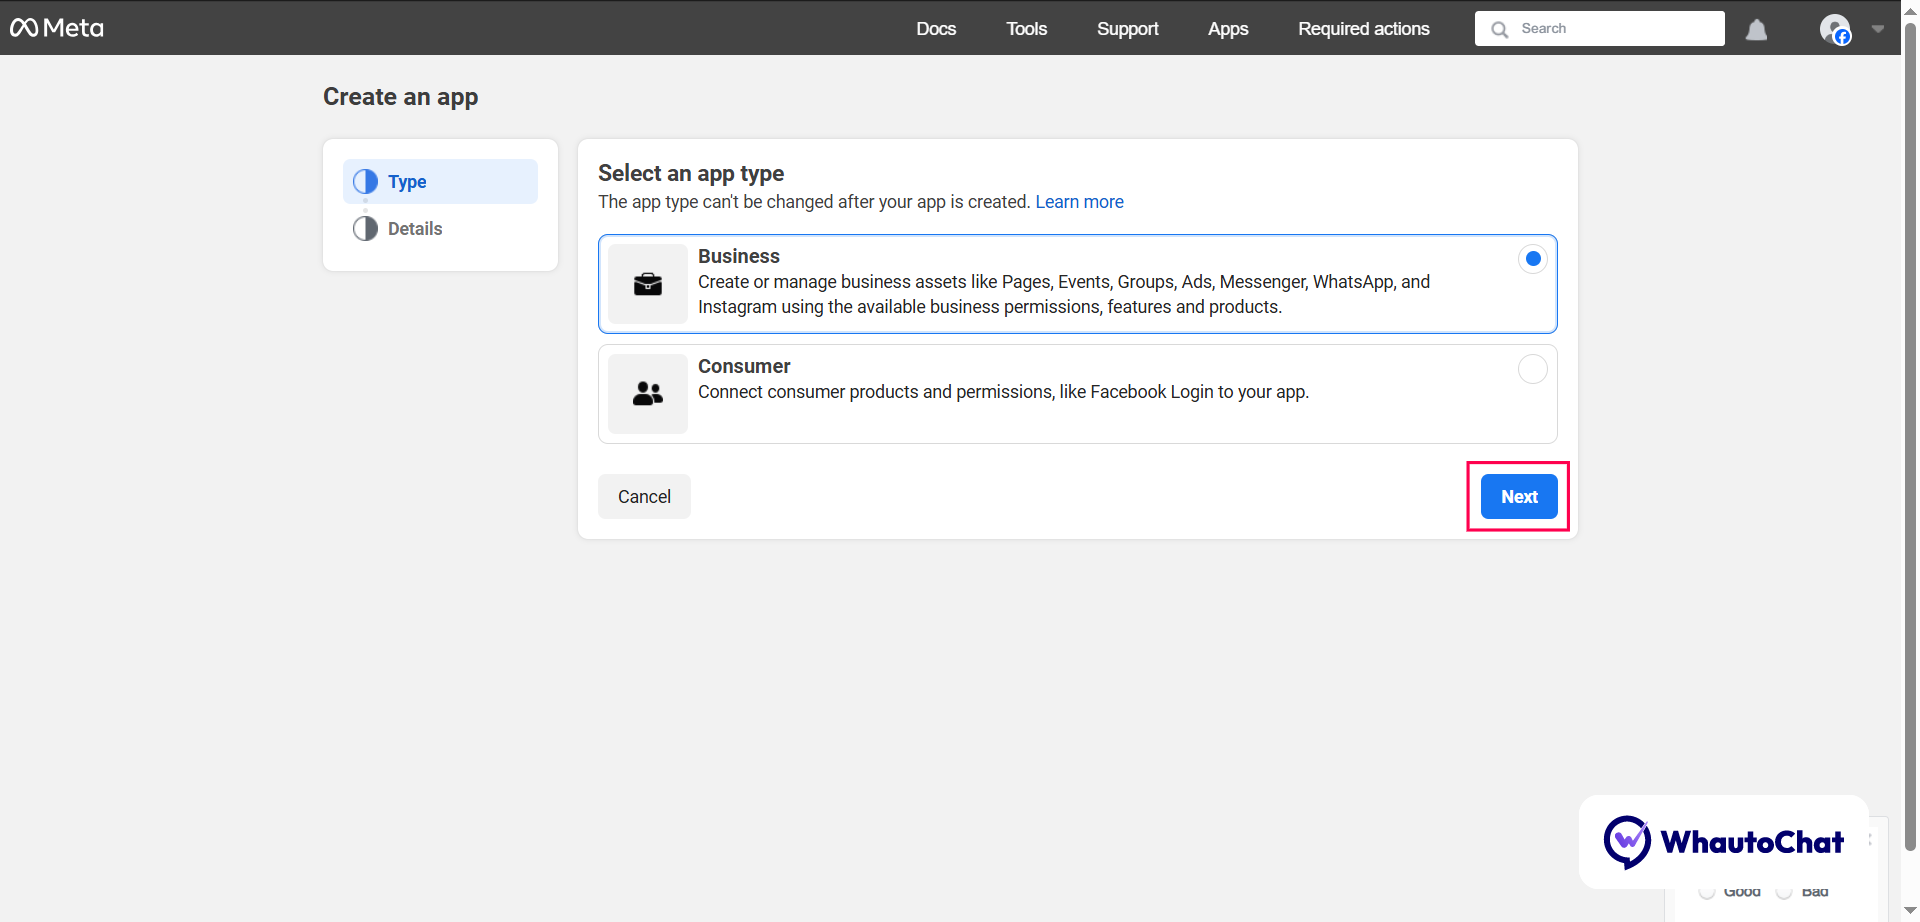
- Select your Meta Business Account → Click Create App
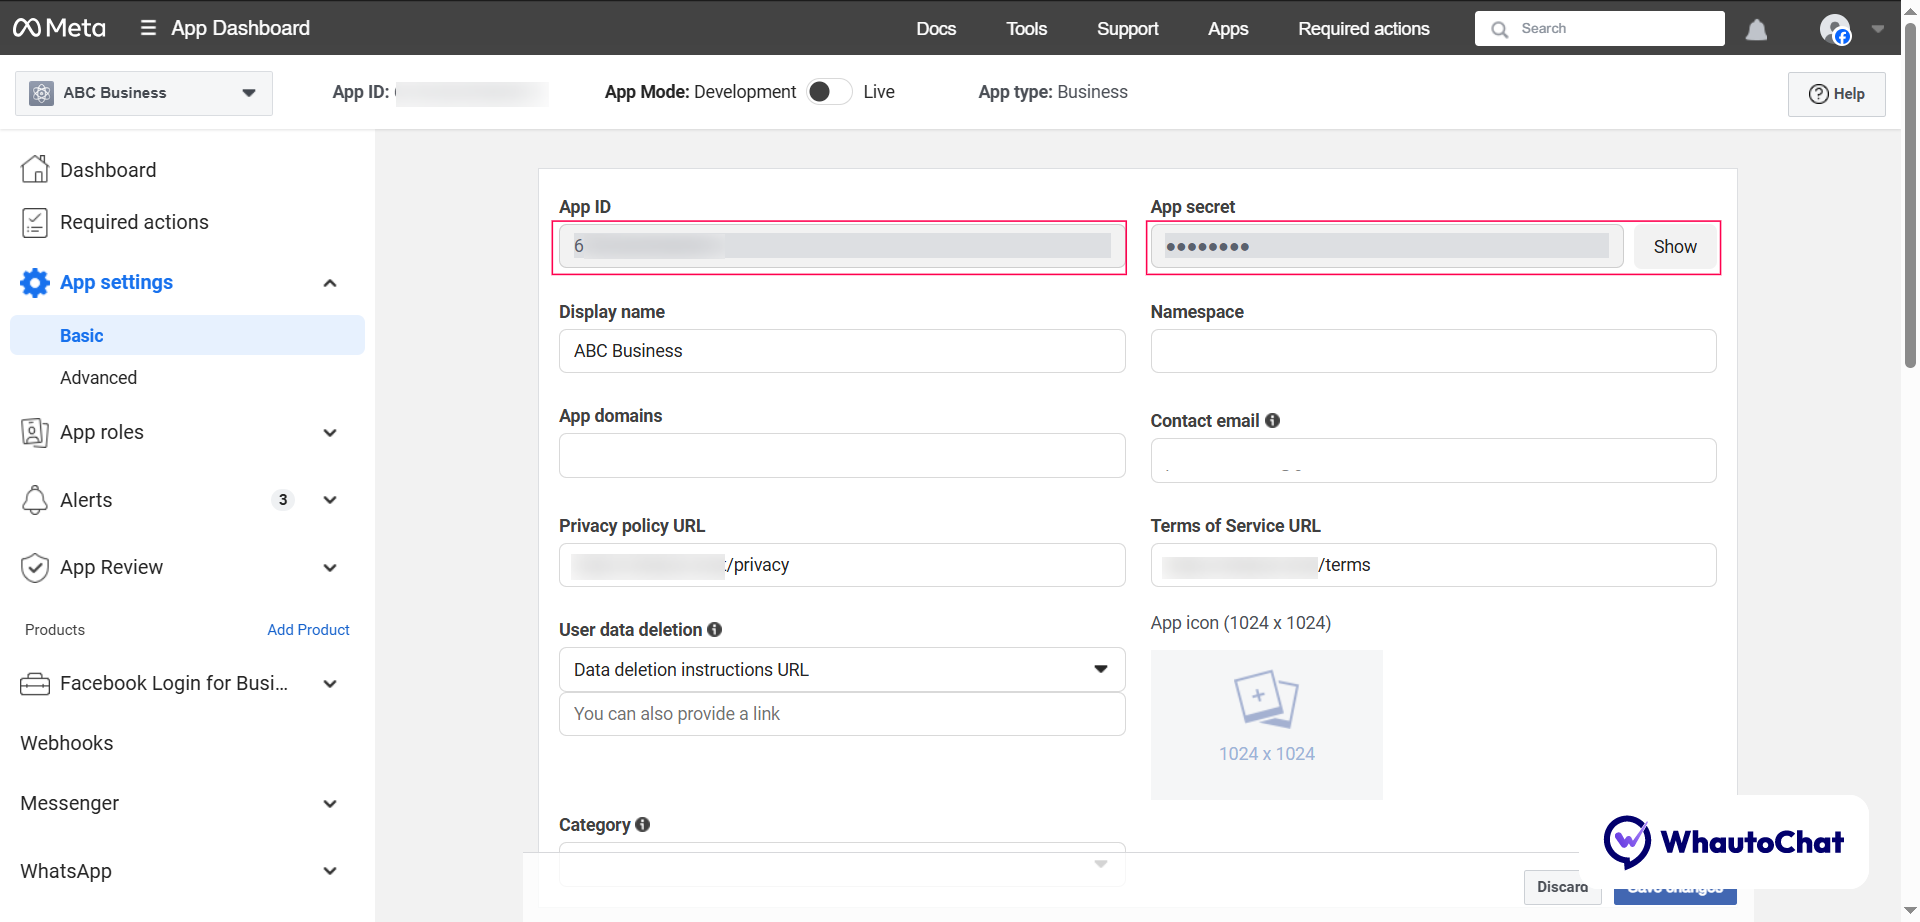
🔑 Step 4: Get App ID & App Secret
- In the left sidebar, go to Settings > Basic
- Update required info (App domain, Privacy Policy, etc.)
- Click Save Changes
- Copy these values:
- App ID → Paste into
INSTAGRAM_APP_ID - App Secret → Paste into
INSTAGRAM_APP_SECRET
- App ID → Paste into
⚙️ Step 5: Configure Instagram Login
⏩ Already done for Messenger or WhatsApp? Skip to Step 6.
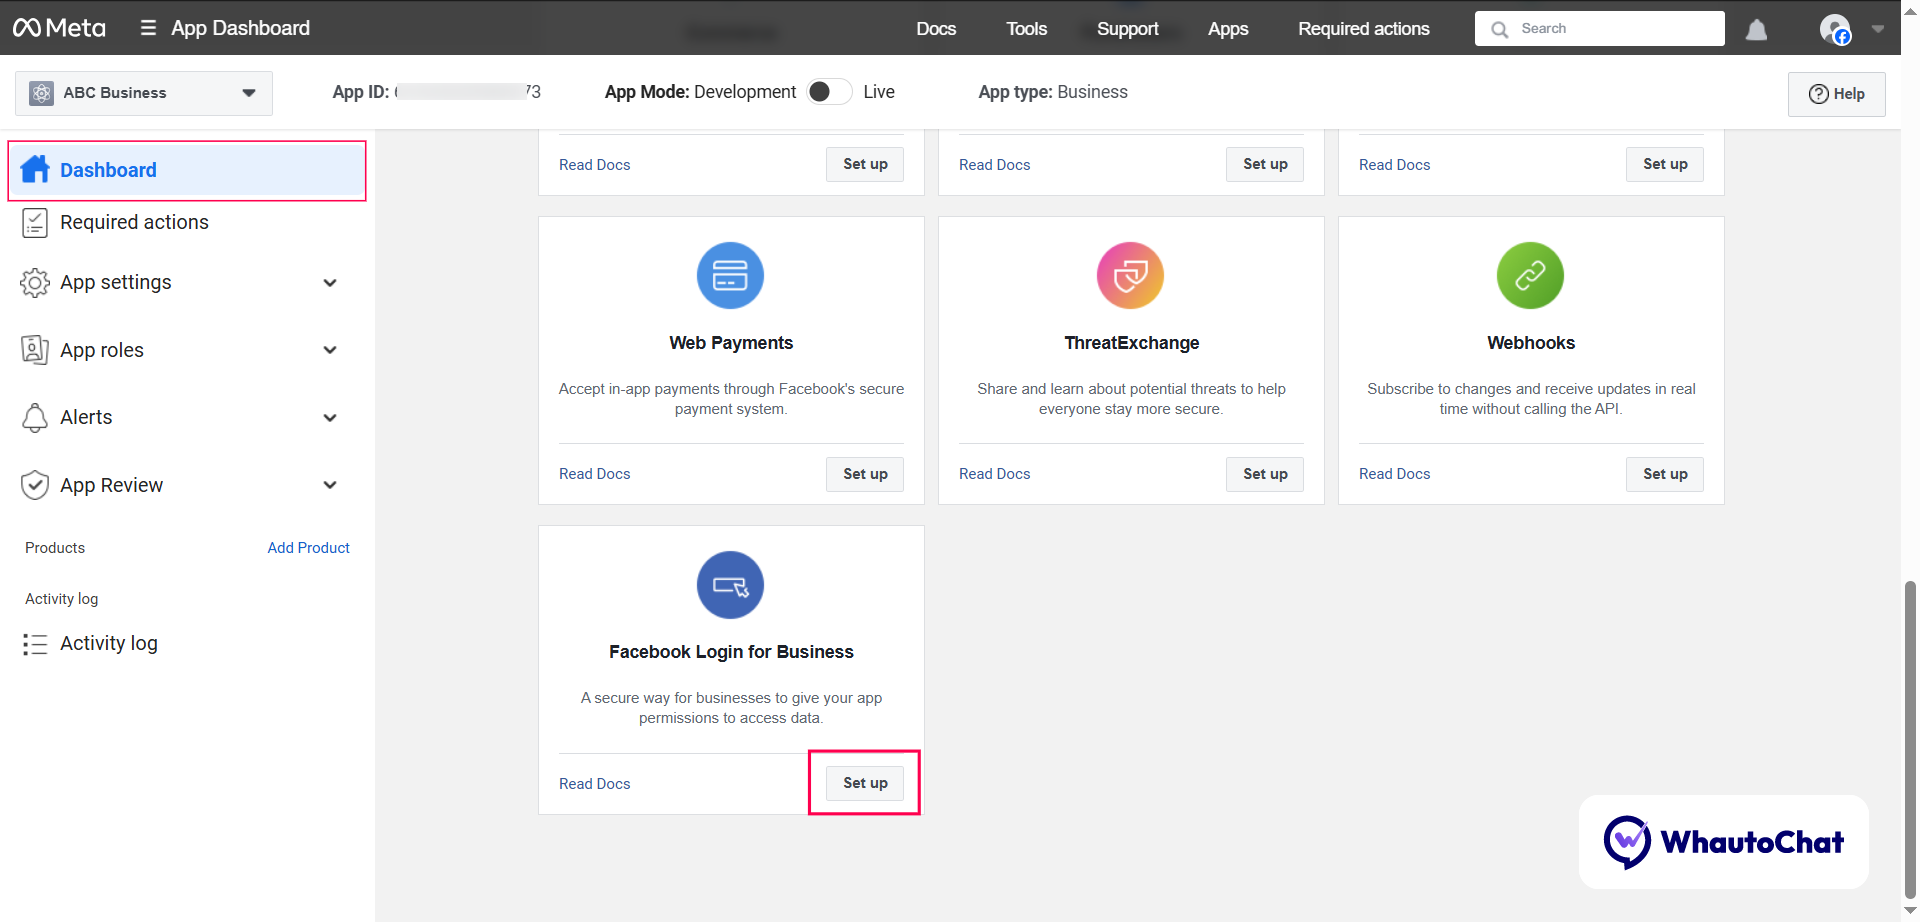
- Go to the Dashboard
- Scroll to "Facebook Login for Business" → Click Set Up
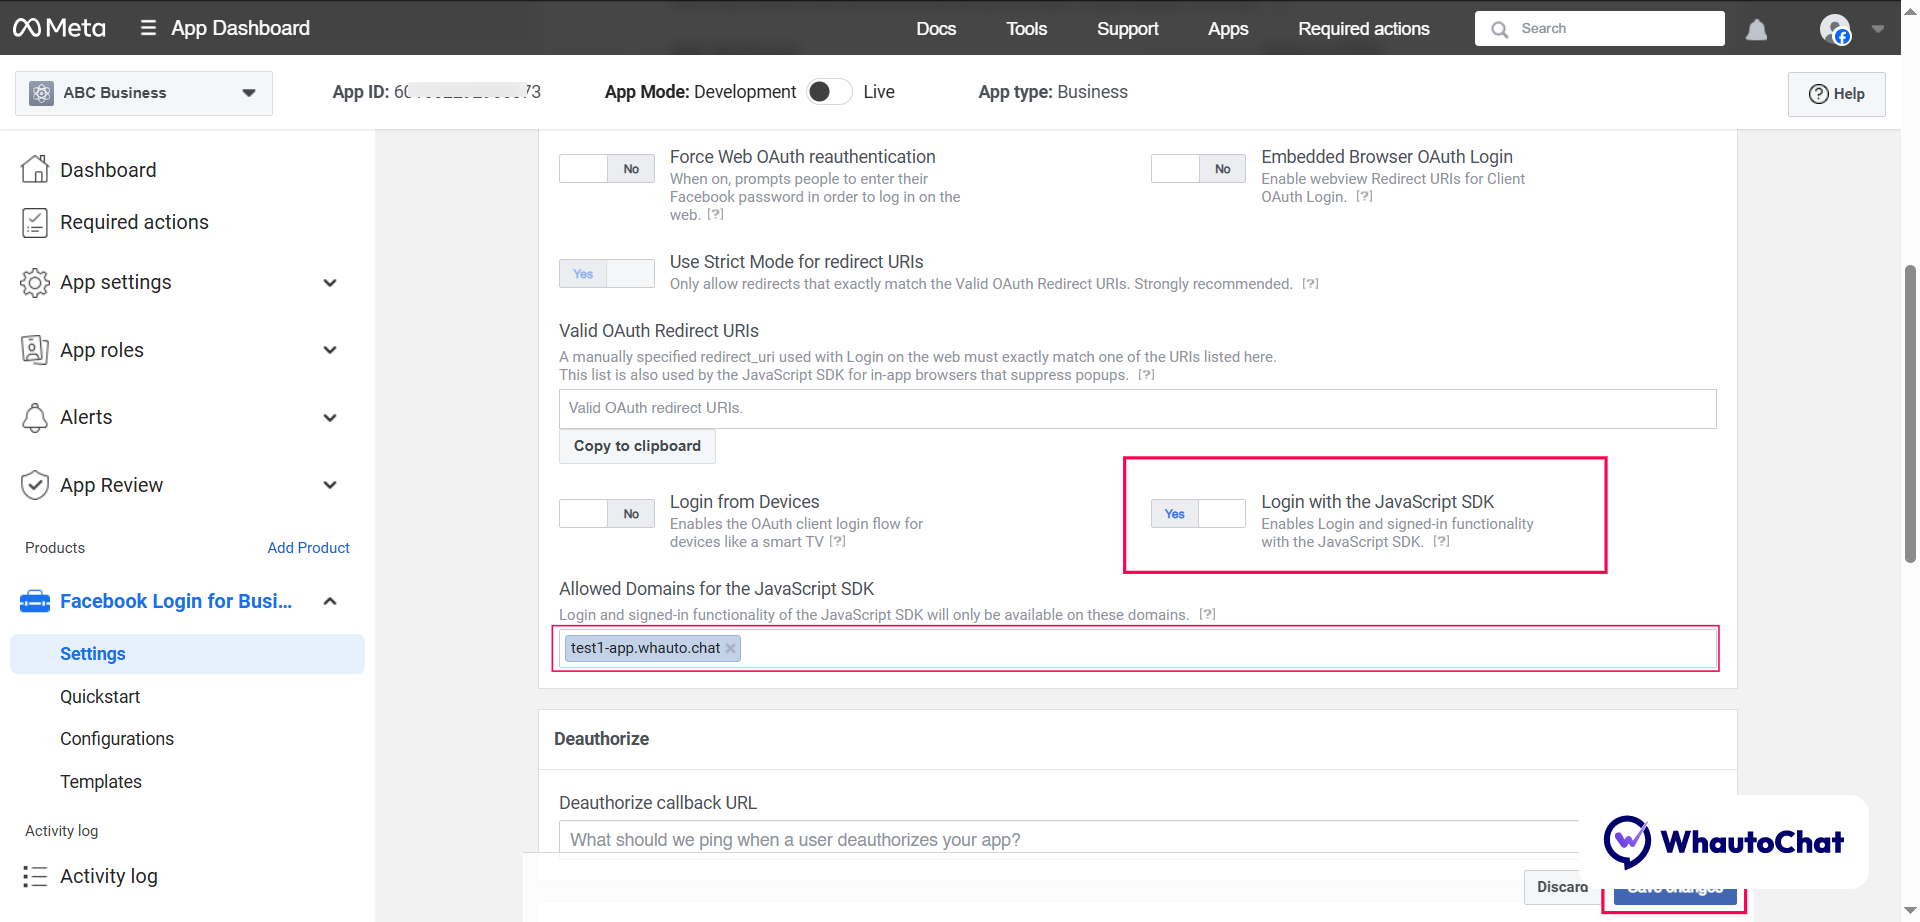
- Under Settings, enable Login with the JavaScript SDK
- Add your self-hosted app domain (e.g.,
https://yourappdomain.com/) - Click Save
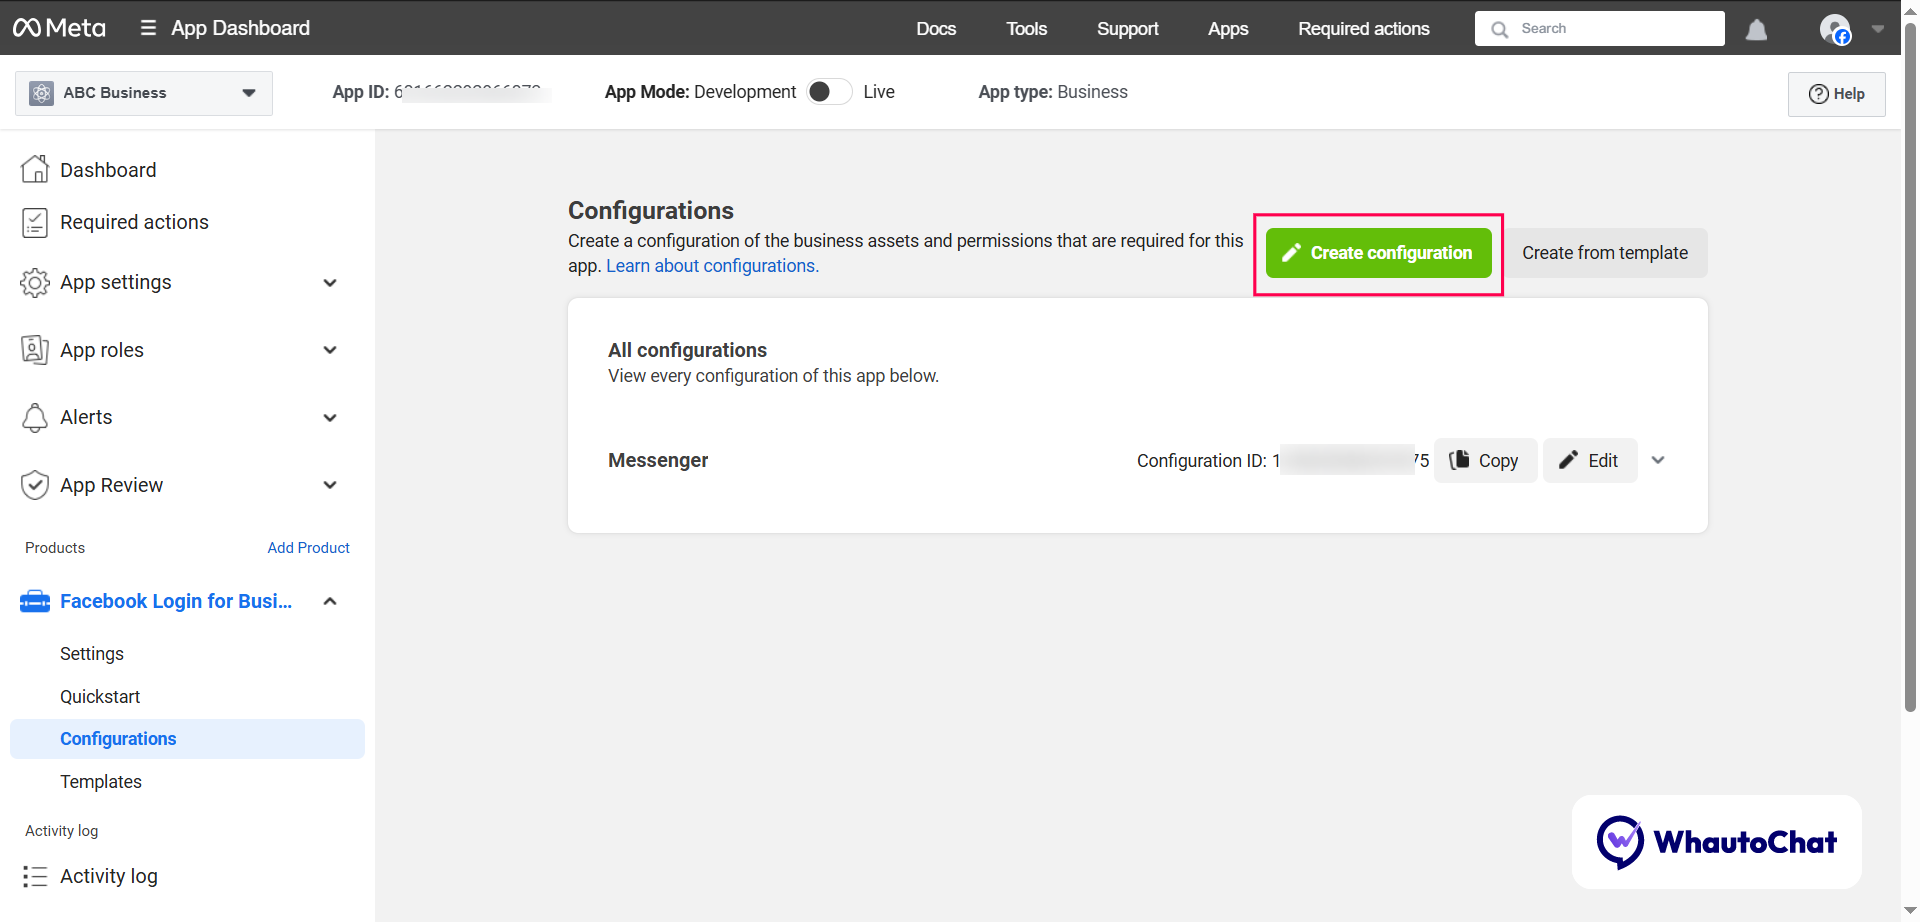
� Step 6: Create Instagram Configuration
- Go to Configuration → Click Create Configuration
- Name it (e.g., "Instagram") → Click Next
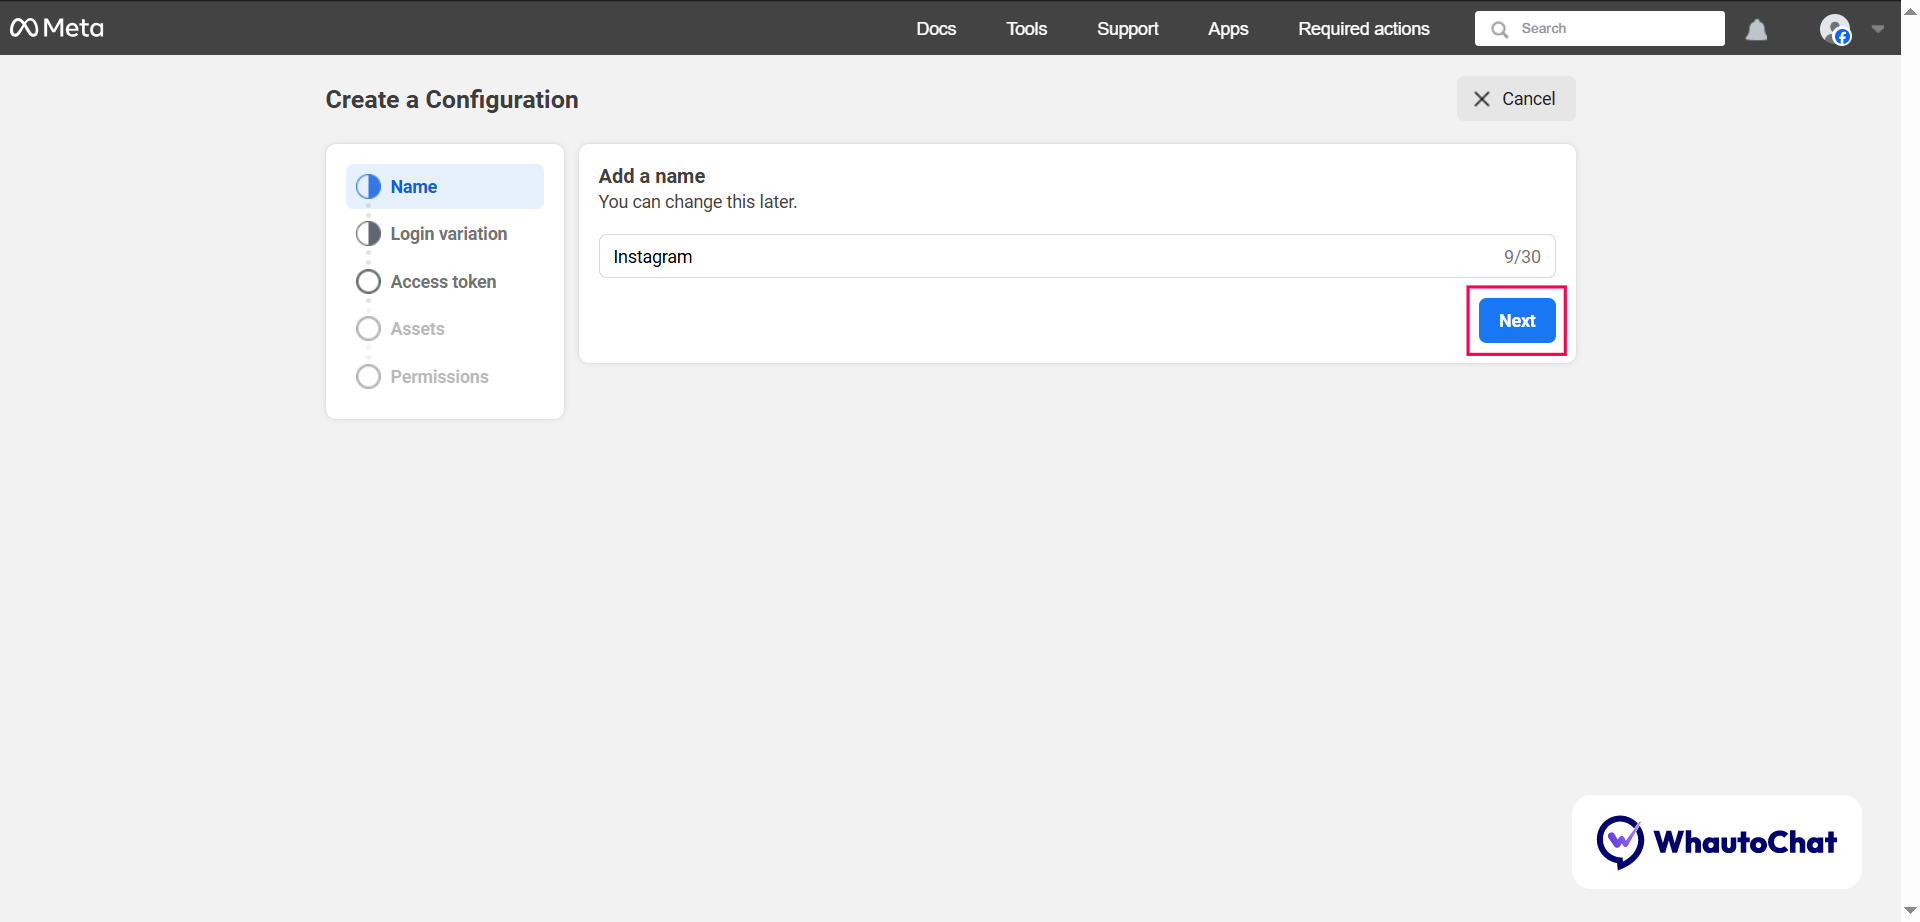
- Choose General login variation → Click Next

- Select User Access Token → Click Next
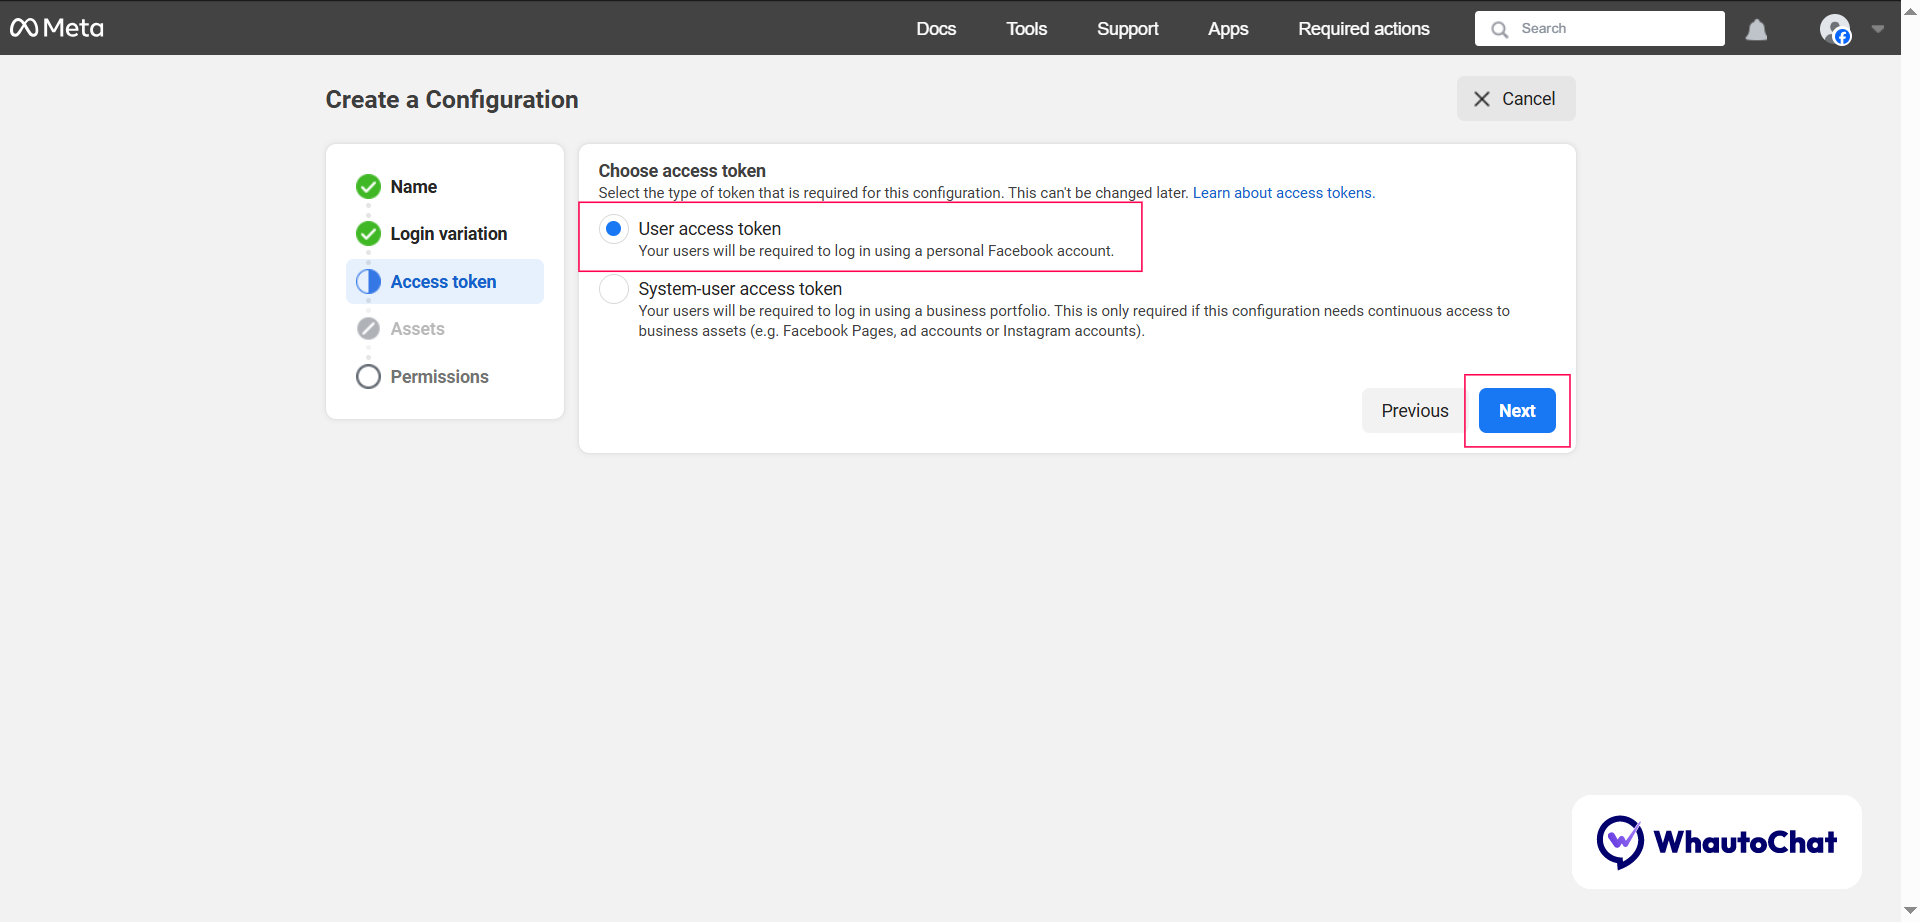
- Enable these permissions:
pages_messagingpages_show_listpages_manage_metadatabusiness_managementinstagram_basicinstagram_manage_messages
- Click Create
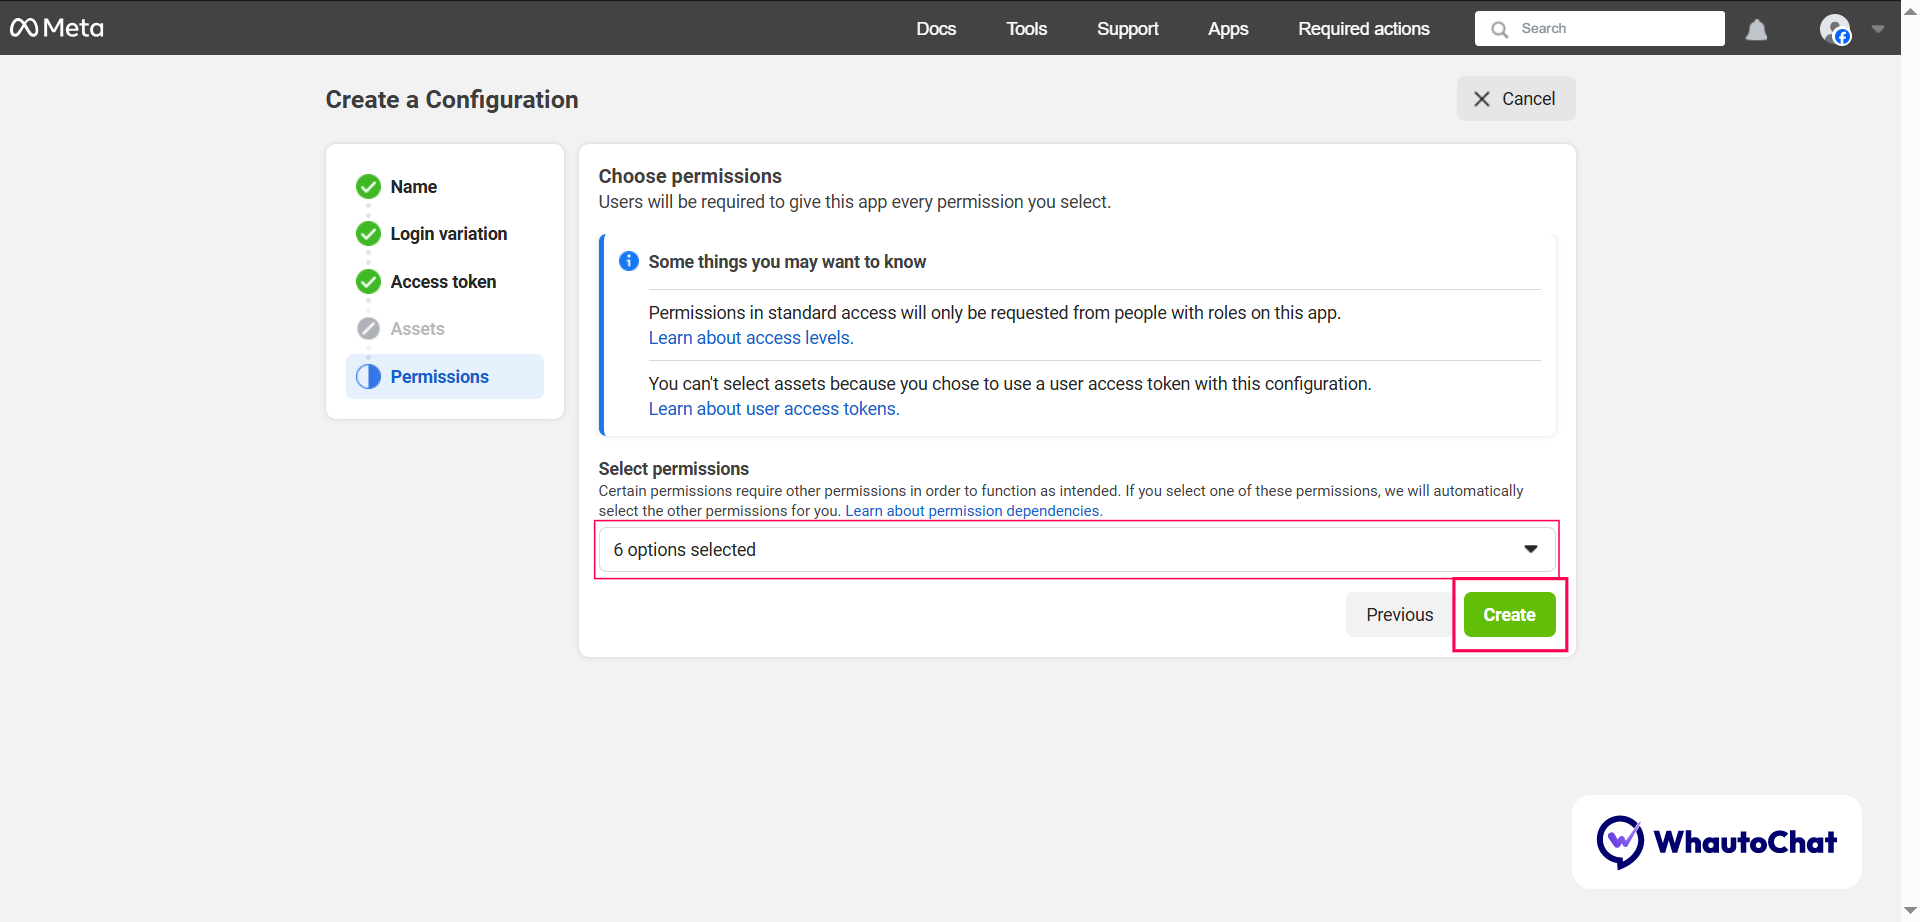
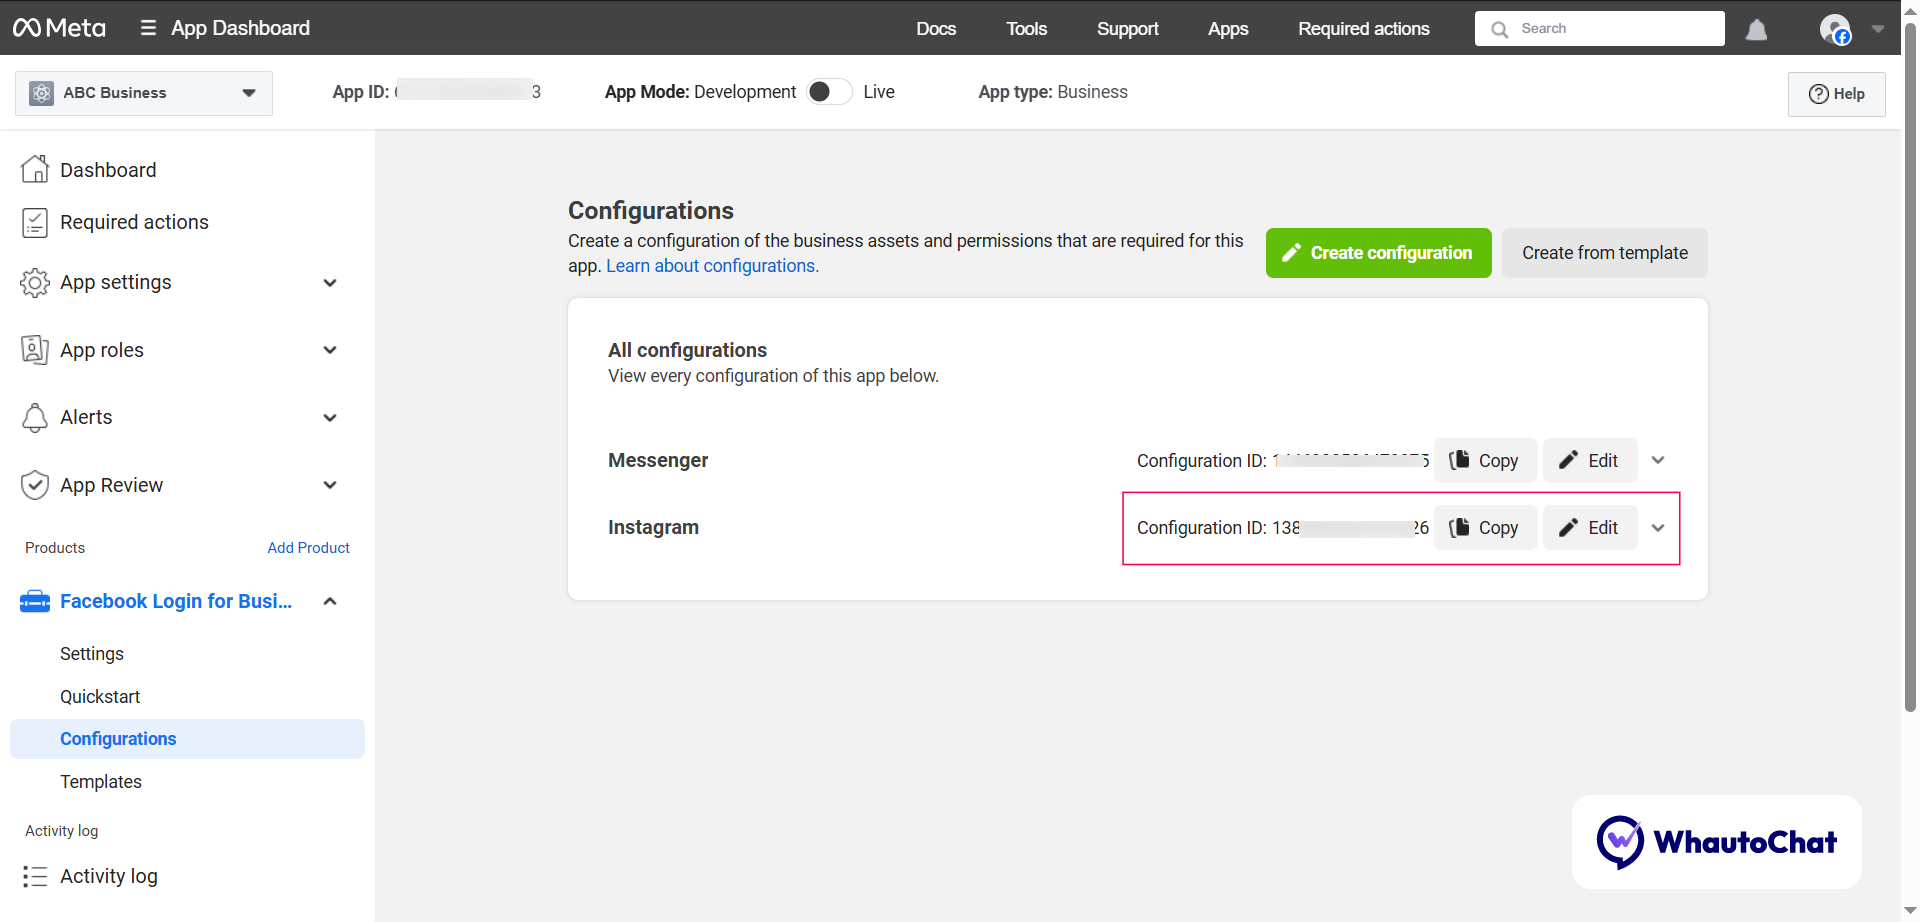
- Copy the generated Configuration ID → Paste into
INSTAGRAM_CONFIGURATION_ID
🔑 Step 7: Set Instagram Verify Token
- Generate a random string using random.org/strings
- Copy any of one generated string
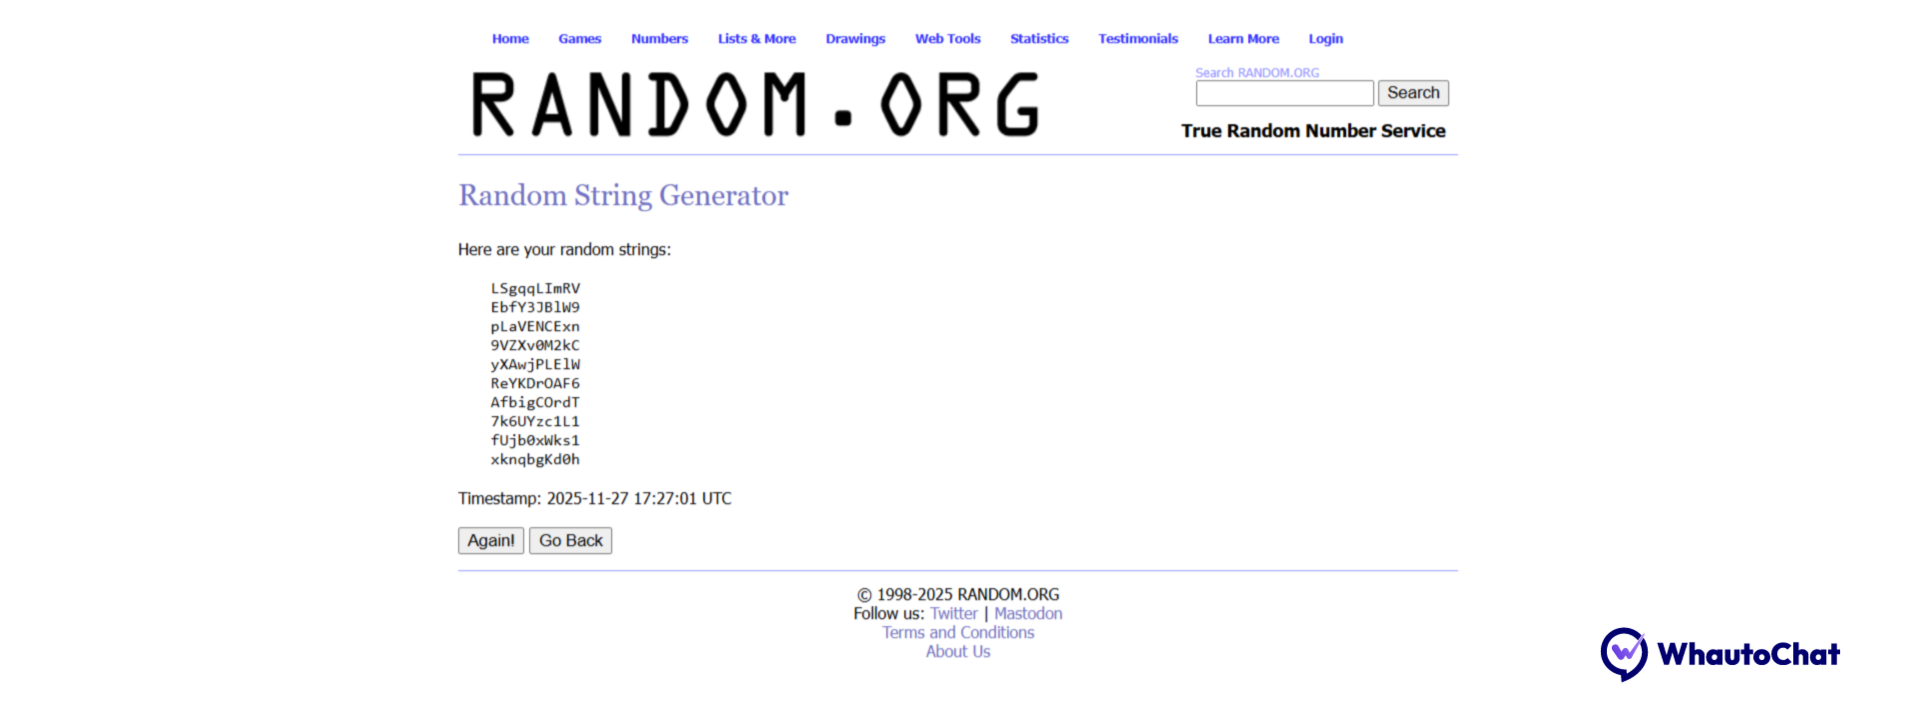
- Update in your configuration:
Example:
INSTAGRAM_VERIFY_TOKEN="your_random_string_here"INSTAGRAM_VERIFY_TOKEN="2AqYO0vP0M"
✅ Final Configuration
Your complete .env configuration should look like this:
# Instagram Integration
INSTAGRAM_APP_ID="112233445566778"
INSTAGRAM_APP_SECRET="a1b2c3d4e5f6g7h8i9j0"
INSTAGRAM_CONFIGURATION_ID="9988776655443322"
INSTAGRAM_VERIFY_TOKEN="2AqYO0vP0M"
⚠️ Important: Instagram configuration is required if you want to offer Instagram Messaging to your customers. Without this, the Instagram channel cannot be connected.
🔹 After App Installation
Post-Installation Configuration
📸 Instagram Webhook Configuration
⚠️ Important: Webhook configuration is mandatory after installation. Without it, Instagram messaging will not work.
🔧 Step-by-Step Instructions
✅ 1. Open Your Meta App
- Go to developers.facebook.com
- Log in with your Meta developer account
- Click My Apps (top-right) and select your app
⚙️ 2. Set Up Webhook for Instagram
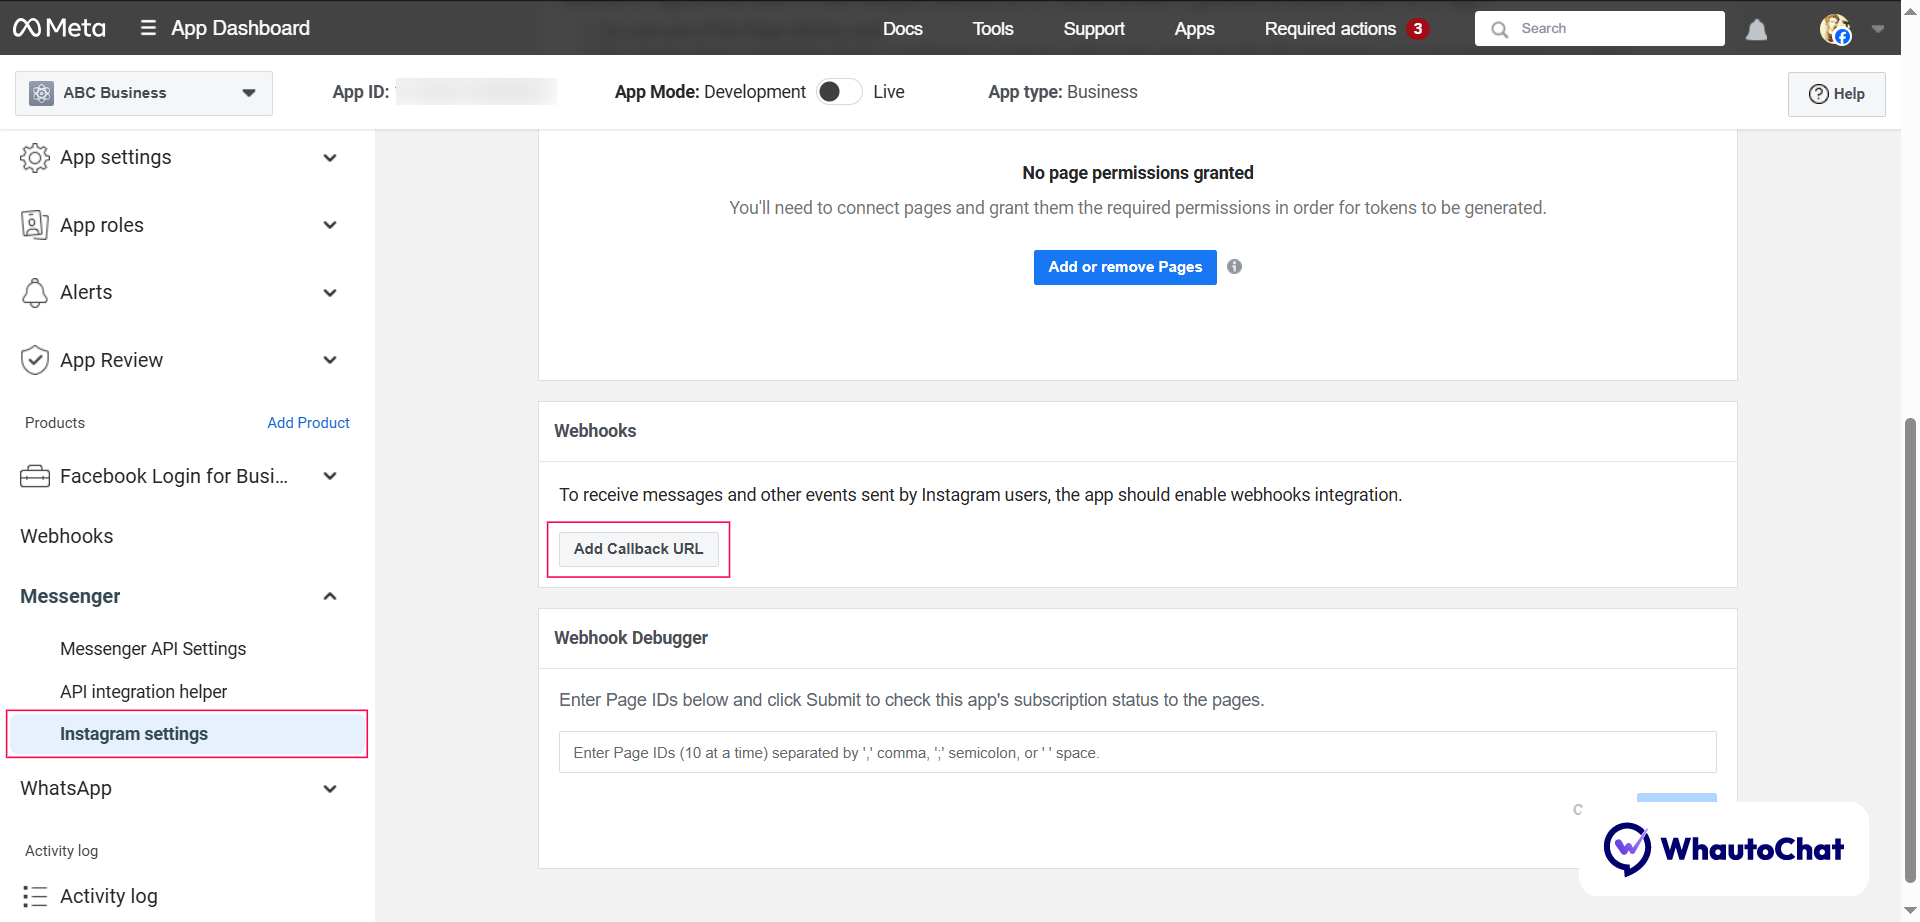
- In the Dashboard, scroll to the Messenger section
- Click Set Up
- Navigate to Instagram Settings
- Under Webhooks, click Add Callback URL
- Enter these details:
- Callback URL:
https://yourserverdomain.com/instagram/webhook
Replace yourserverdomain with the domain you configured during license installation.
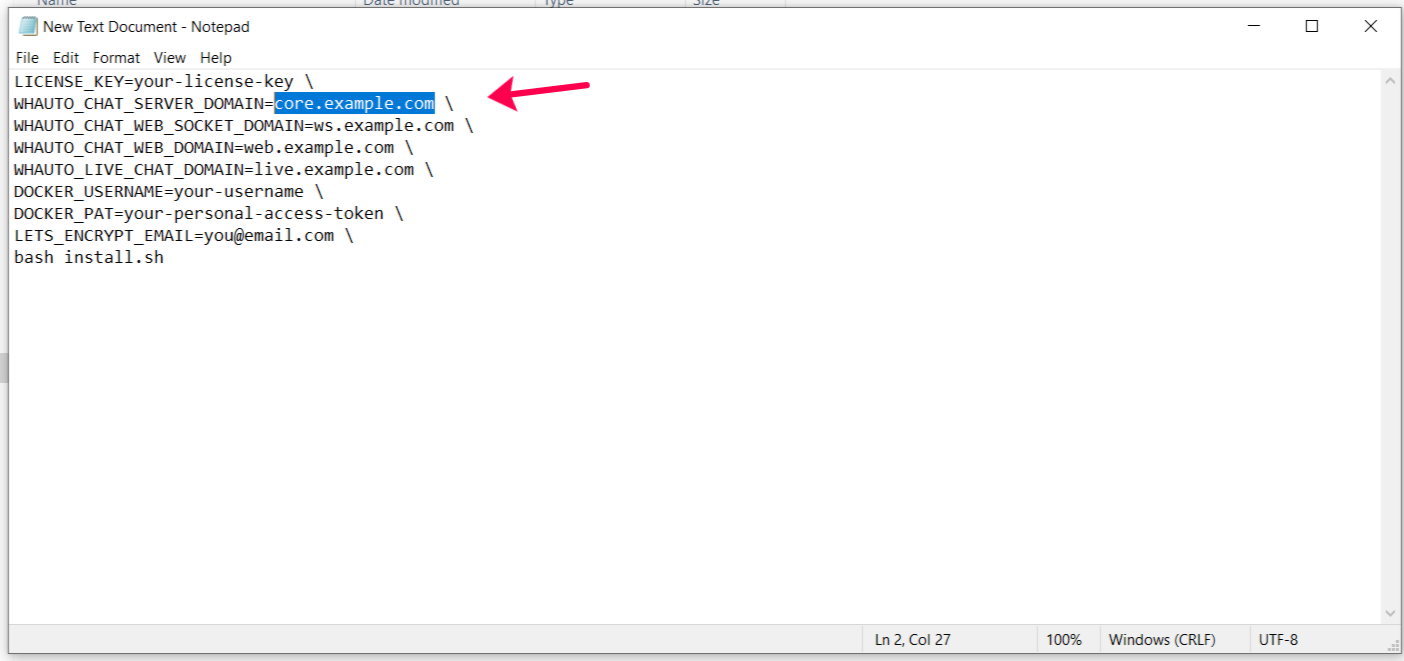
Example: https://core.example.com/instagram/webhook
- Verify Token:
Use the same value from your
.envfile (INSTAGRAM_VERIFY_TOKEN) Example:2AqYO0vP0M
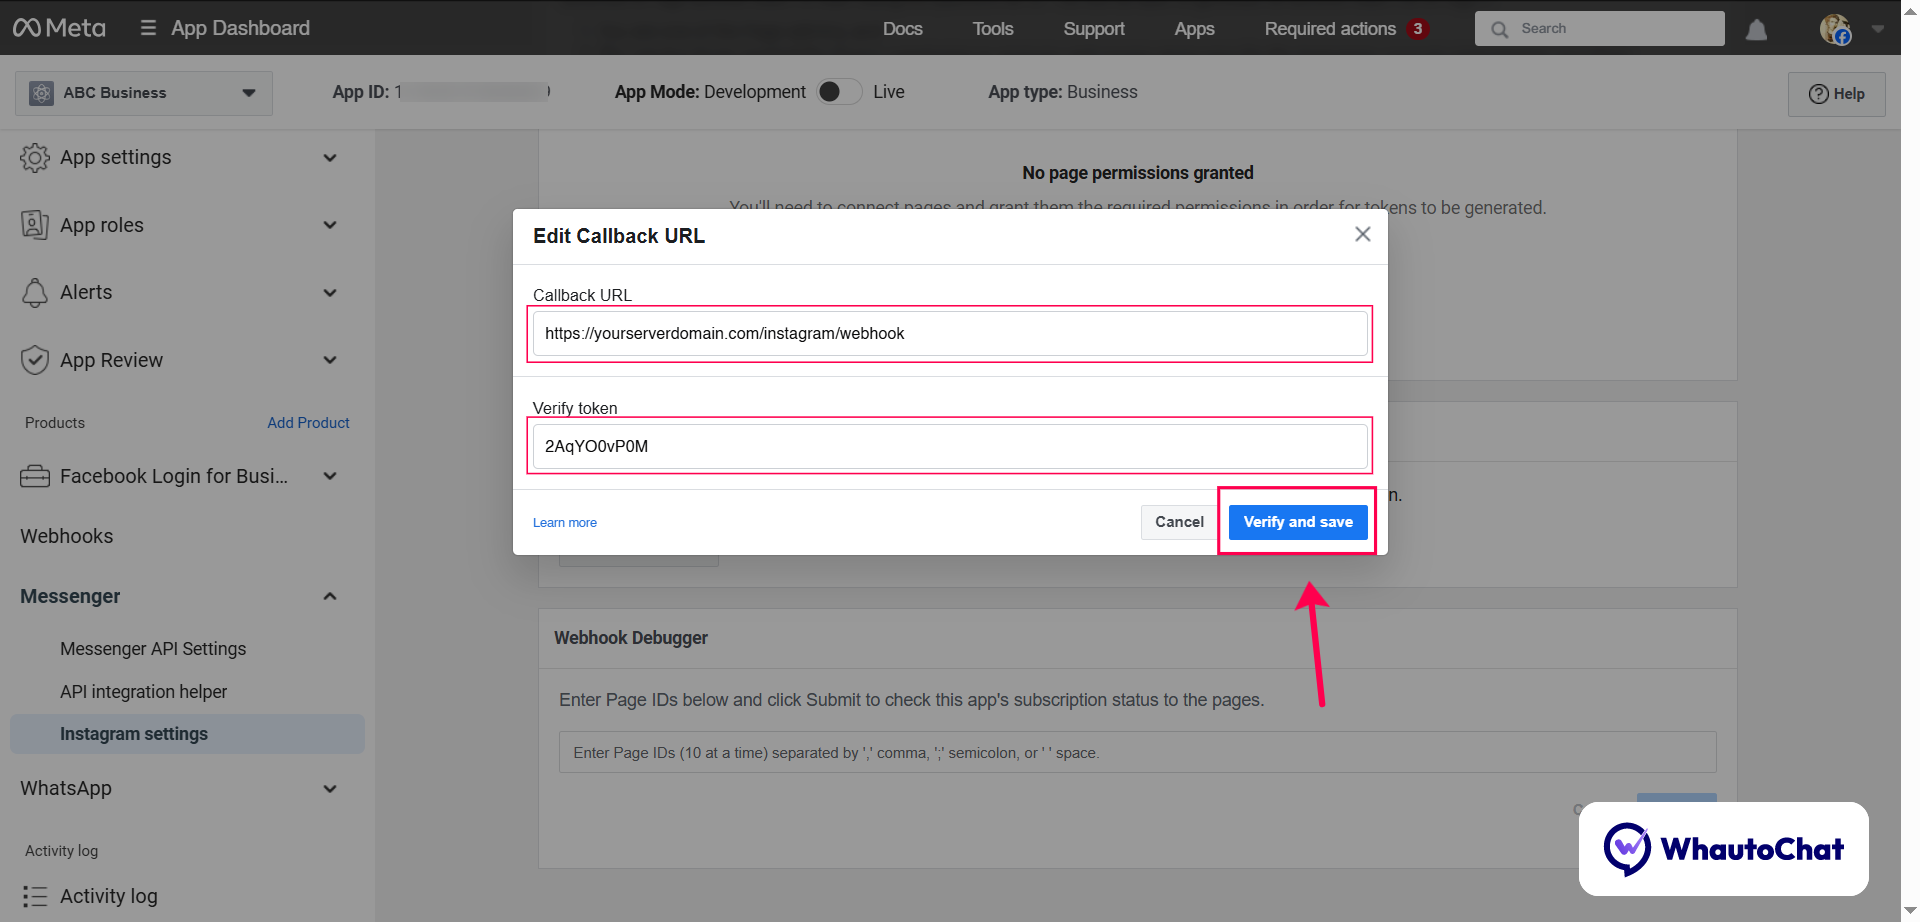
- Click Verify and Save
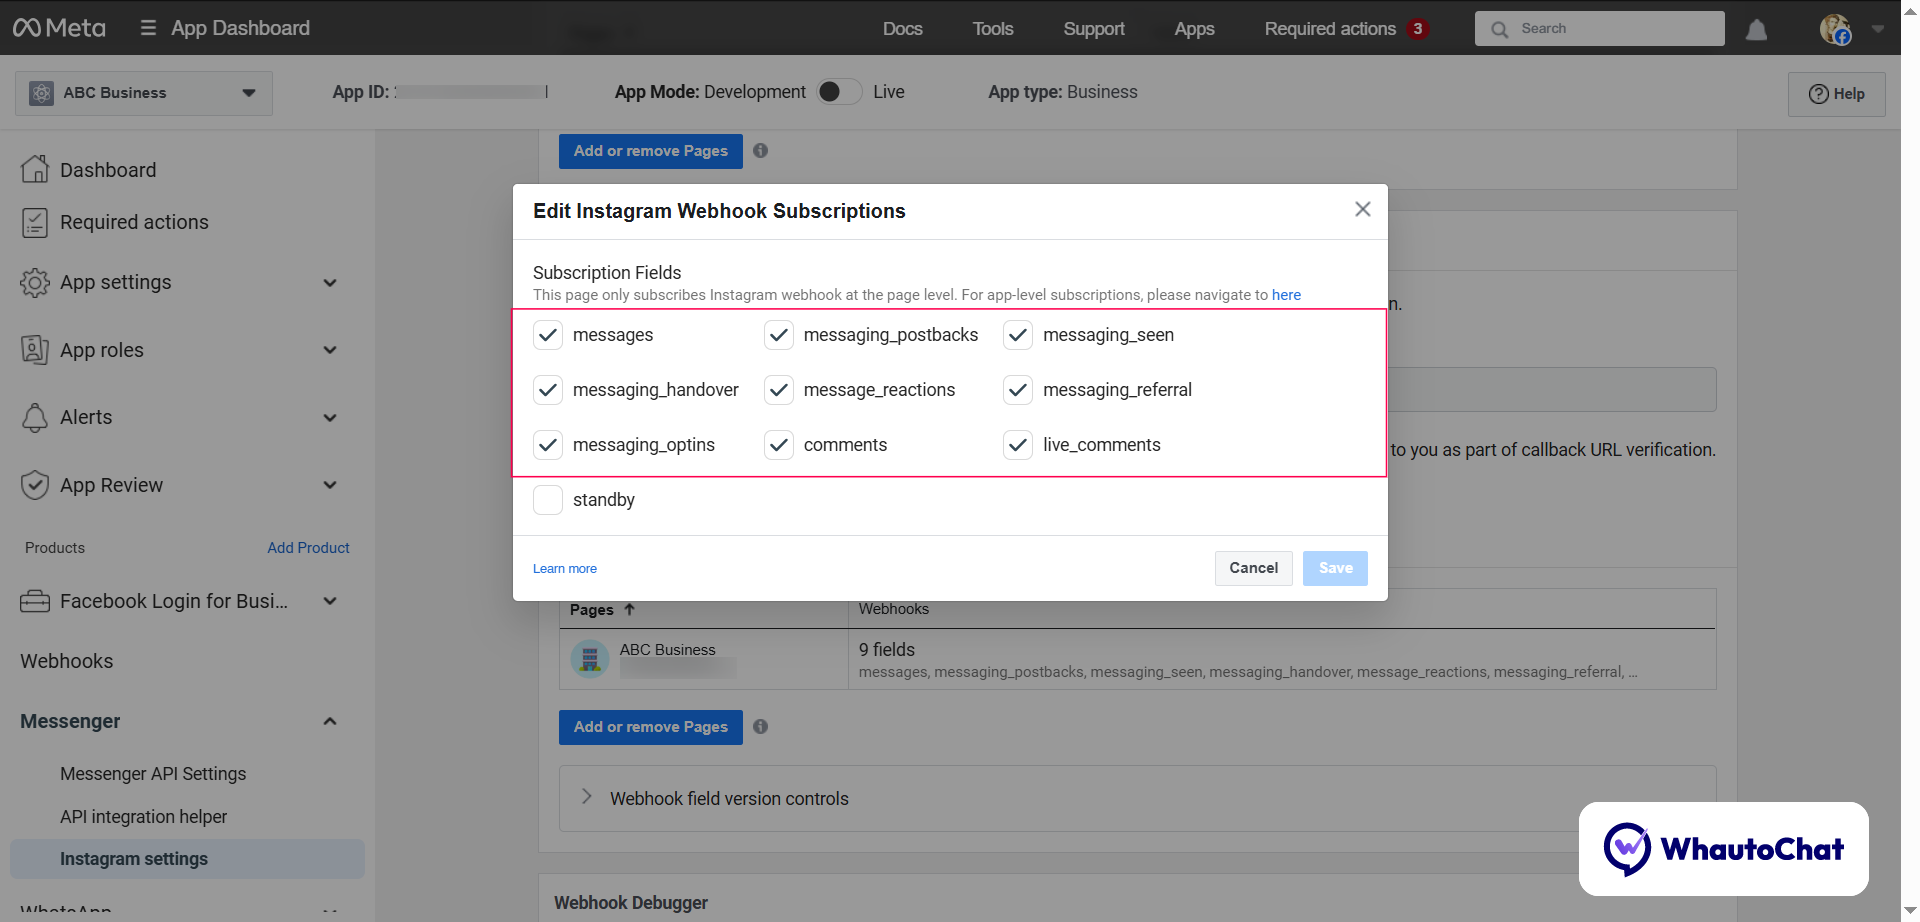
📡 3. Subscribe to Webhook Fields
In the Webhook Fields section, enable Subscribed for:
messagesmessaging_postbacksmessaging_seenmessaging_handovermessage_reactionsmessaging_referralmessaging_optinscommentslive_comments
✅ 4. Finalize in WhautoChat
- Go to your self-hosted WhautoChat app
- Complete the Instagram Integration setup
- Send a test message to verify the connection
💡 Summary of Required Values
INSTAGRAM_VERIFY_TOKEN="2AqYO0vP0M" INSTAGRAM_WEBHOOK_URL="https://yourserverdomain.com/instagram/webhook"
Need Help?
📩 Contact us at support@whauto.chat – we're happy to help!
Additional Resources
For advanced features or troubleshooting, refer to Meta's documentation or WhautoChat support.