WhatsApp Integration
🔹 Before App Installation
Pre-Installation Checklist
Complete these steps before proceeding with the installation.
💬 WhatsApp Setup Guide (Reseller SaaS License)
Set up WhatsApp integration for your Reseller SaaS using WhautoChat.
🛠 Step 0: Locate Configuration File
- Navigate to the
web-server.envfile in the installation folder provided by the WhautoChat team. - Update the following WhatsApp integration settings:
# WhatsApp Integration
WHATSAPP_APP_ID="your_whatsapp_app_id"
WHATSAPP_APP_SECRET="your_whatsapp_app_secret"
WHATSAPP_CONFIGURATION_ID="your_whatsapp_configuration_id"
WHATSAPP_APP_TOKEN="your_whatsapp_app_token"

# Generate a random string for webhook validation at:
# https://www.random.org/strings/?num=10&len=10&digits=on&upperalpha=on&loweralpha=on&unique=on
WHATSAPP_VERIFY_TOKEN="your_whatsapp_verify_token"
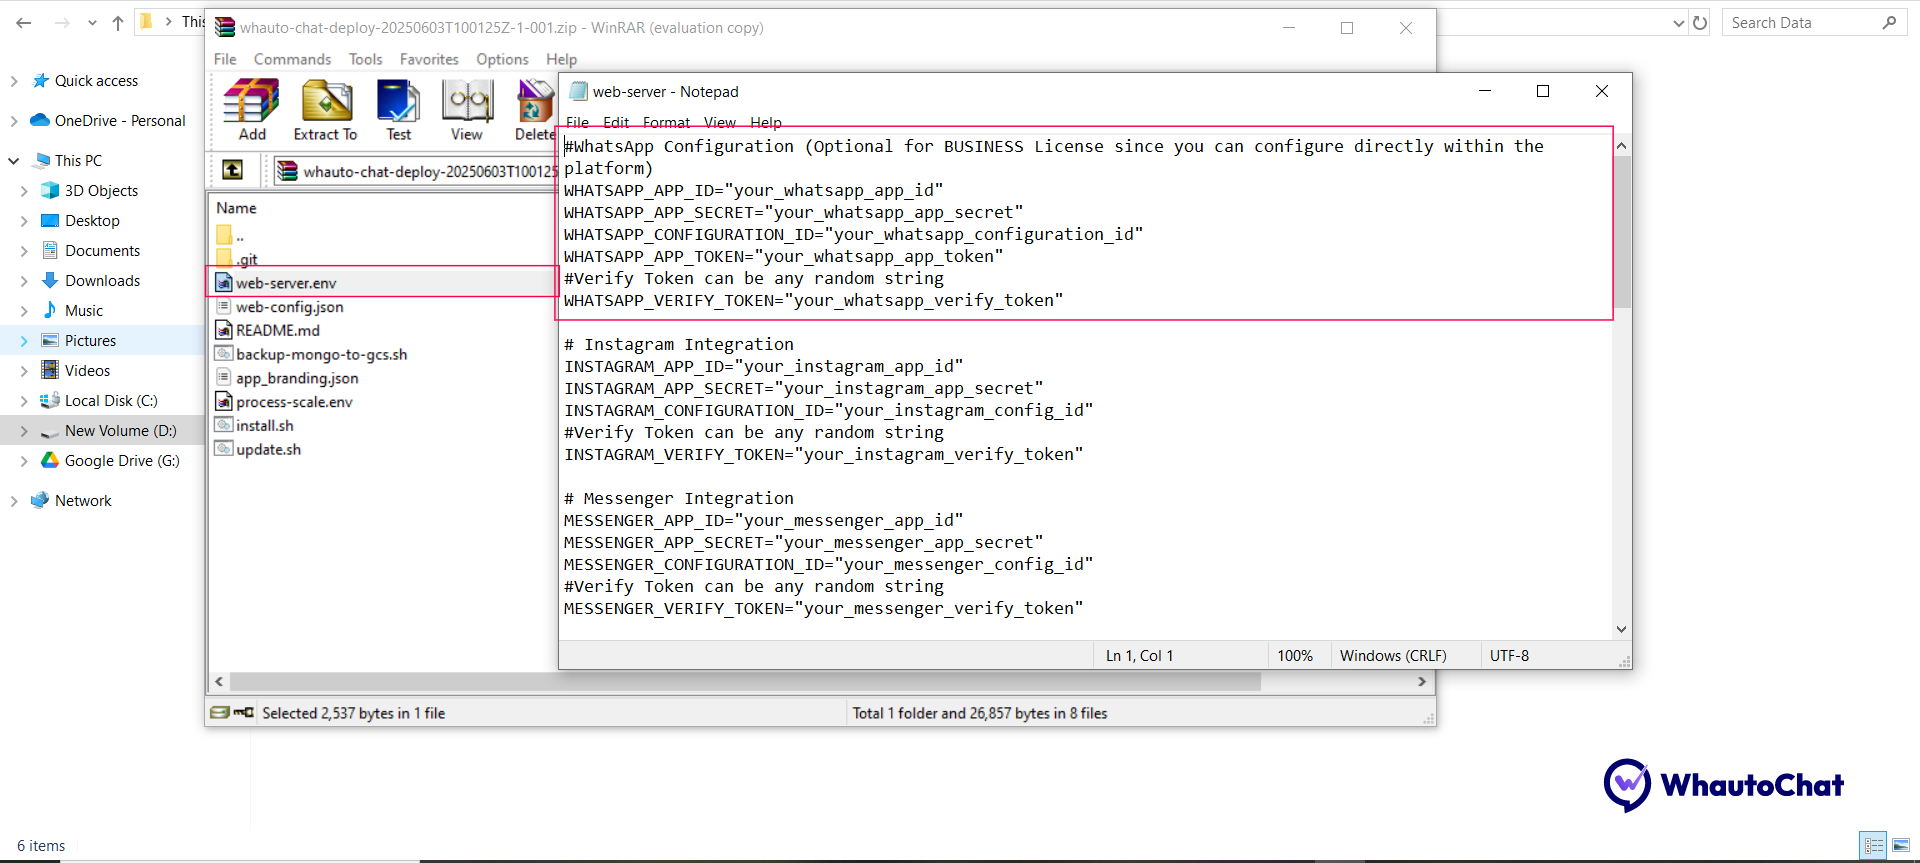
📝 Note: For Business License users, WhatsApp can be configured directly within the platform. These steps are optional for them.
🧩 Step 1: Create a Meta Business Portfolio
If you already have a Meta Business Suite account, skip this step.
- Go to business.facebook.com
- Log in with your Facebook account
- Create a Meta Business Suite account — this will generate your business portfolio
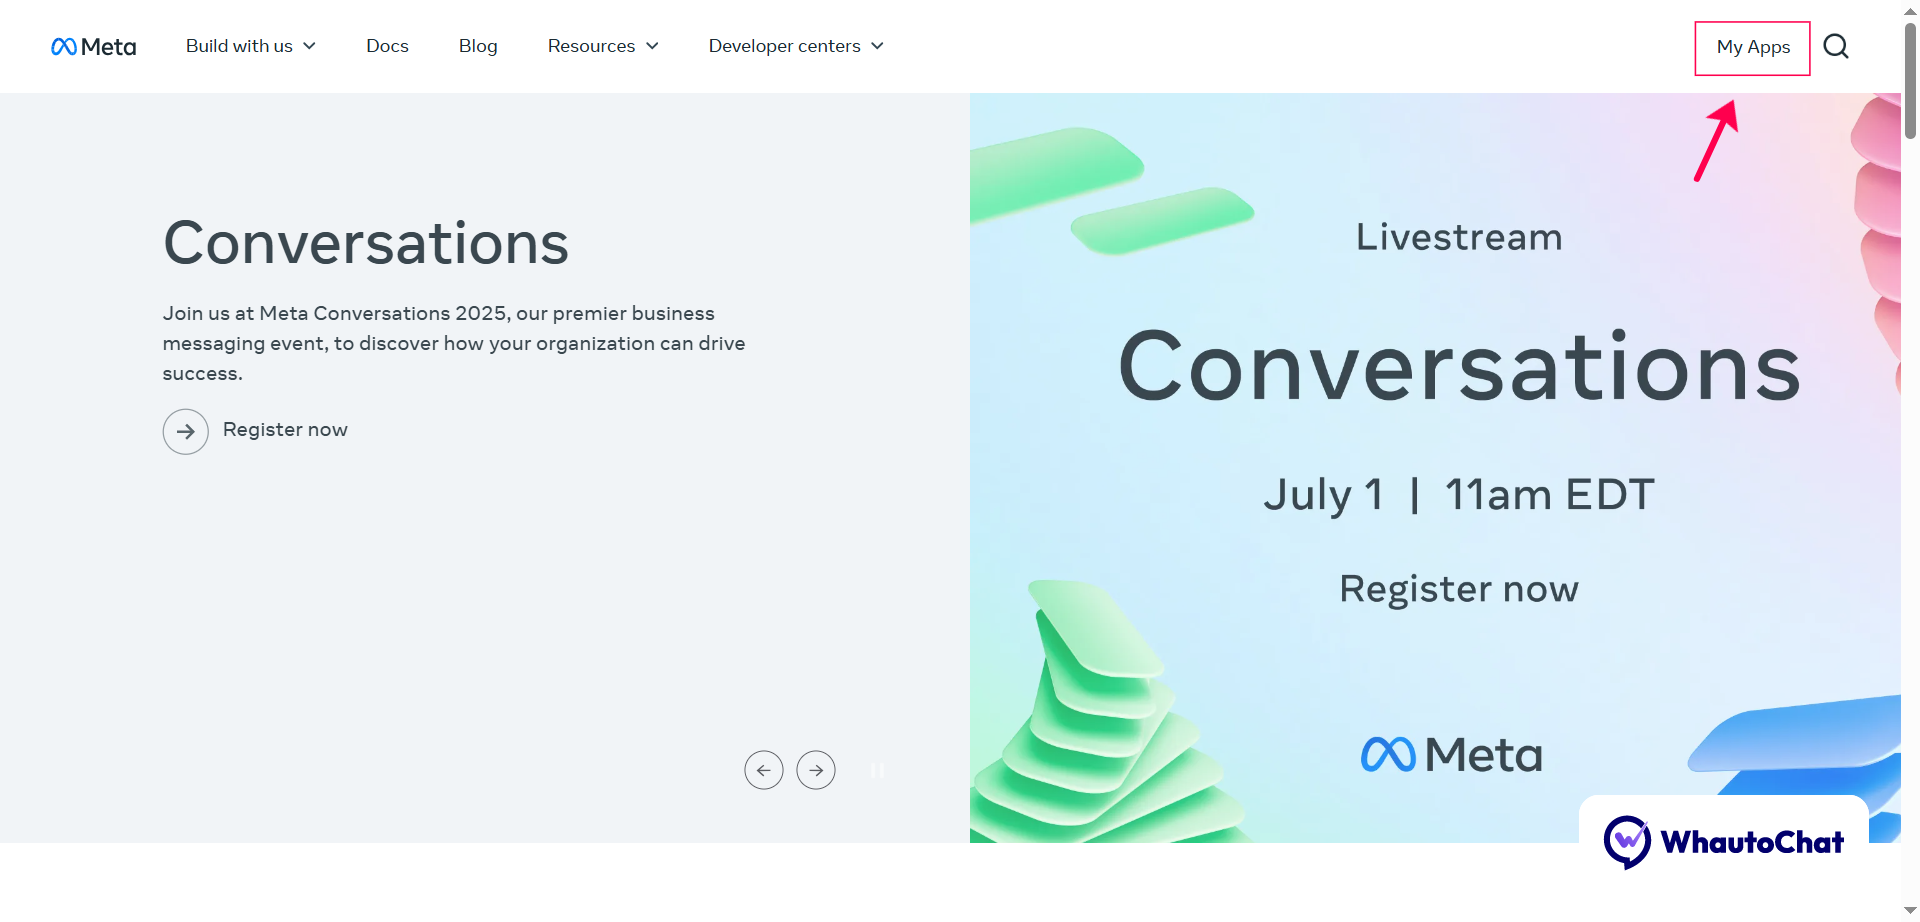
👨💻 Step 2: Register as a Meta Developer
- Go to developers.facebook.com
- Log in or sign up for a Developer account
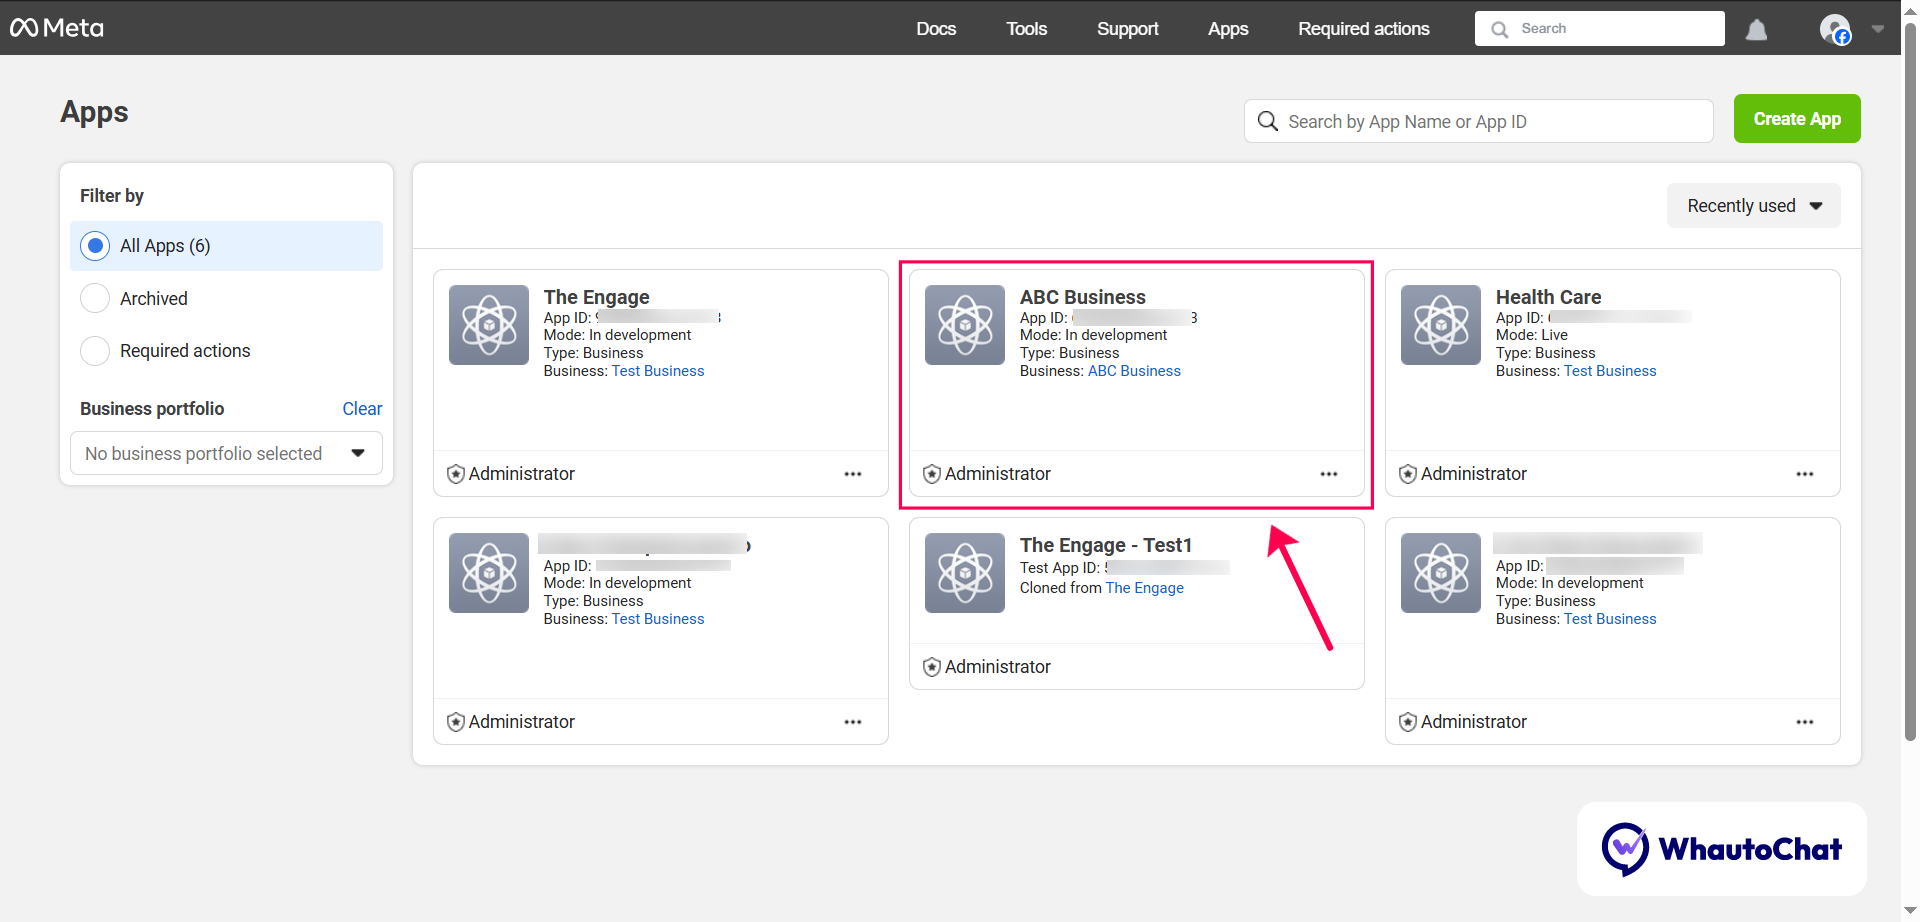
- Click on "My Apps" in the top-right corner, then click "Create App"
- Click the Create App button in the top-right corner
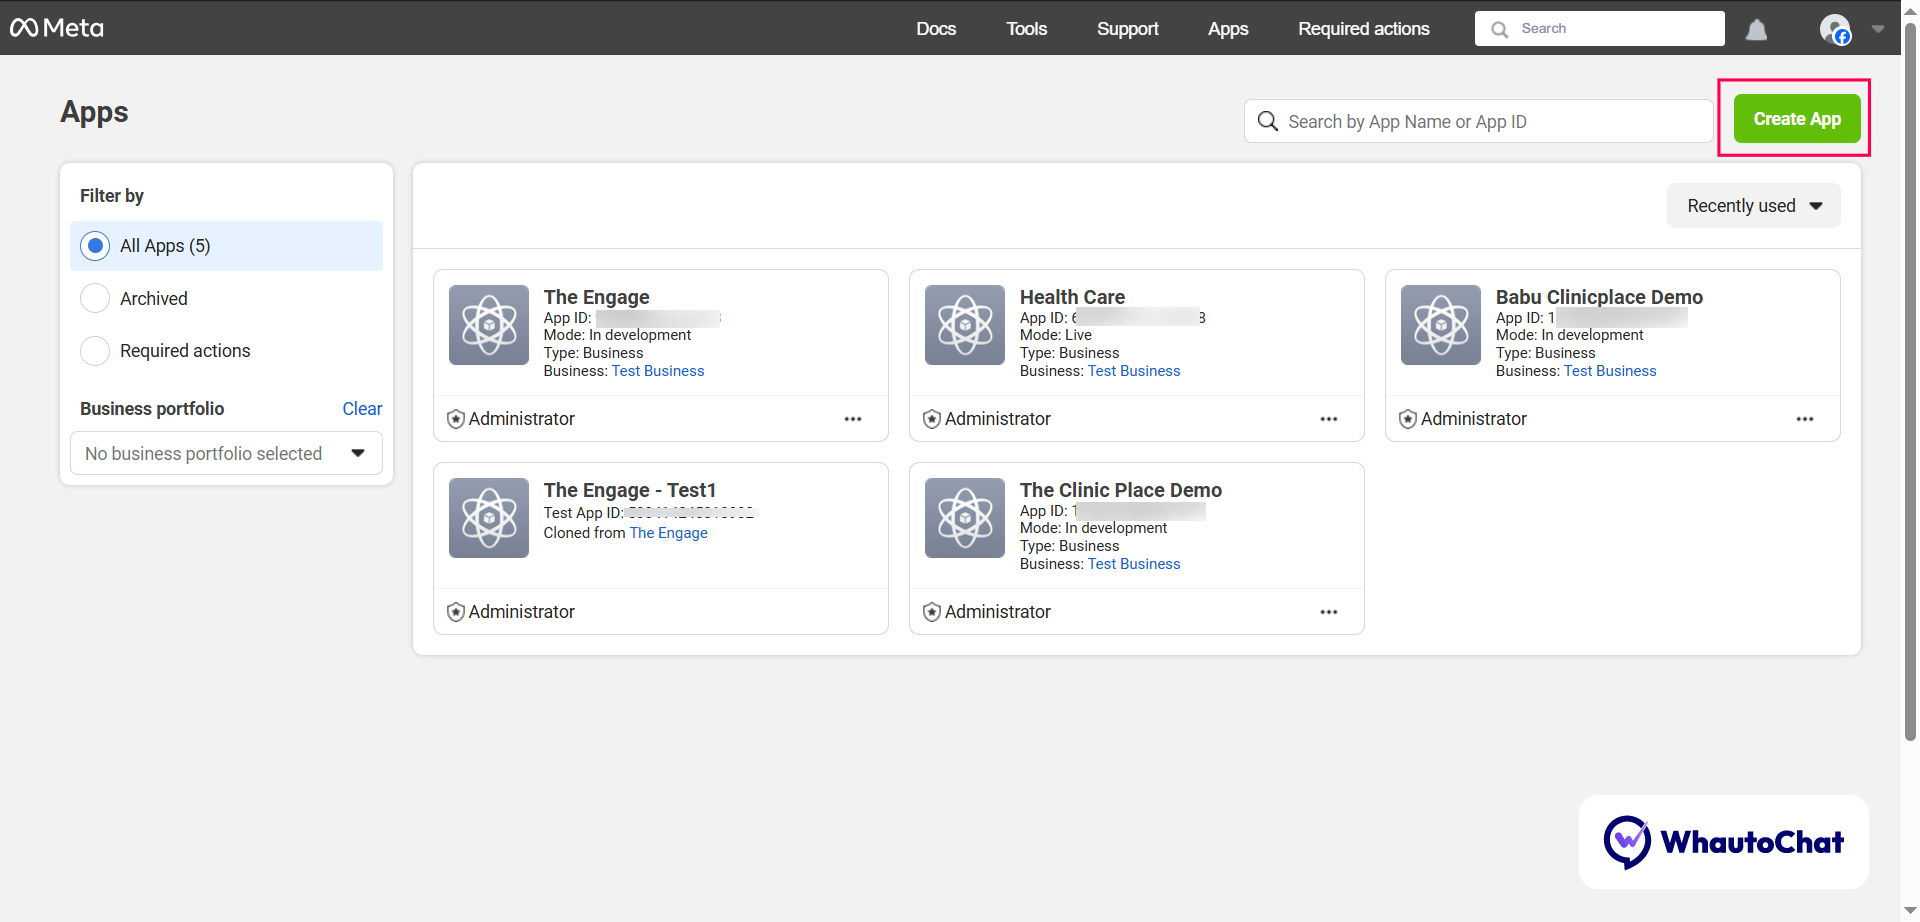
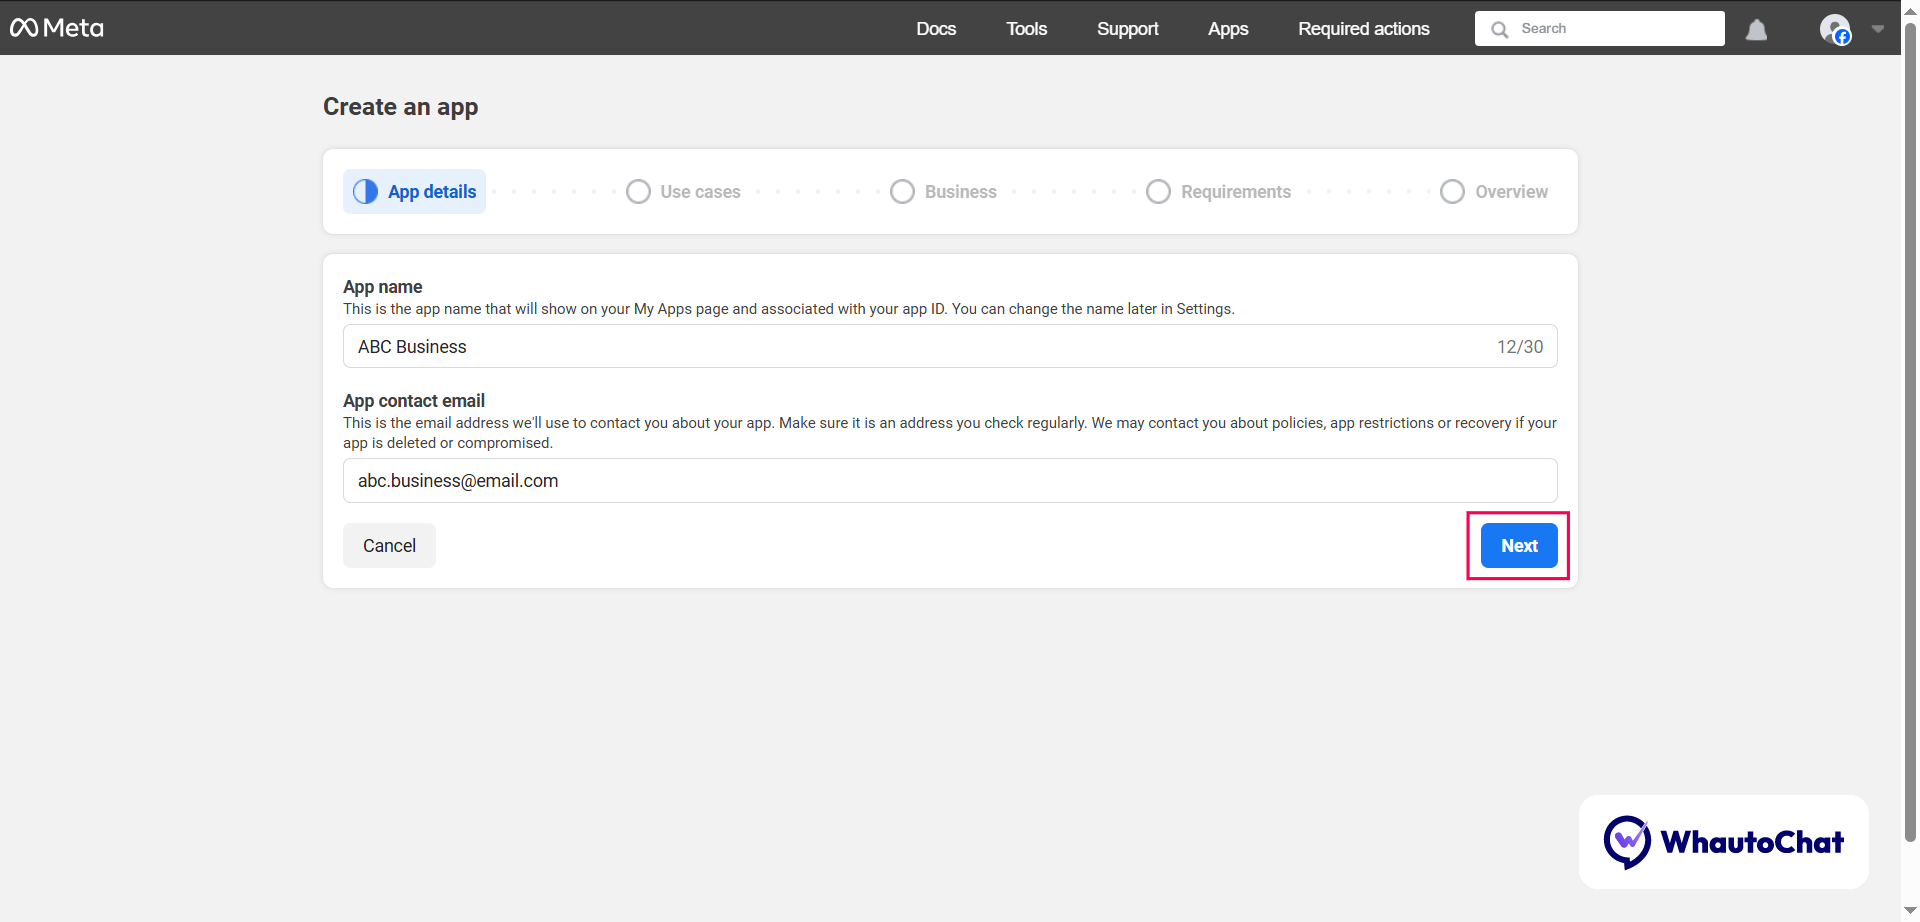
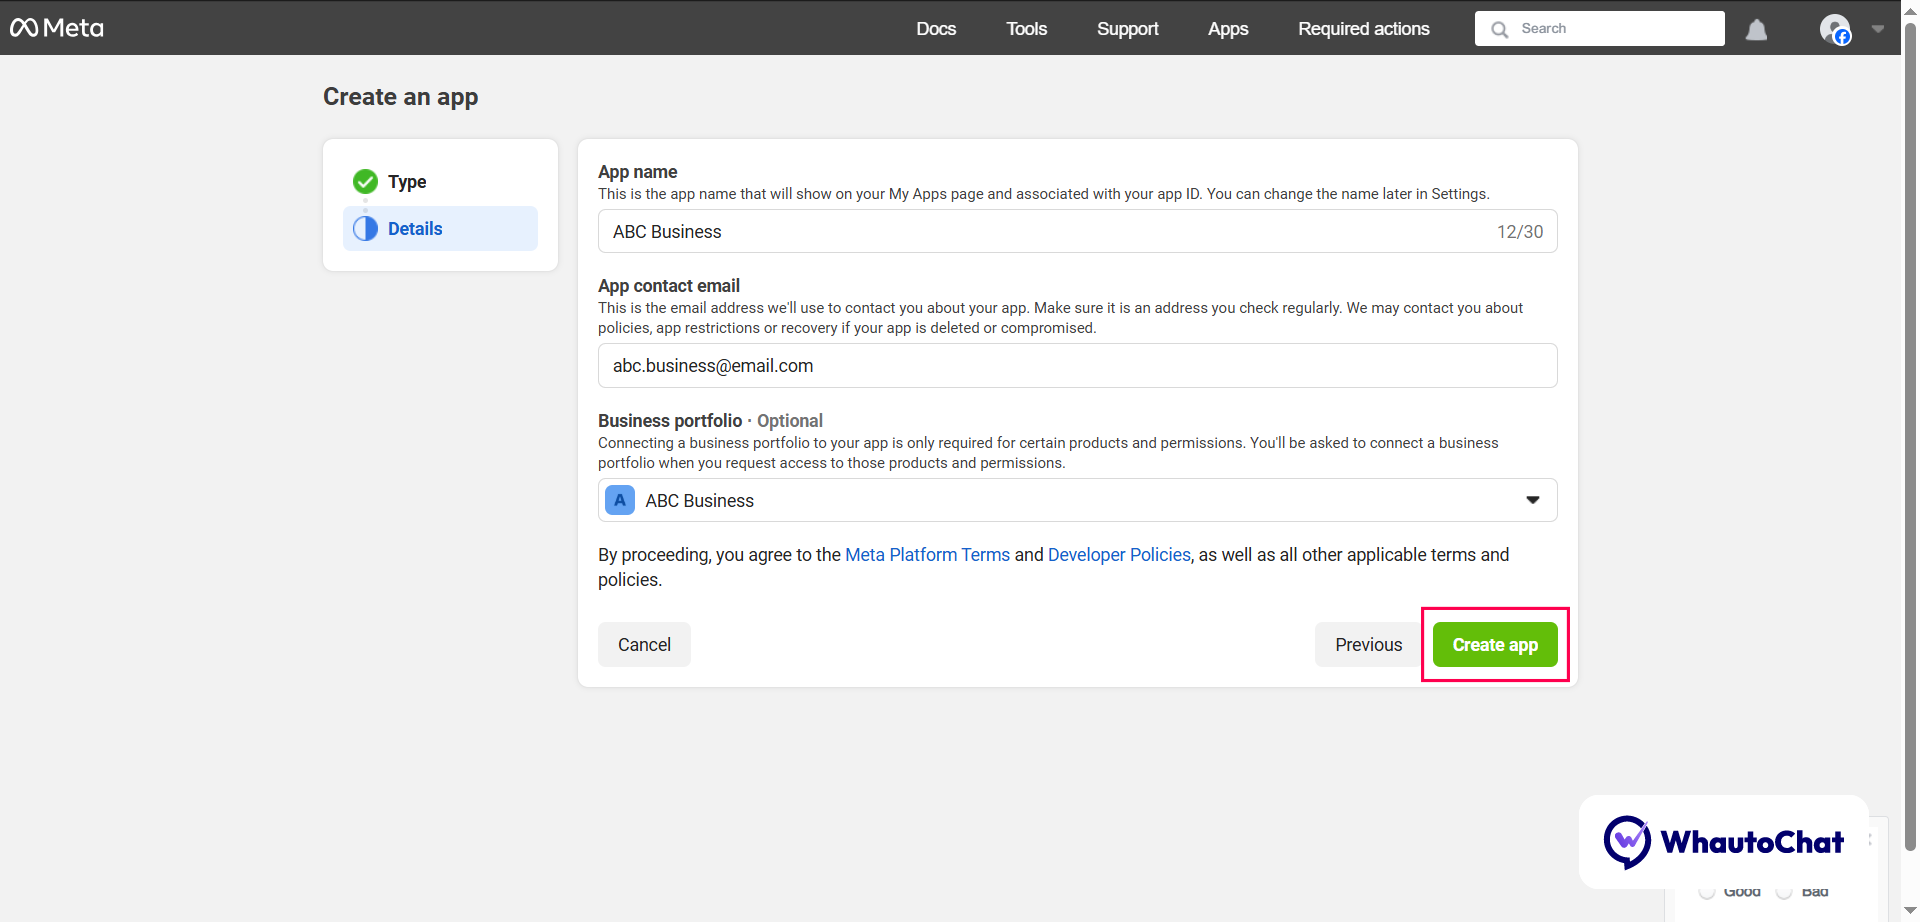
- Enter the app details:
- App Name (e.g., ABC Business)
- Contact Email → Click Next
- Use Cases: Select Other → Click Next
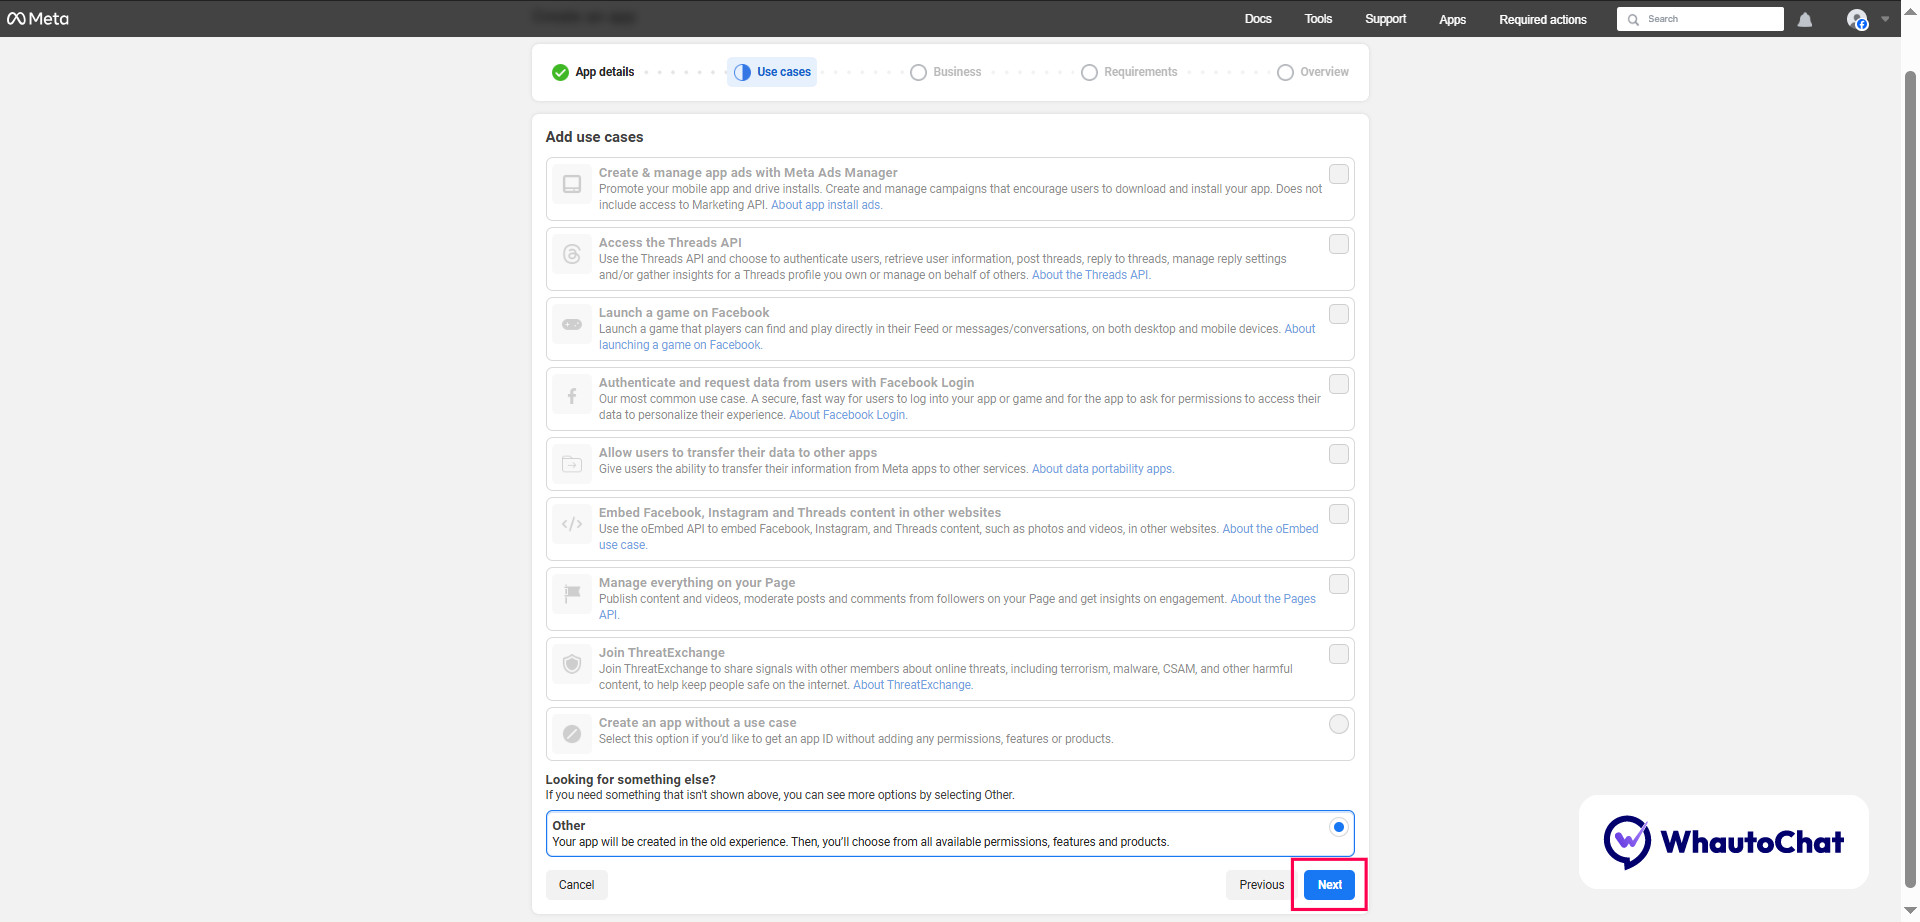
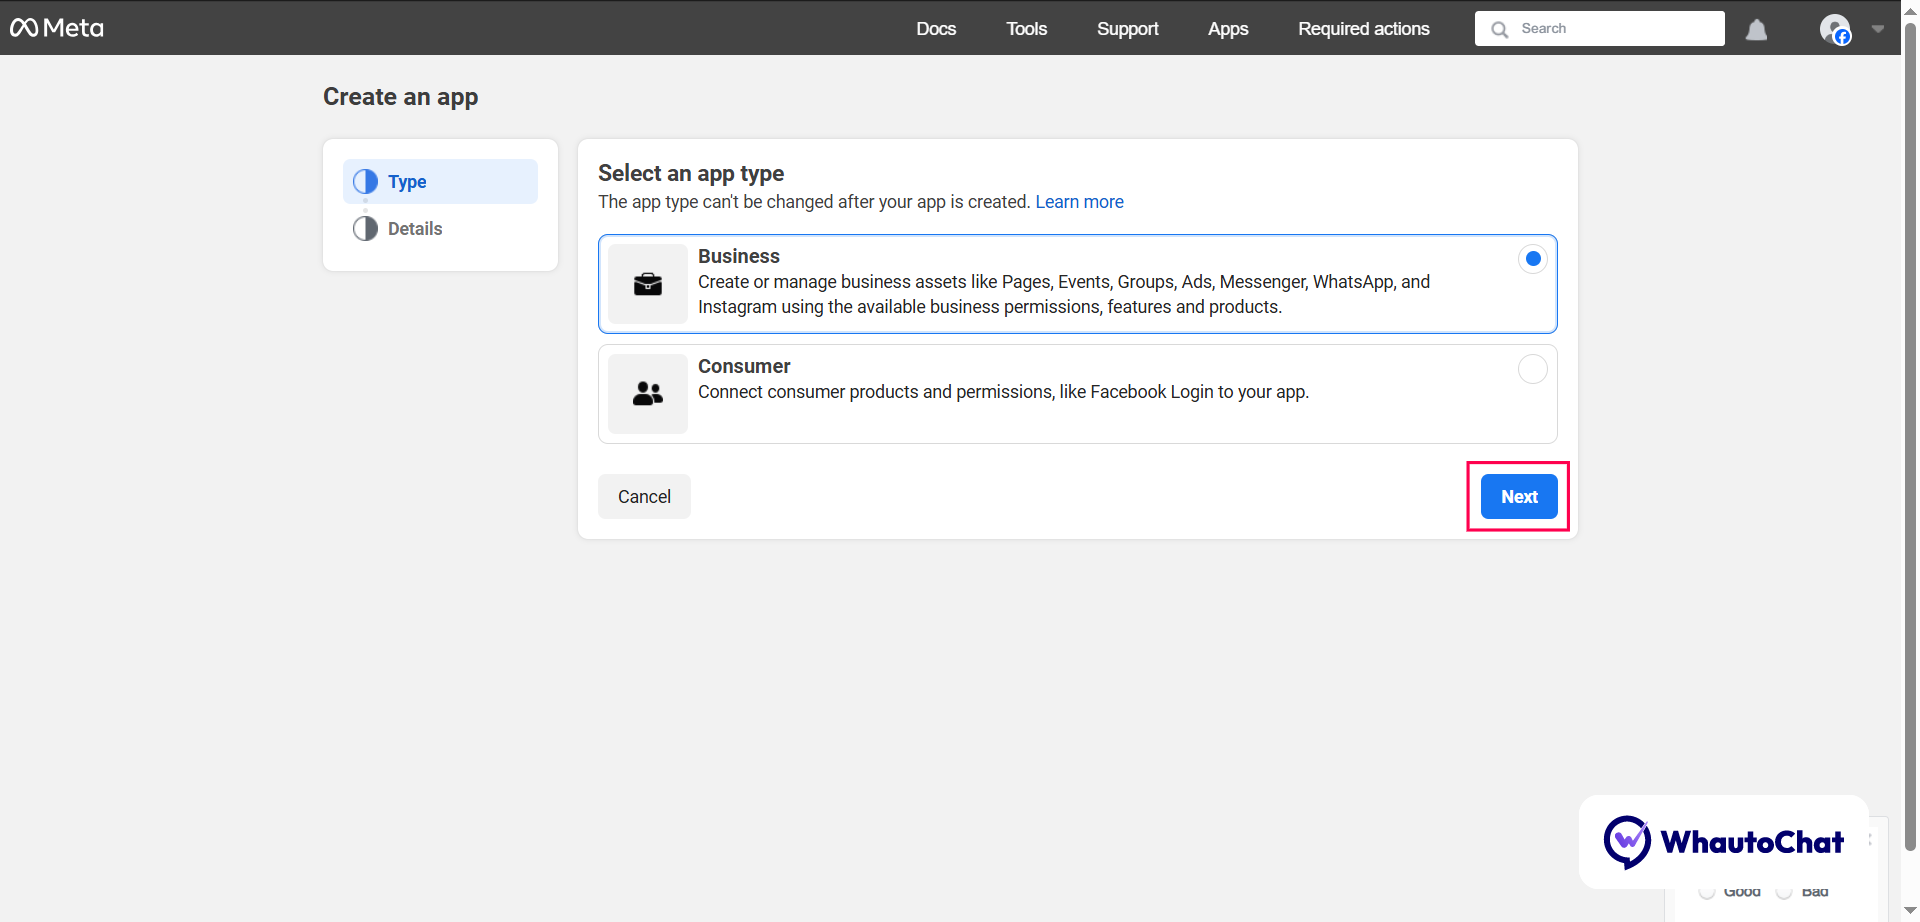
- App Type: Select Business option → Click Next
- Business Portfolio: Choose your Meta Business Account → Click Create App
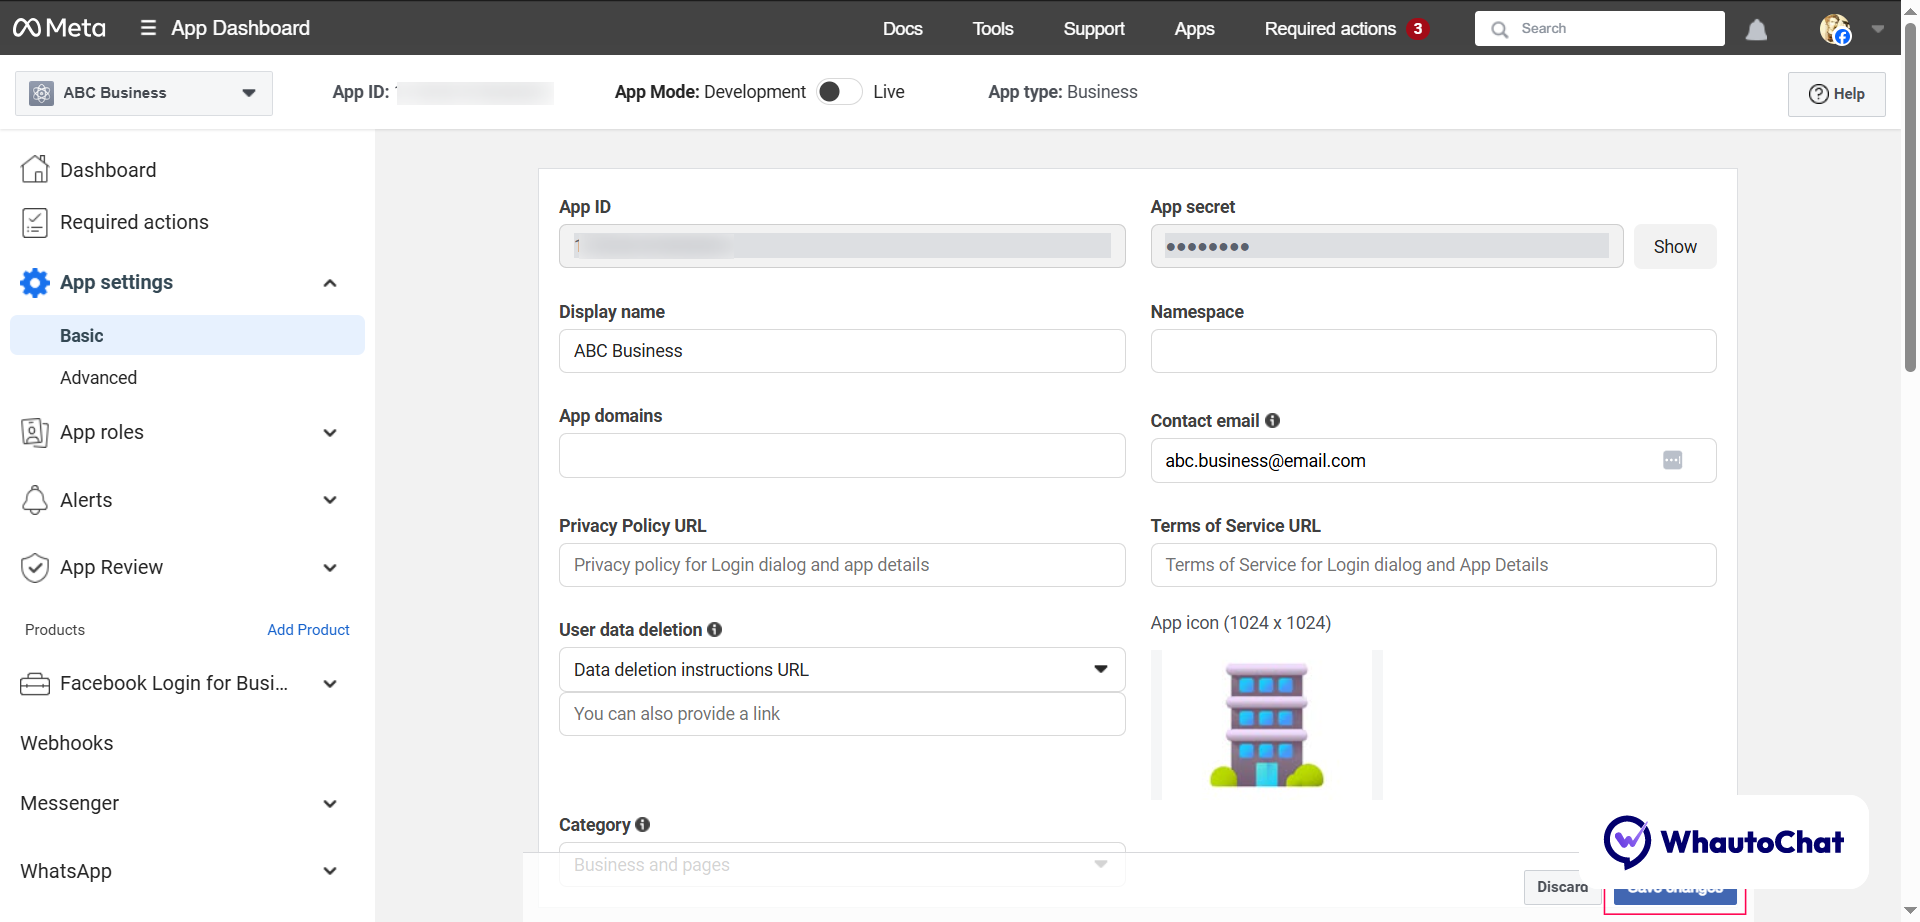
⚙️ Step 3: Update App Settings
- Go to App Settings → Basic
- Update:
- App Icon
- Privacy Policy & Terms URLs
- App Category
- Platform details (if needed)
- Click Save Changes
Note: Be sure to save your changes. You can add additional information if you wish, but the information above is the only information required to complete the remaining steps.
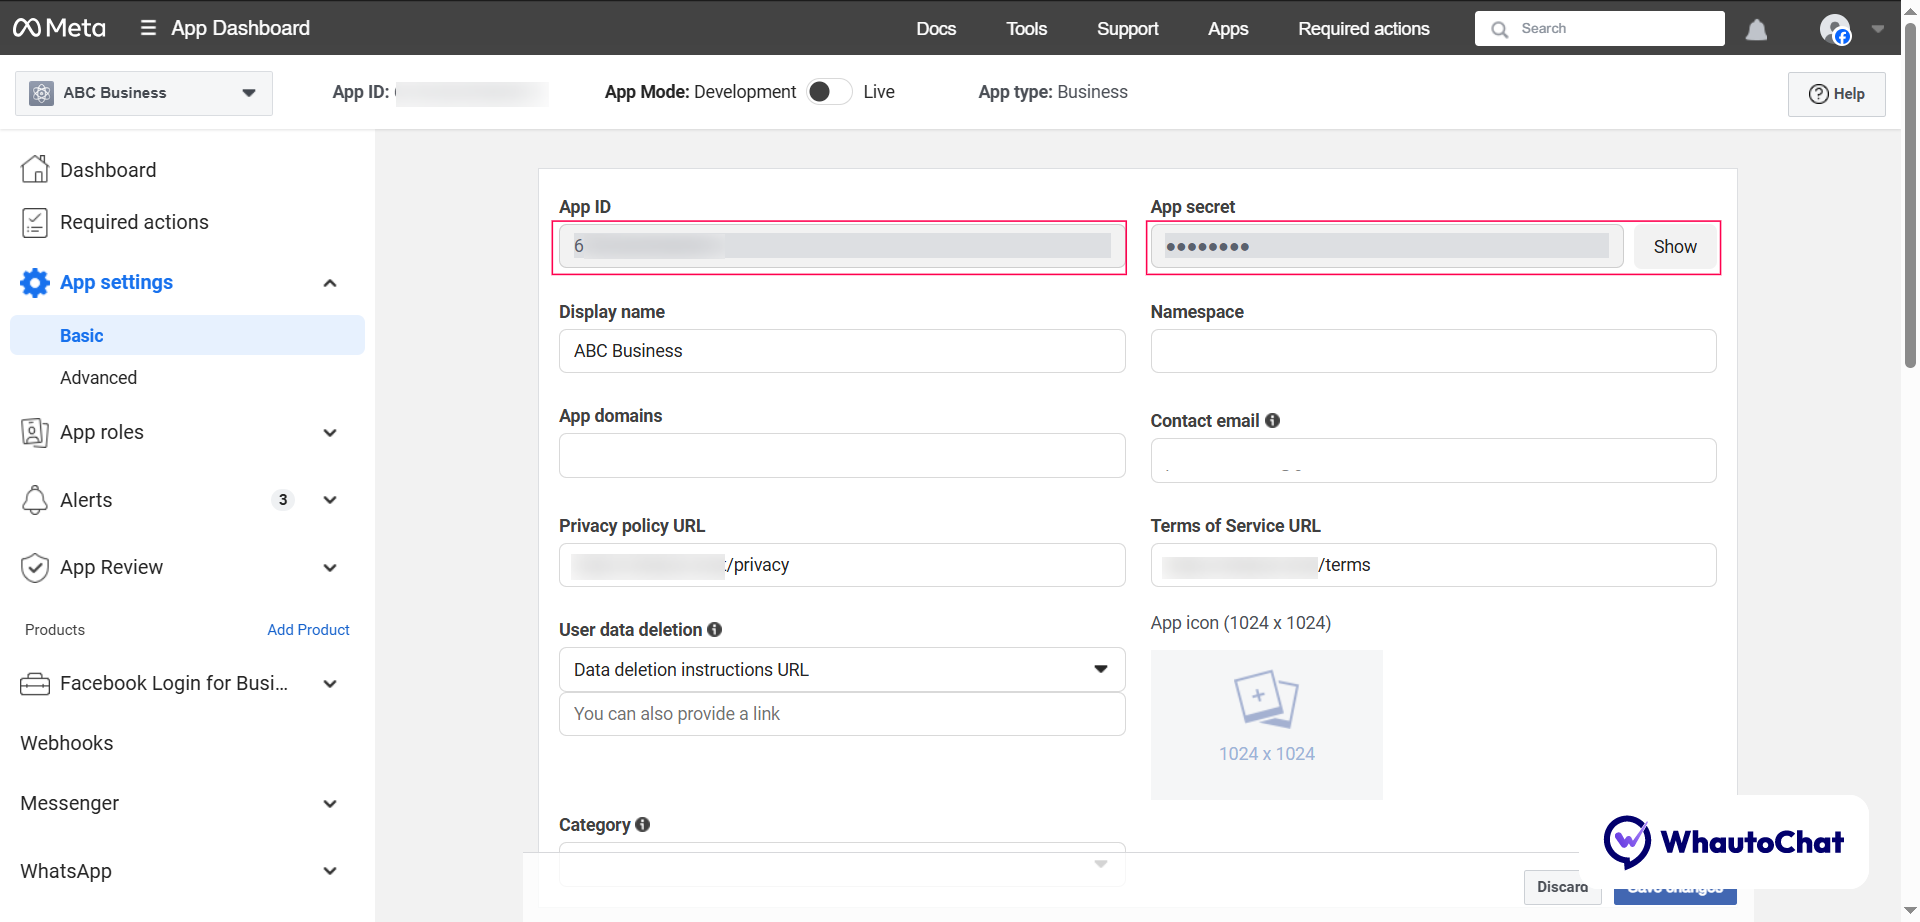
🔑 Step 4: Get App ID and App Secret
- In your Meta app, go to Settings > Basic
- Copy the App ID and App Secret:
- App ID → paste into WHATSAPP_APP_ID
- App Secret → paste into WHATSAPP_APP_SECRET
- Update your (web-server.env) file with these values.
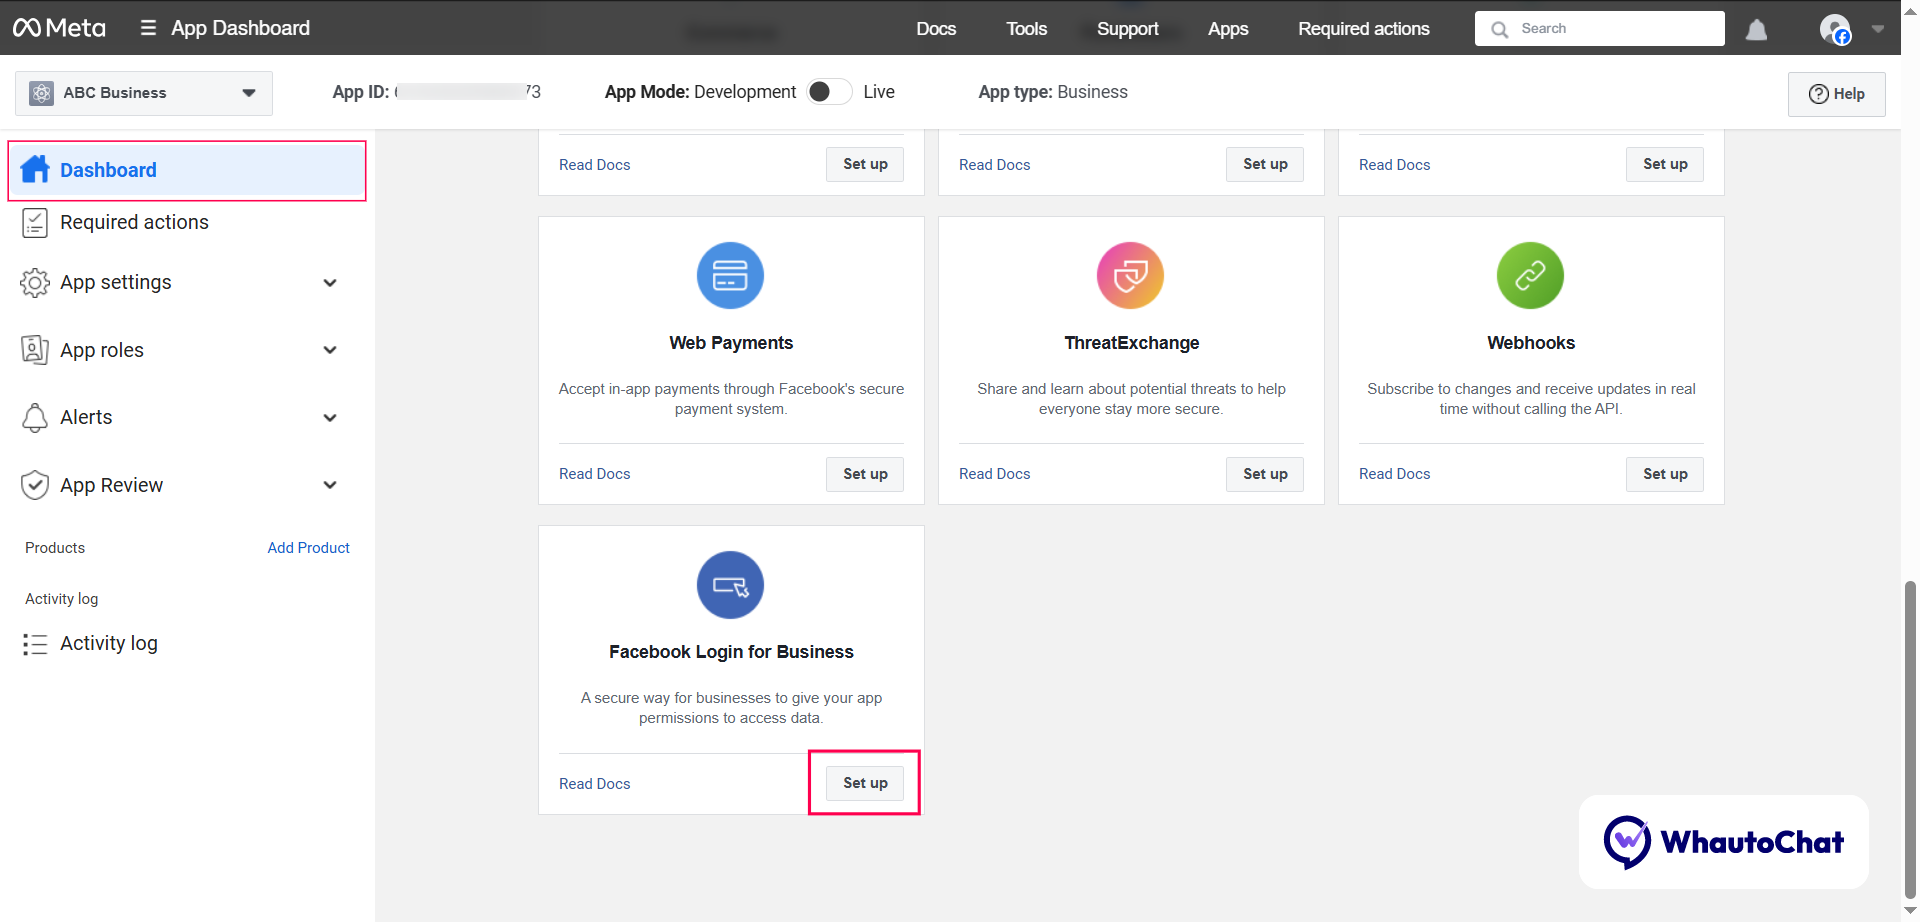
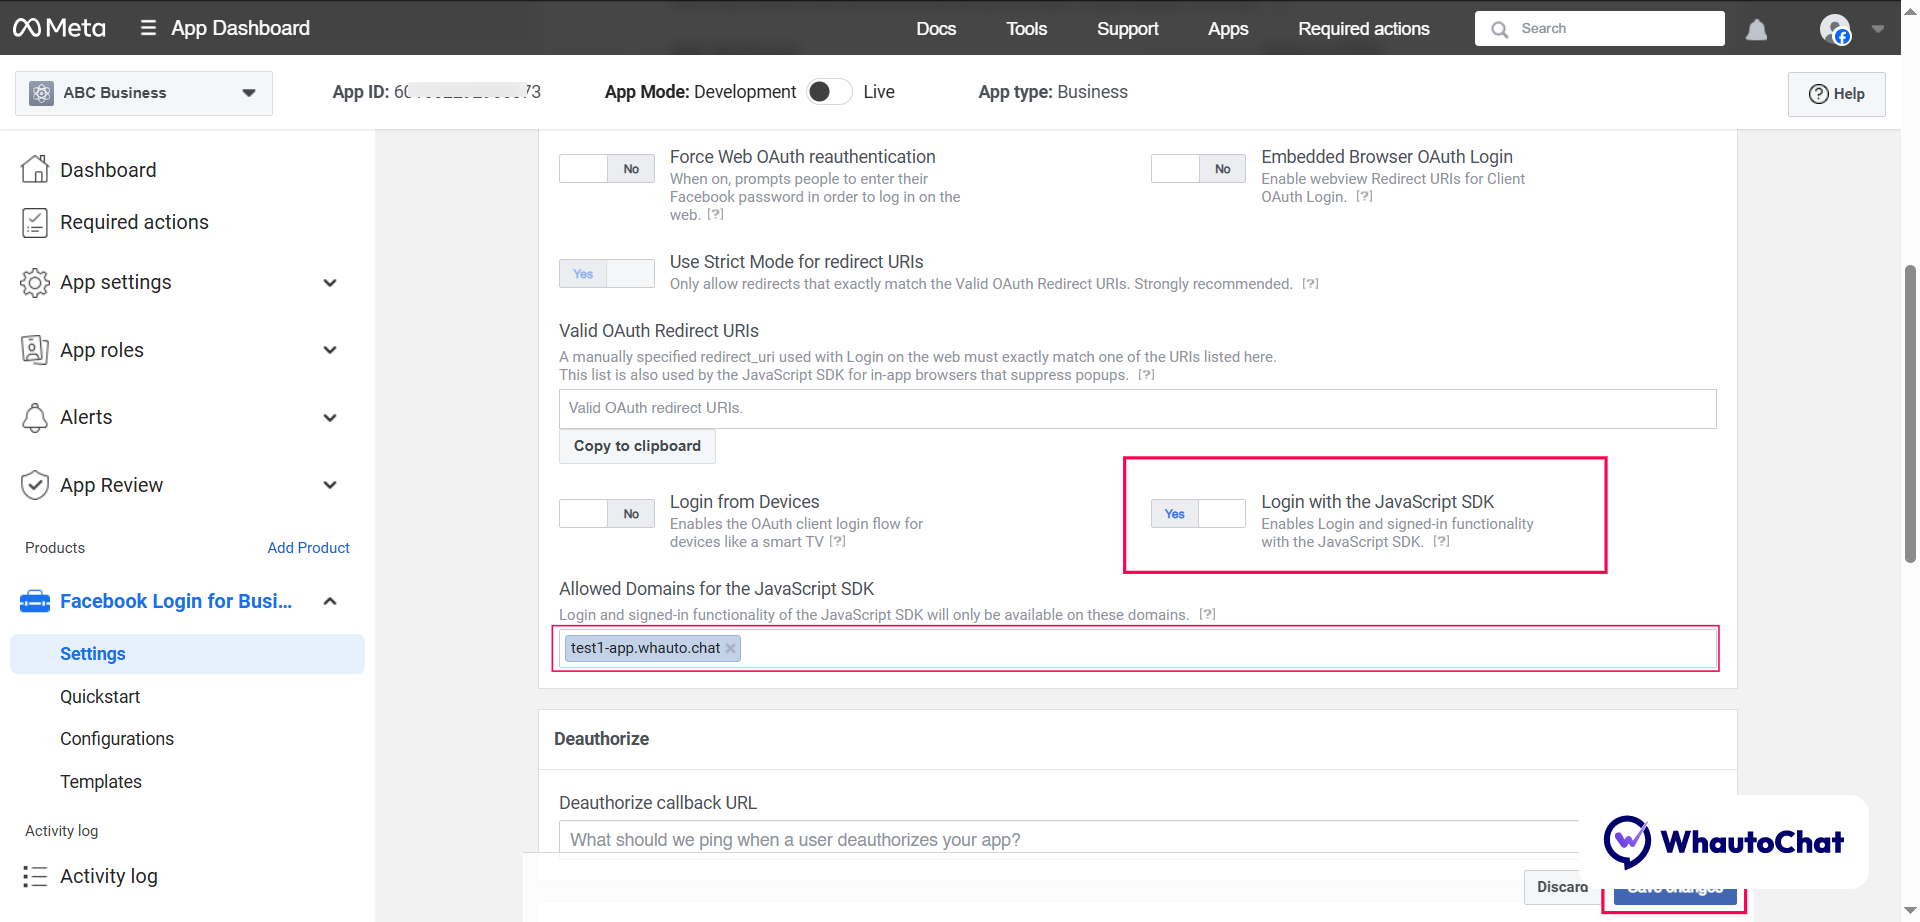
⚙️ Step 5: Configure WhatsApp Login
- Go to Dashboard → Scroll to Facebook Login for Business → Click Set Up
- In Settings, enable Login with JavaScript SDK
- Add your self-hosted app domain Eg. https://yourappdomain.com/
- Click Save Changes
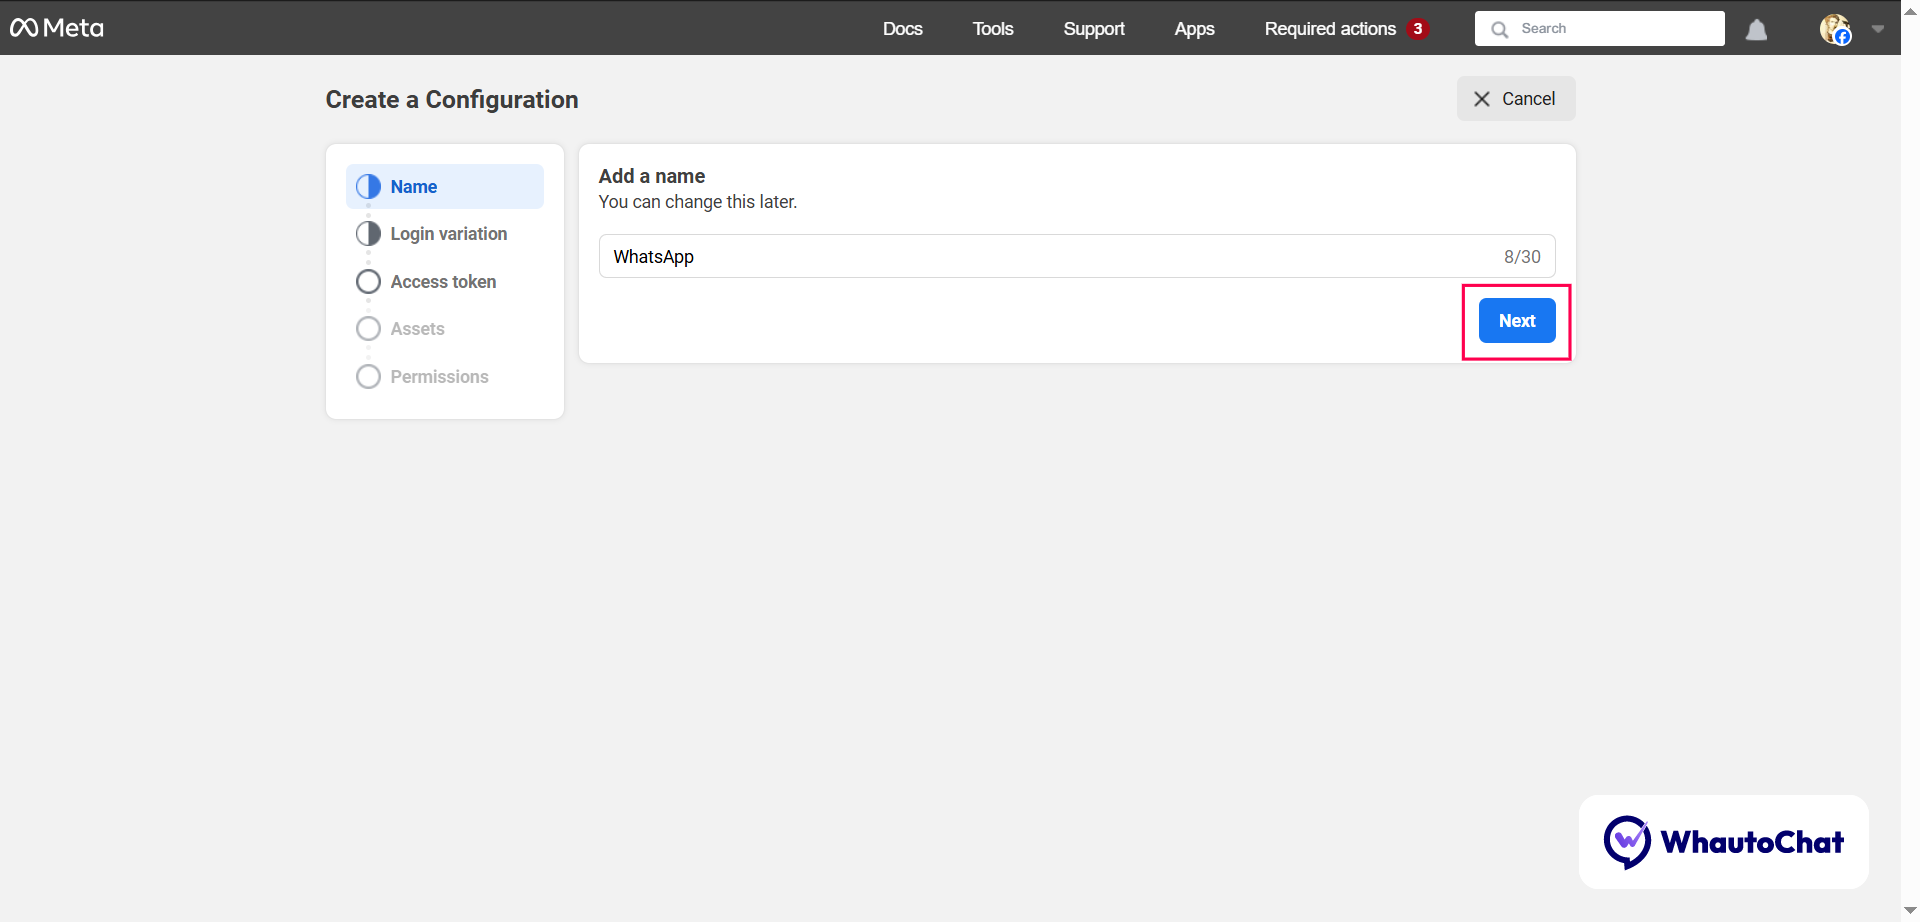
🔁 Step 6: Create WhatsApp Configuration
- Go to Configuration → Click Create Configuration
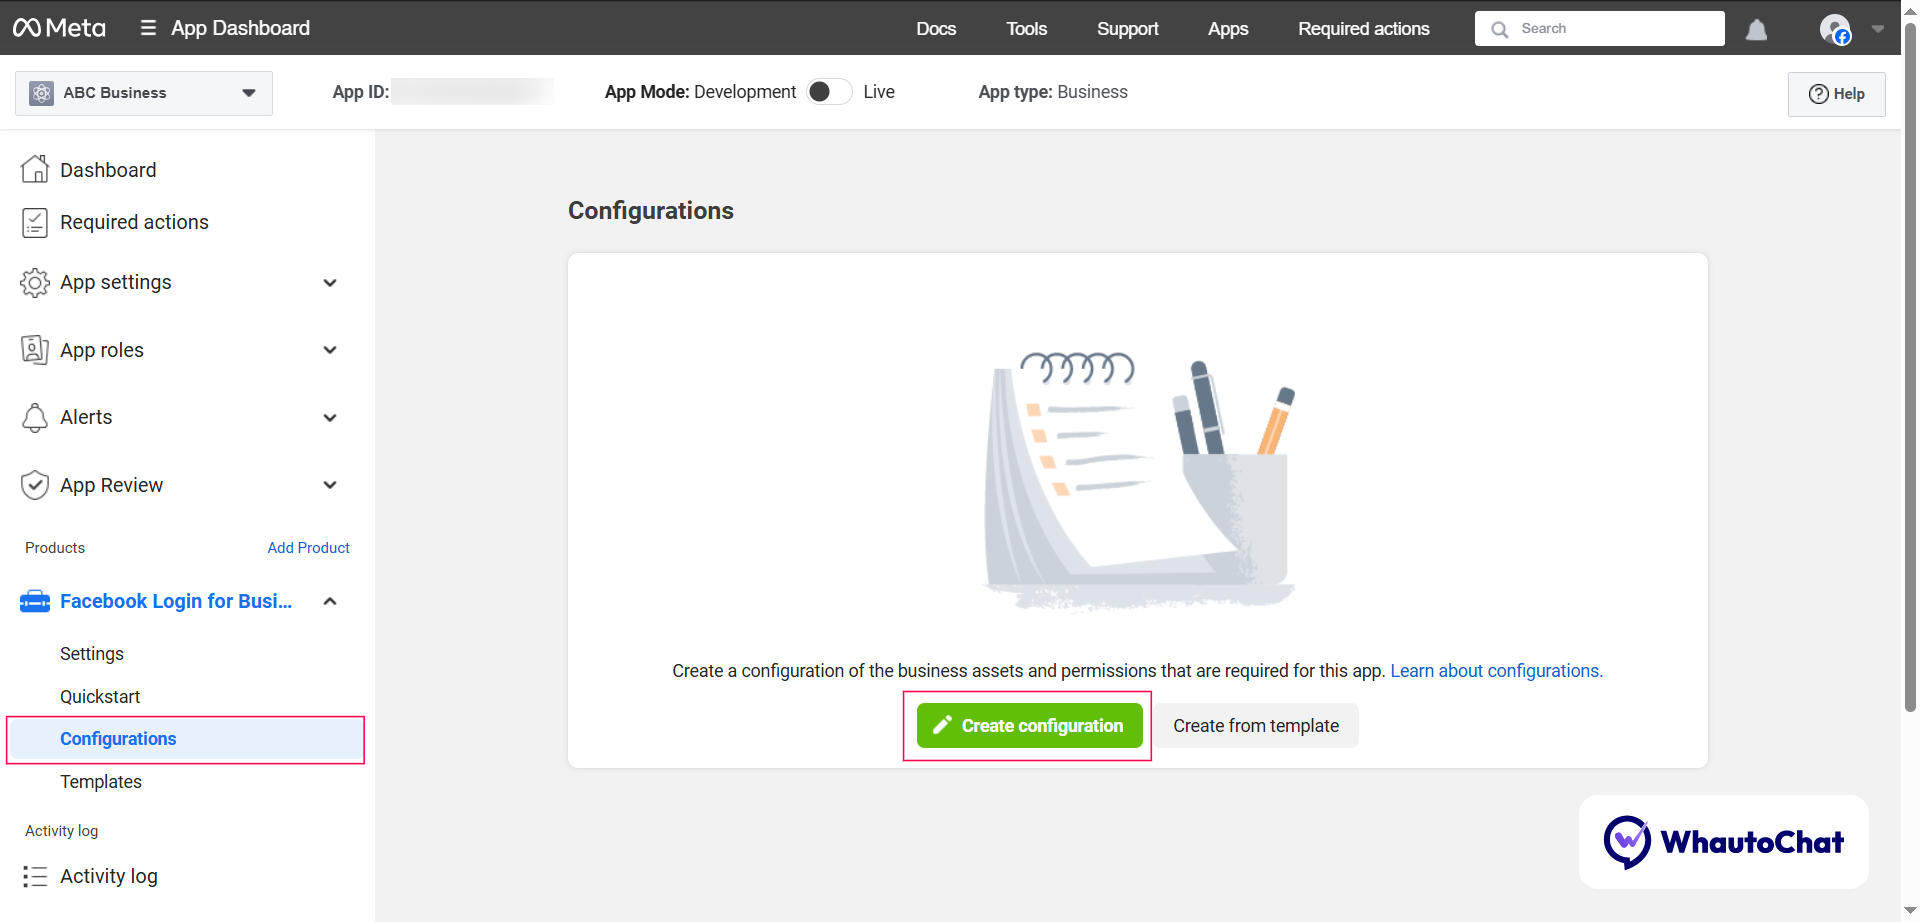
- Name it (e.g., WhatsApp) → Click Next
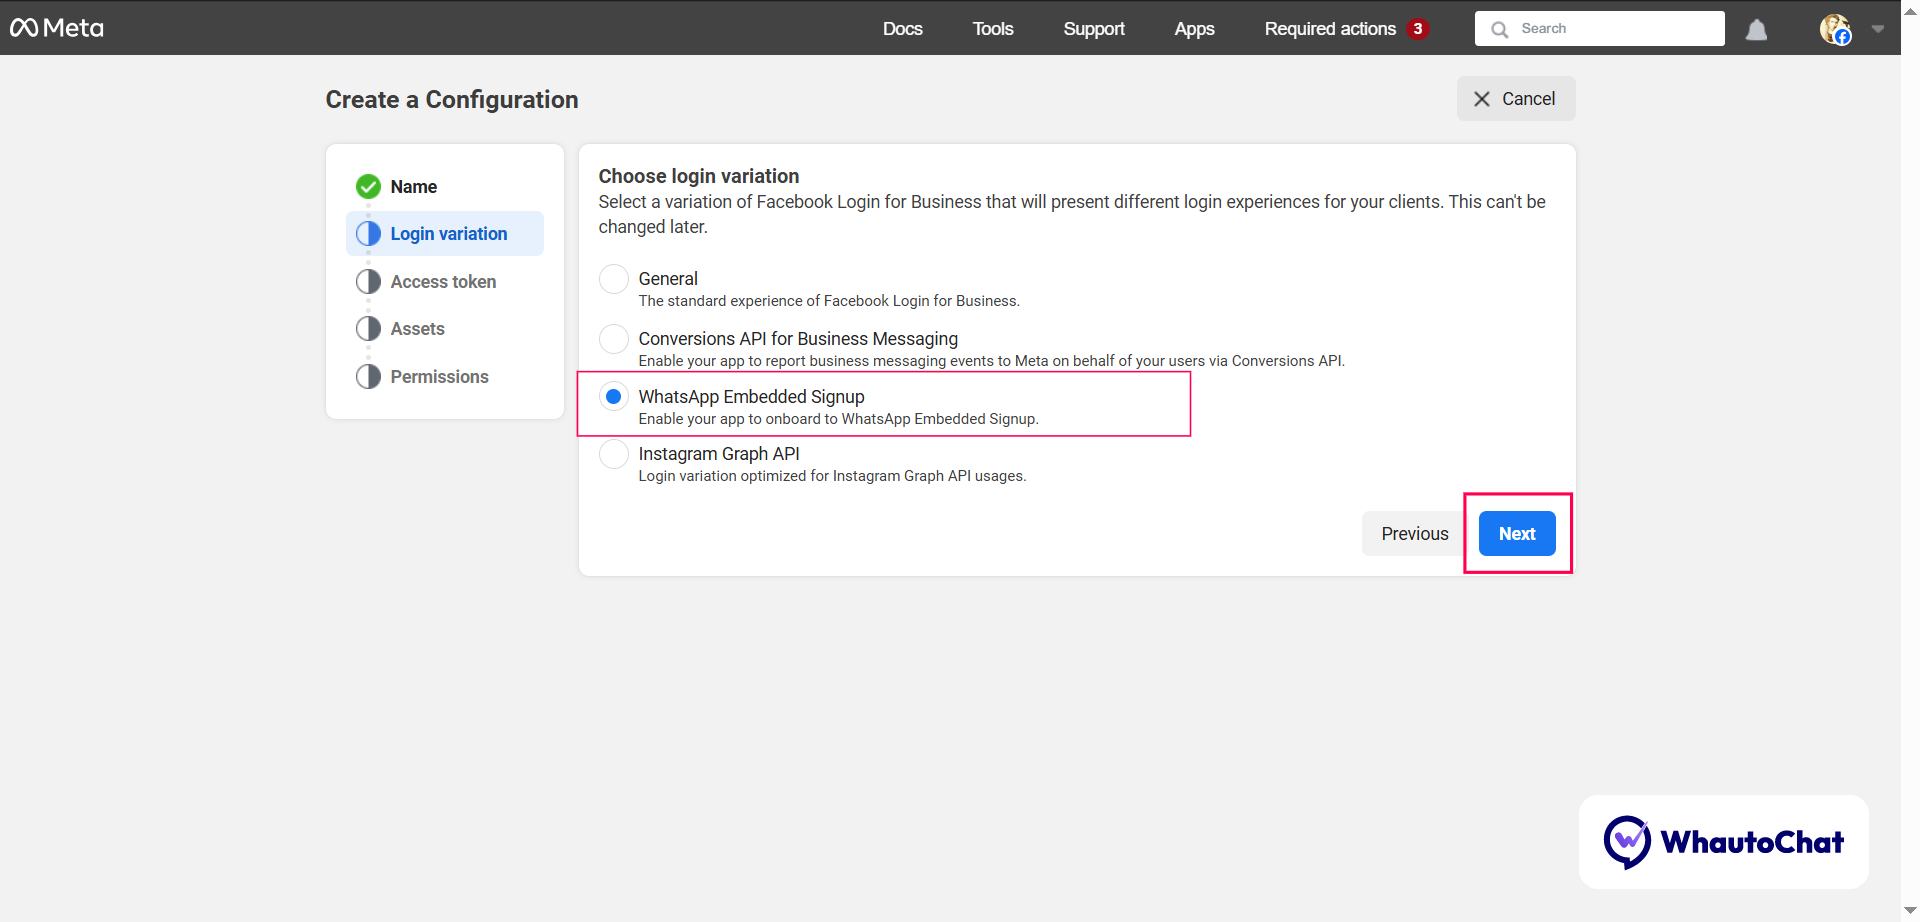
- Login Variation: Choose WhatsApp Embedded Signup → Click Next ⚠️ Make sure your Meta Business is verified — required to access this option.
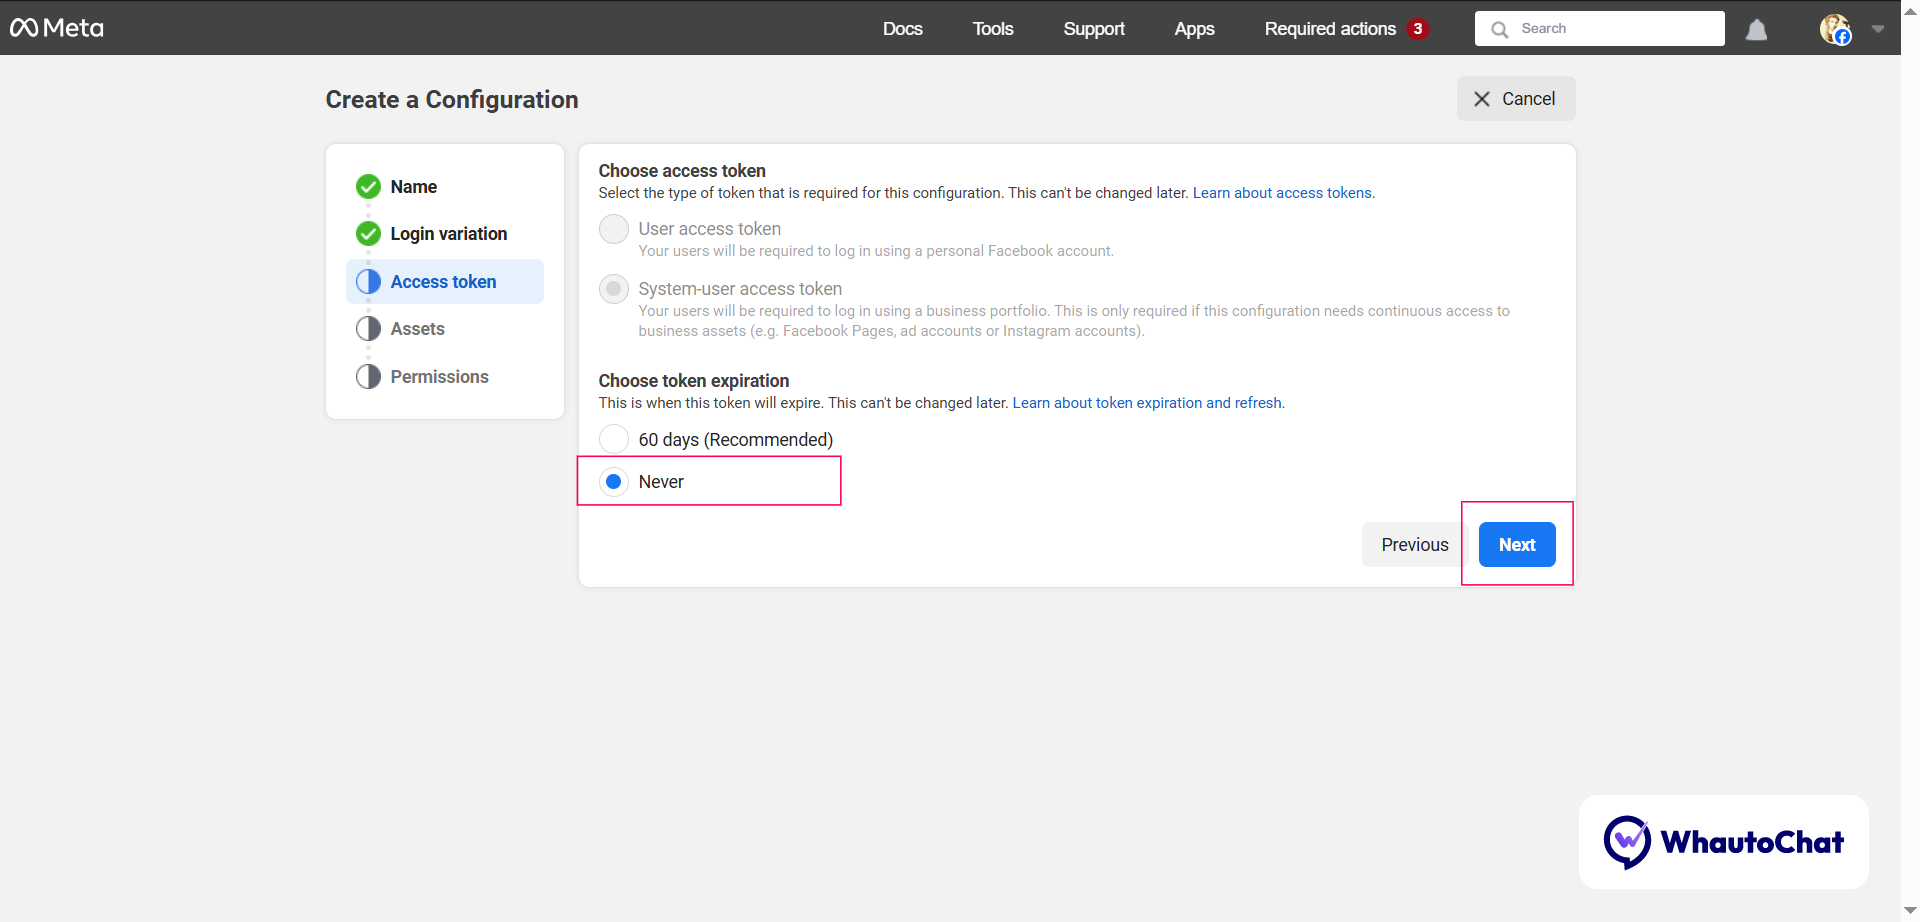
- Token Expiration: Select Never → Click Next
- Choose Products: Select WhatsApp Cloud API only Click Next.

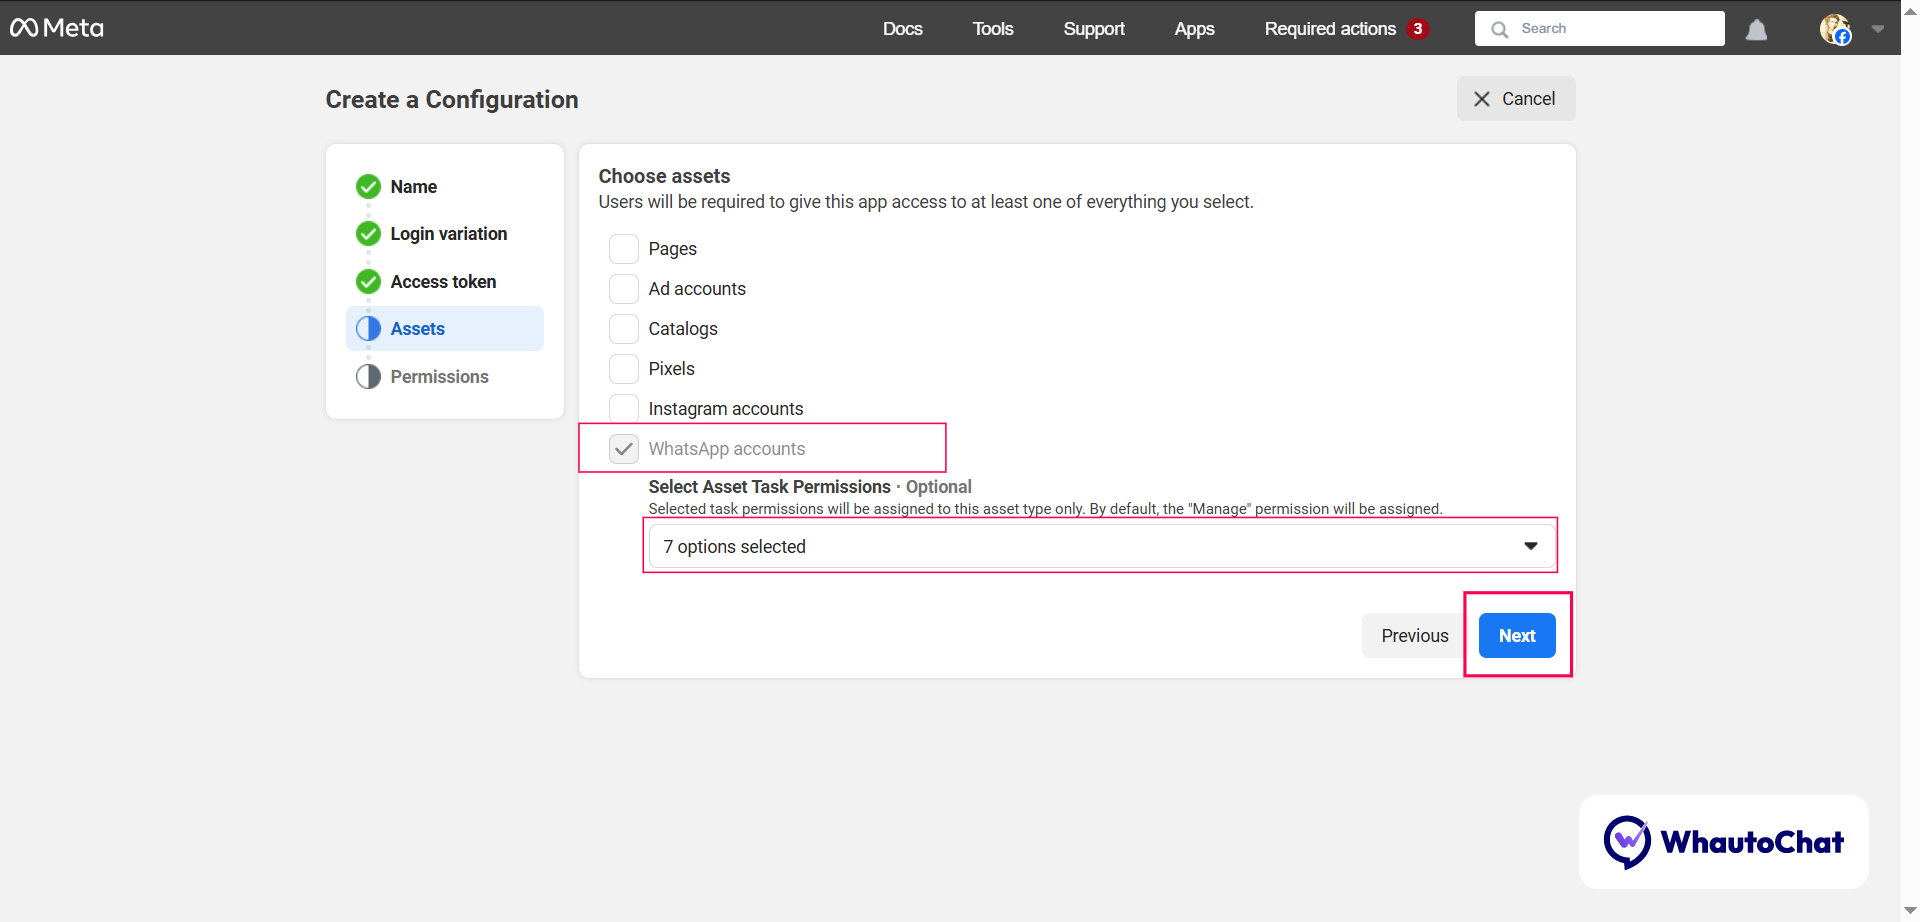
- Choose Assets:
- Select WhatsApp Accounts
- Asset Task Permissions (Select all):
- manage
- develop
- manage_templates
- view_phone_assets
- manage_phone_assets
- view_templates
- Messaging
- Select below mentioned 3 Permissions and click Create.
- whatsapp_business_management
- business_management
- Whatsapp_business_messaging
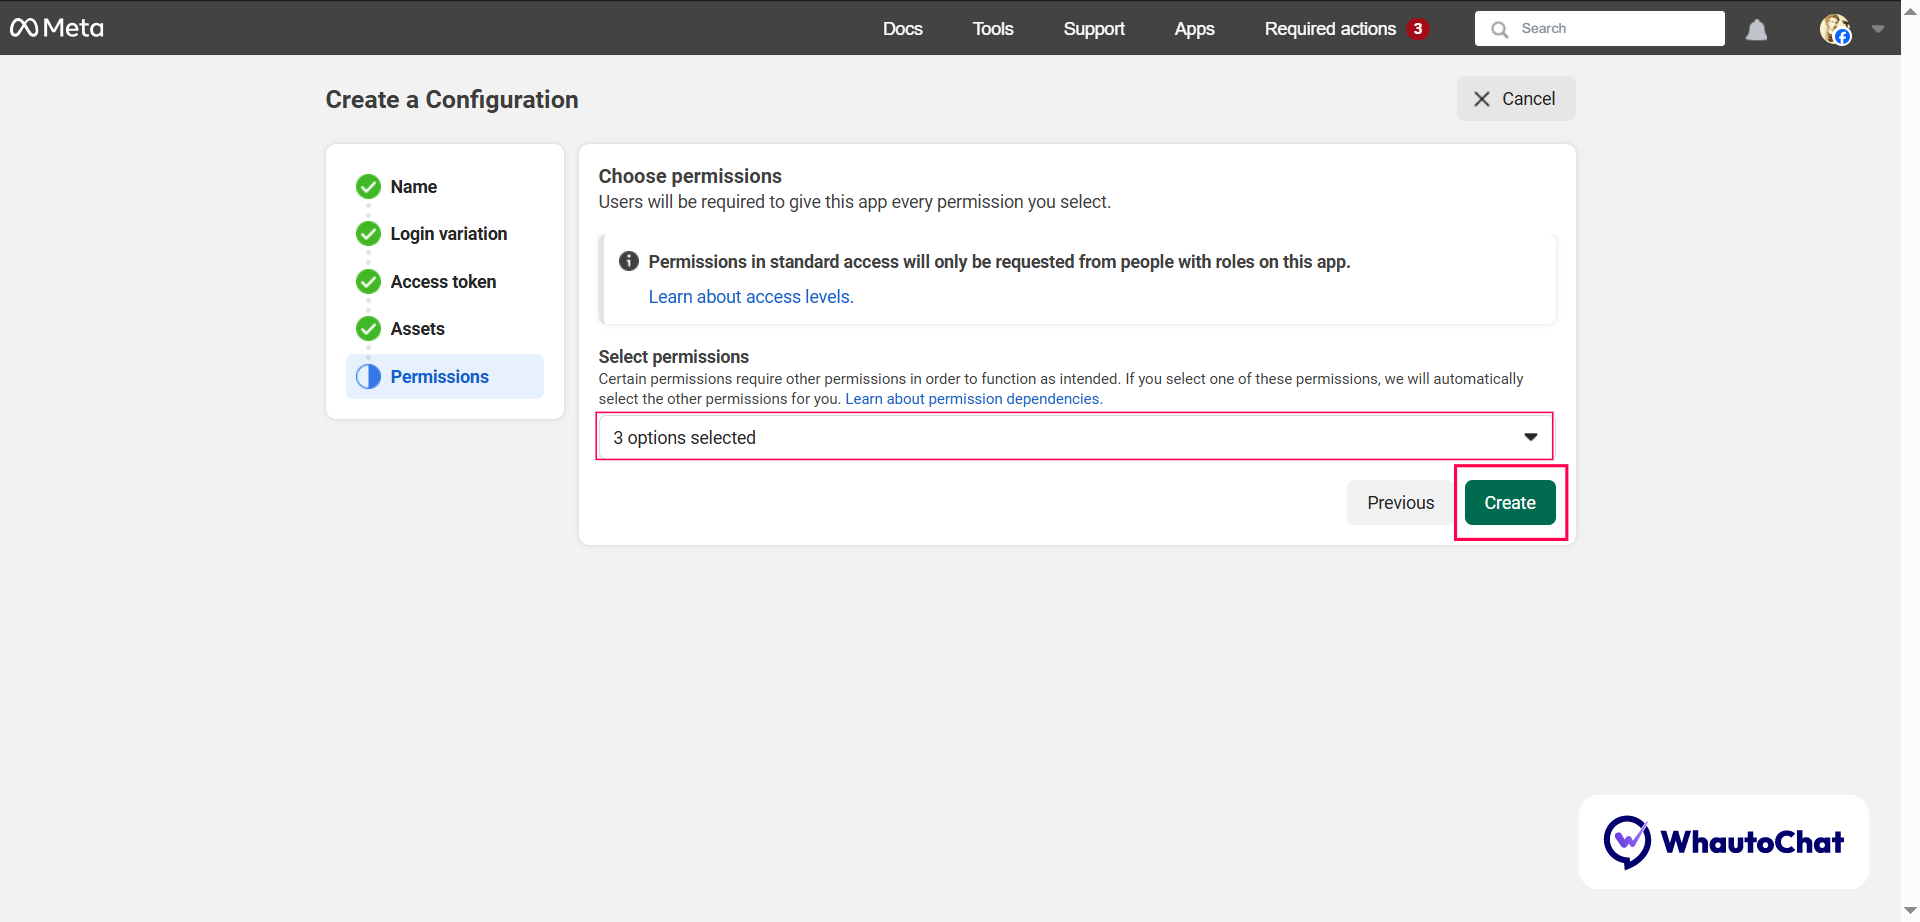
✅ WhatsApp Configuration is now created. Copy the Configuration ID → Paste into WHATSAPP_CONFIGURATION_ID Update your (web-server.env) file with this value.
🔐 Step 7: Generate WhatsApp App Token
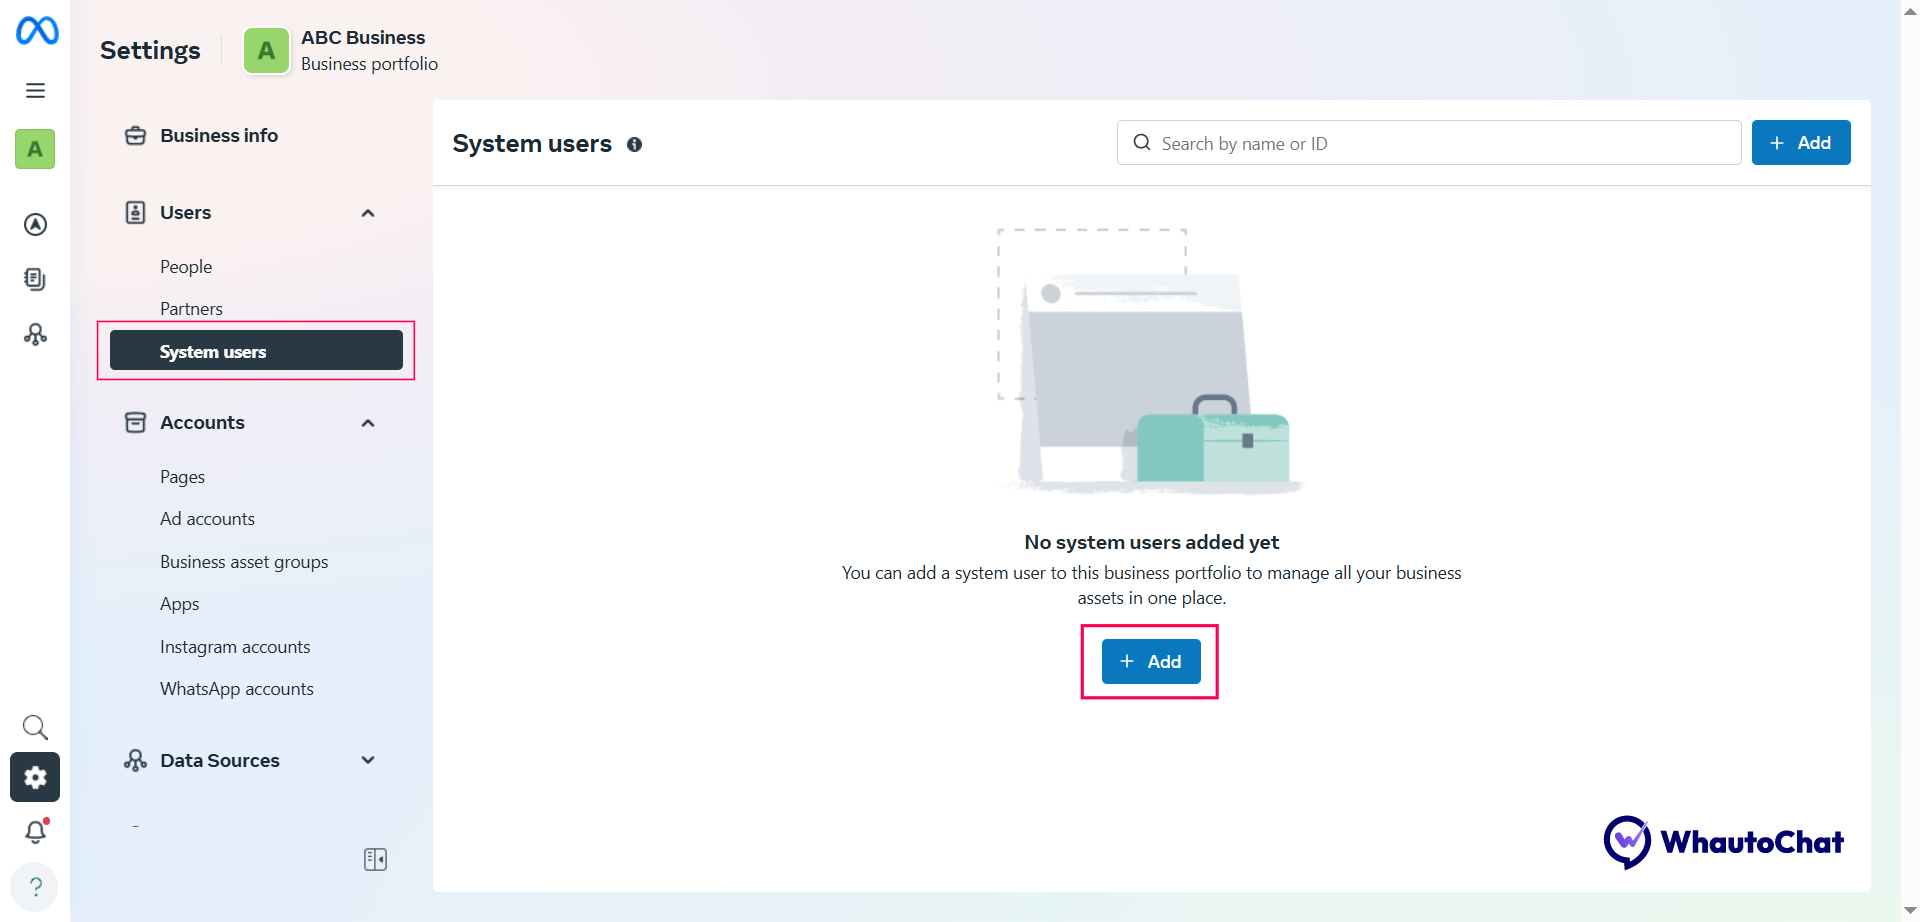
- Go to https://business.facebook.com/settings and select your business portfolio to continue
- In the left panel, under Users, click System Users → Click Add
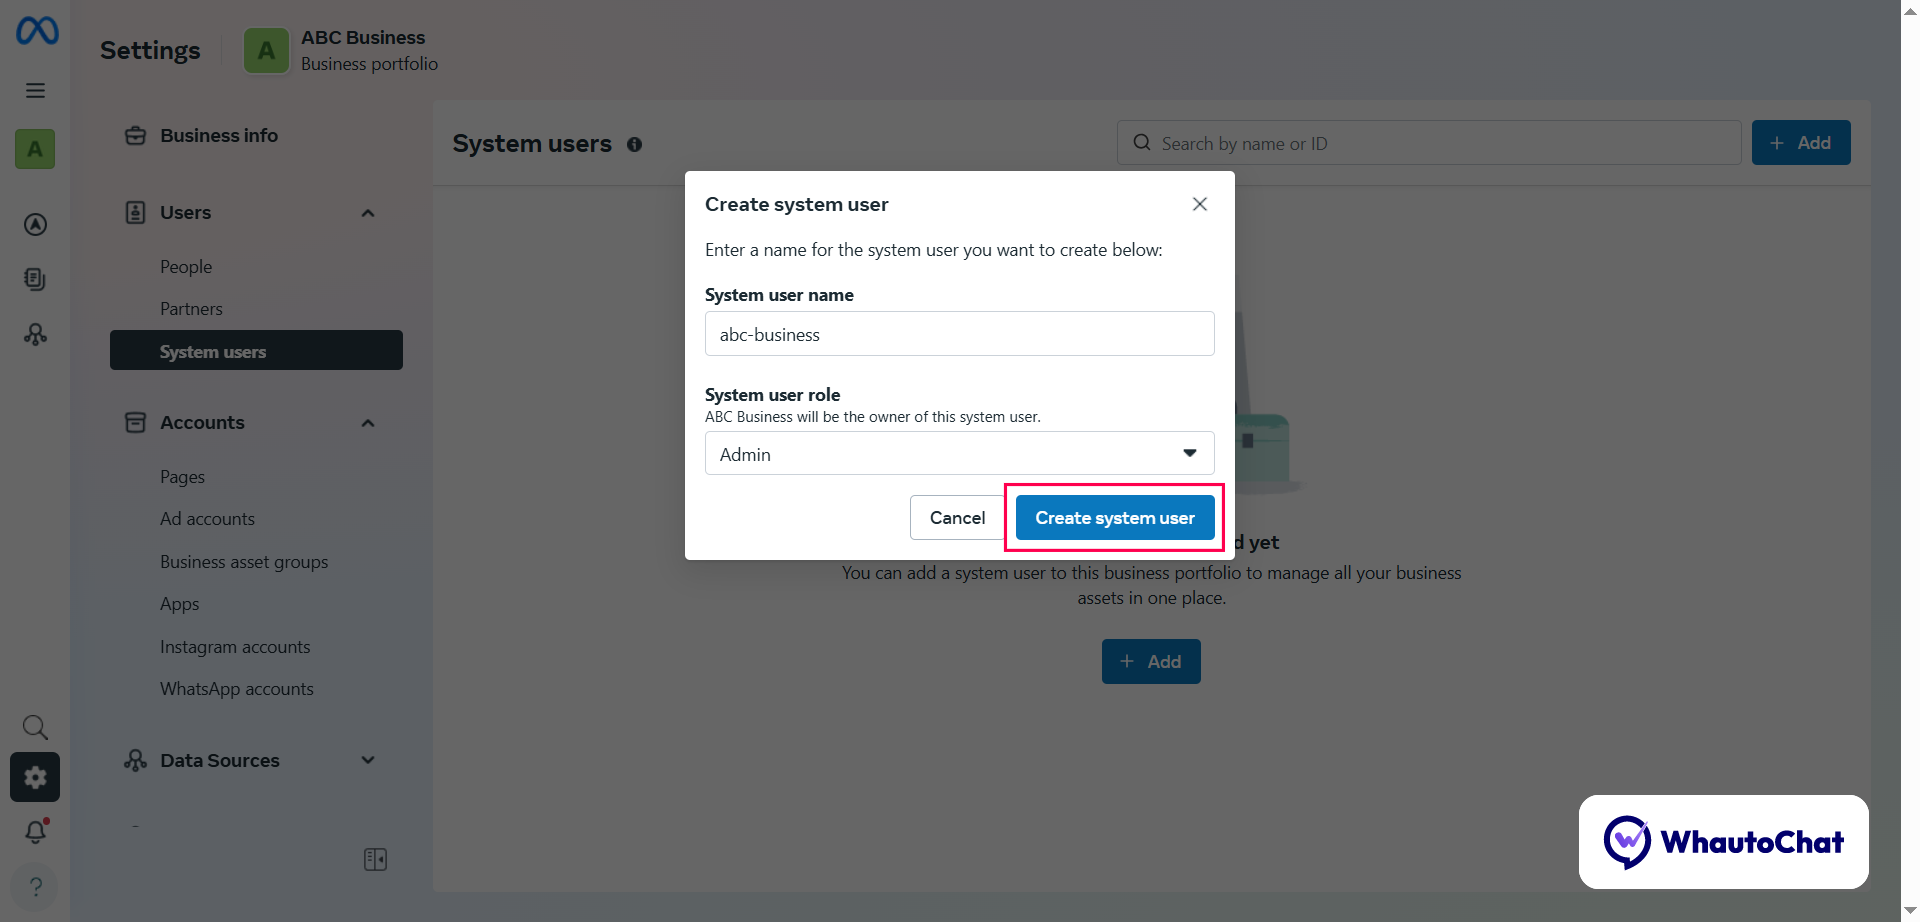
- Create System User:
- Enter Name (e.g., abc-business)
- Role: Select Admin (Or) Employee → Click Create
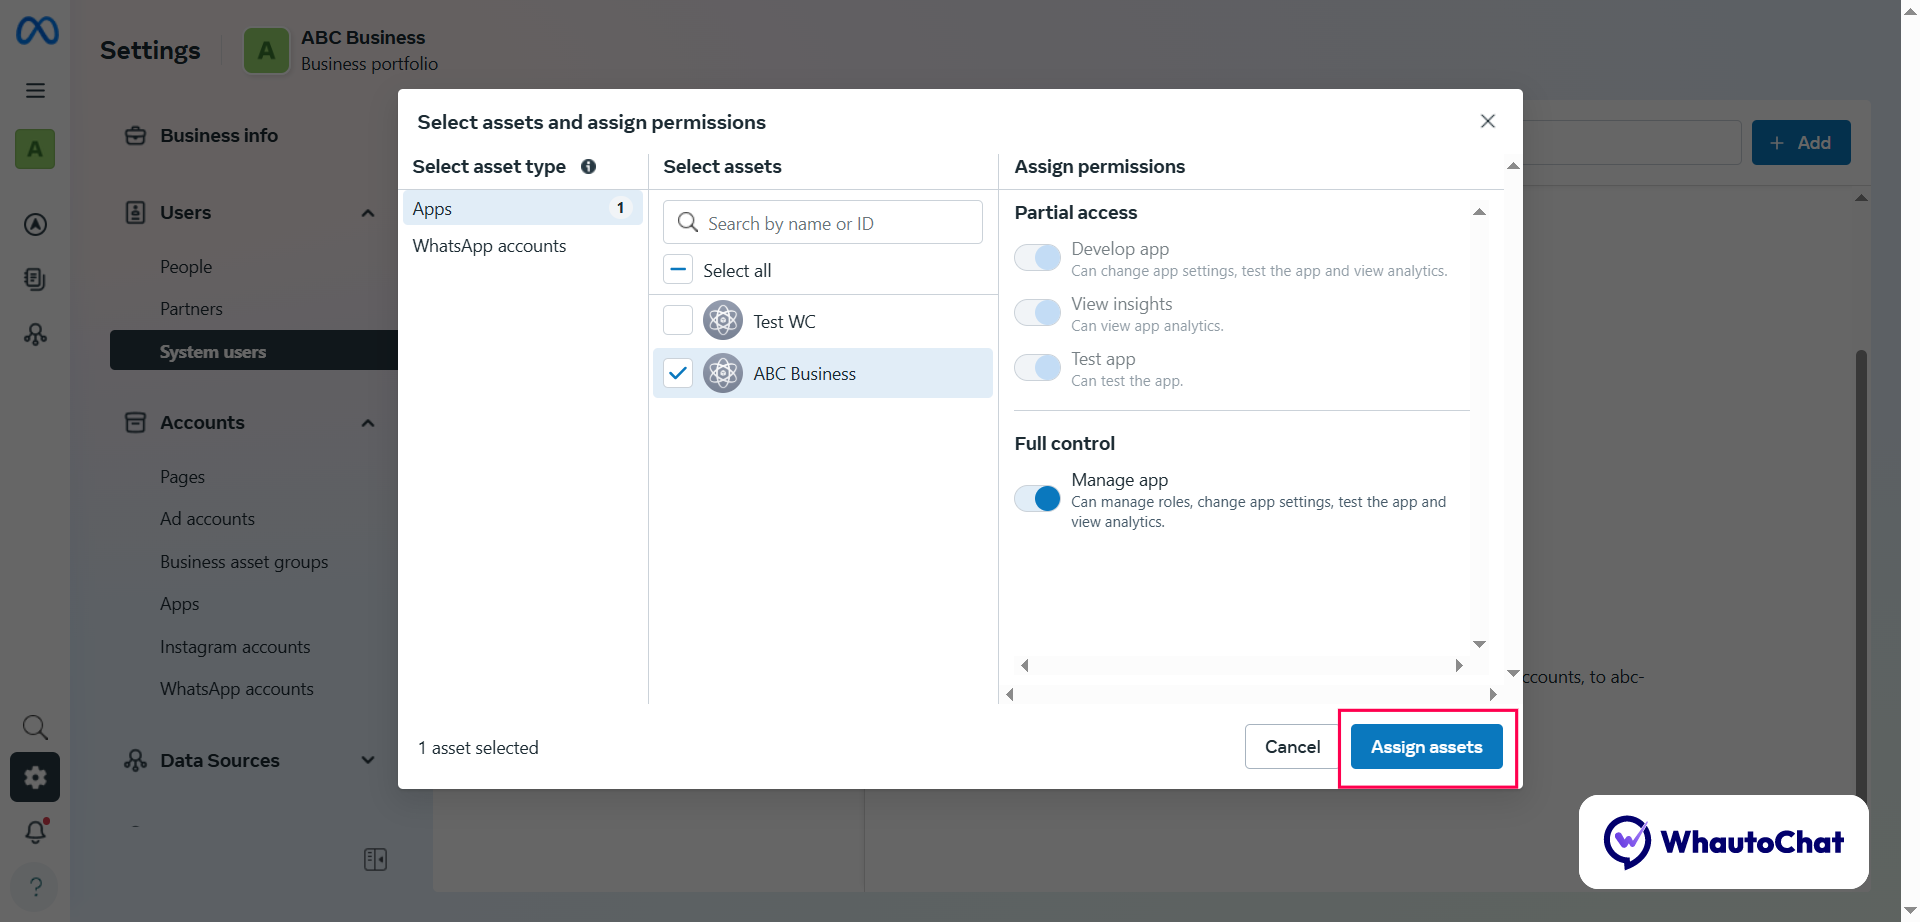
- Click Assign Assets:
- Select your Meta App → Enable Full Control (Manage App) → Click Assign Assets
- Scroll up → Click Generate Token
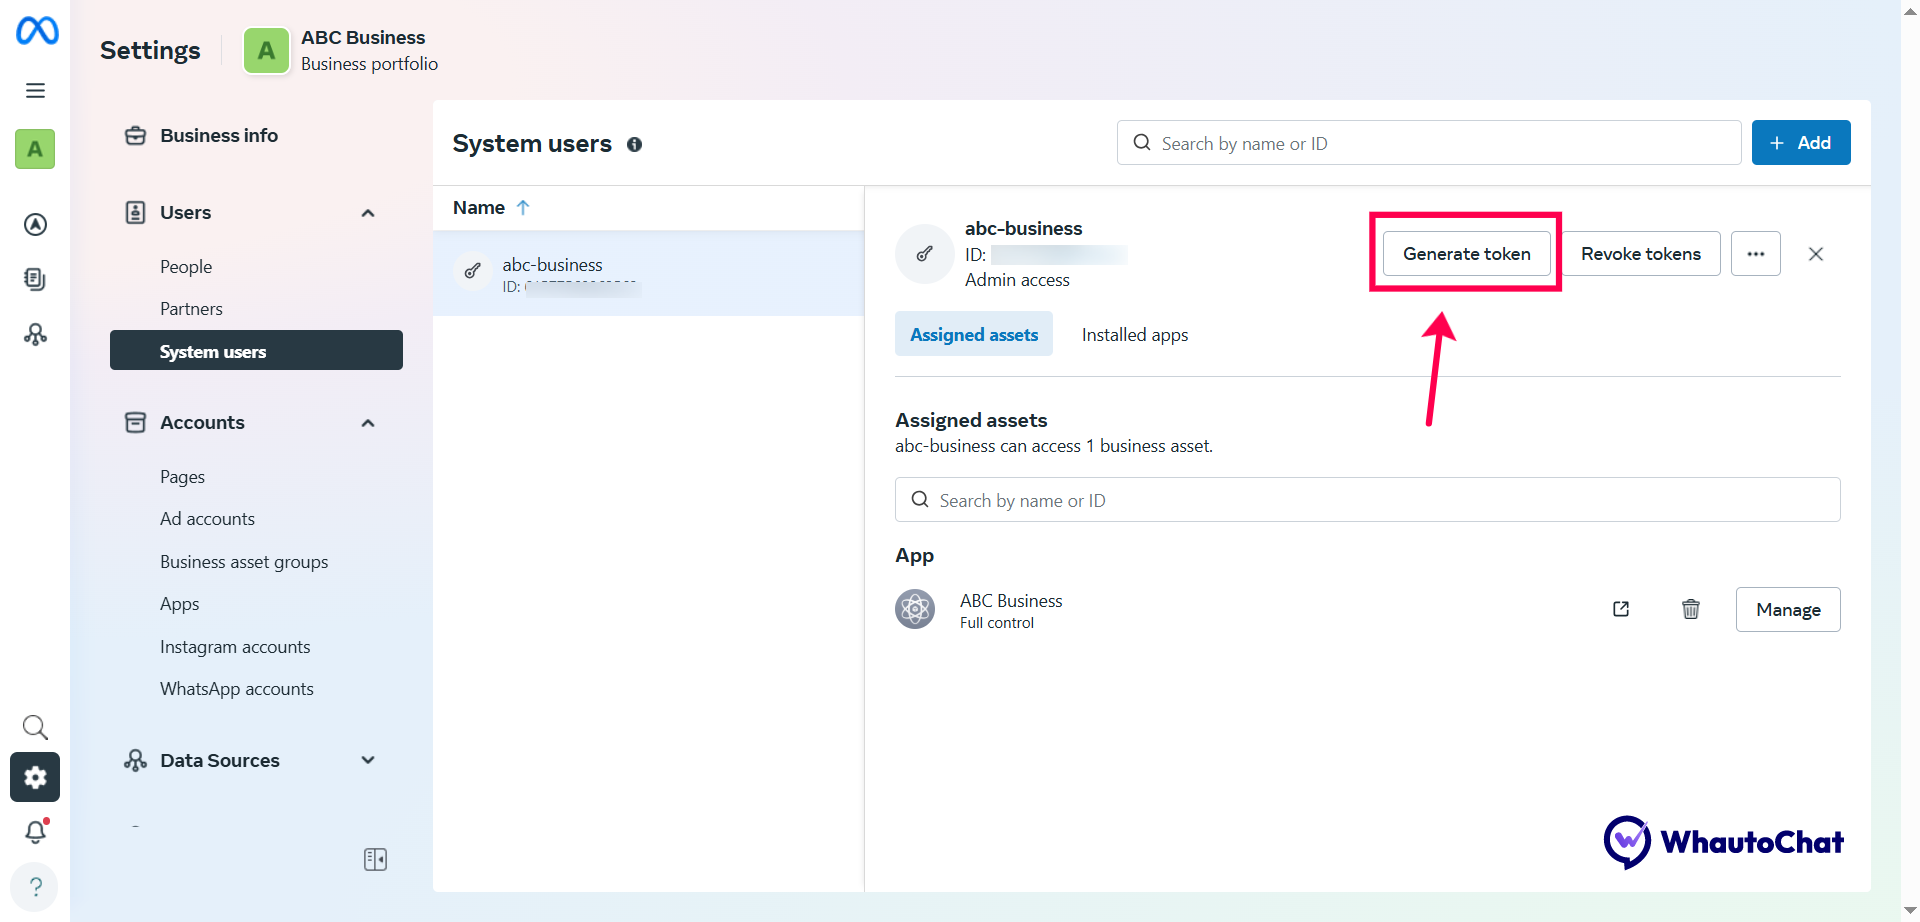
- Generate Token:
- Select your Meta App Eg. ABC Business → Click Next

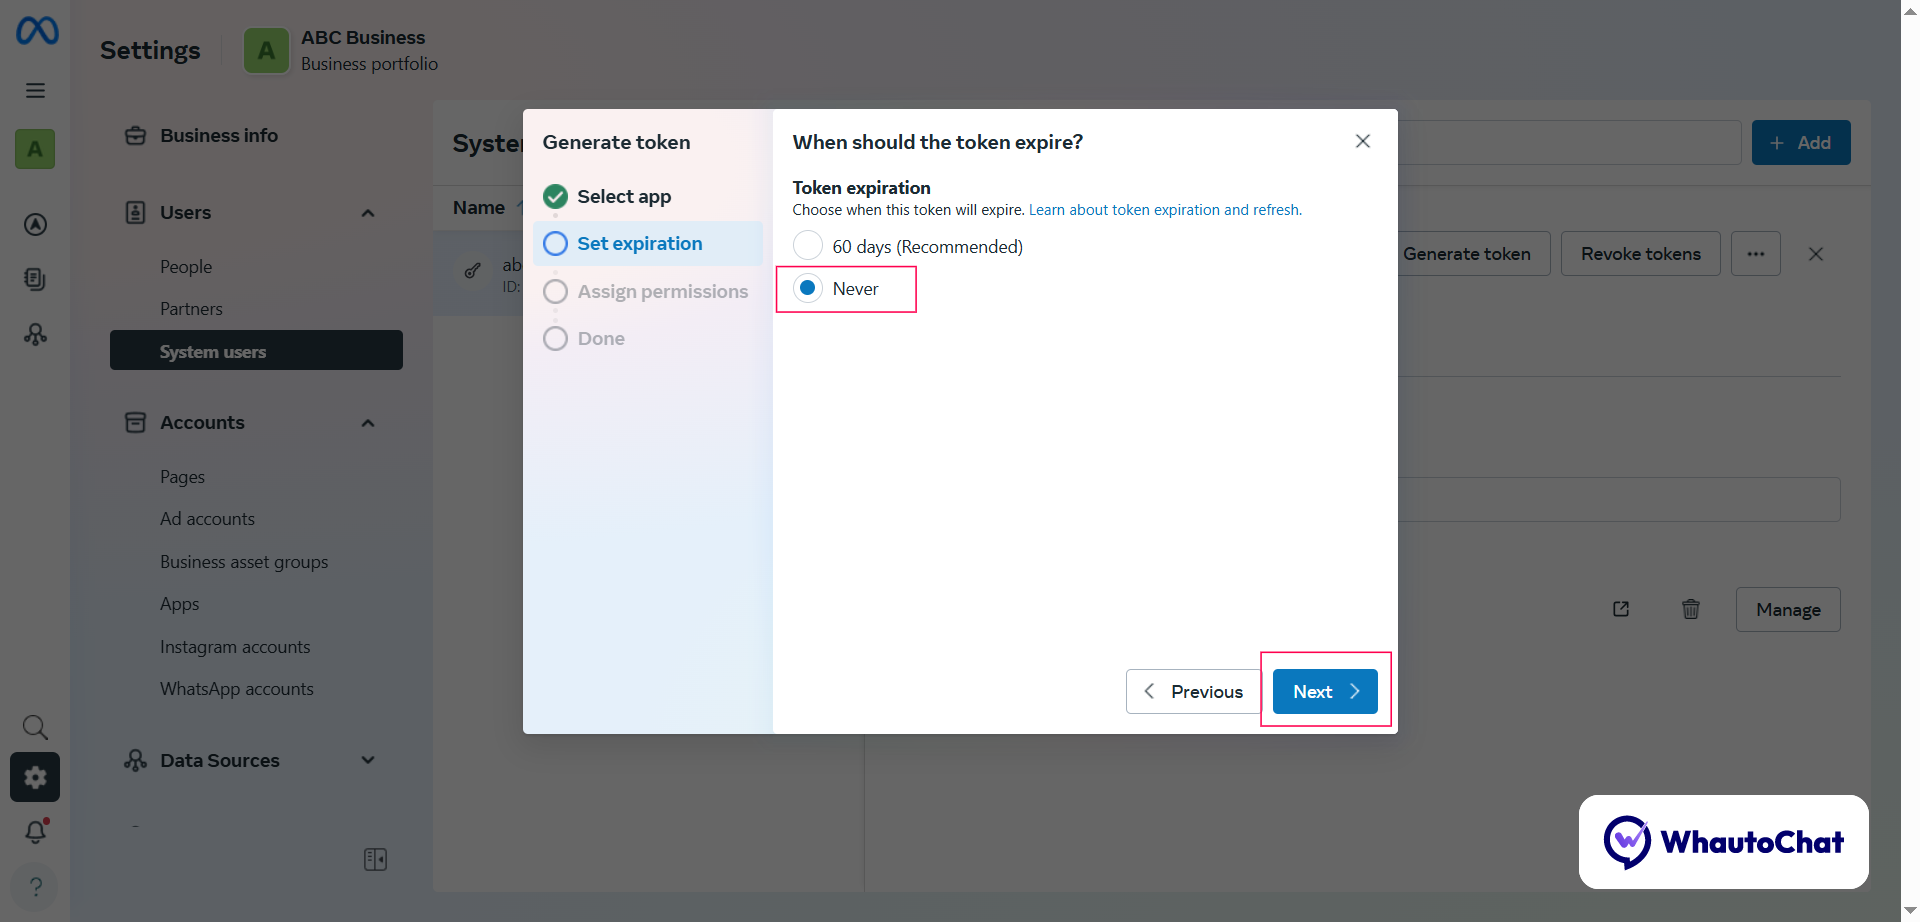
- Token Expiration: Select Never → Click Next
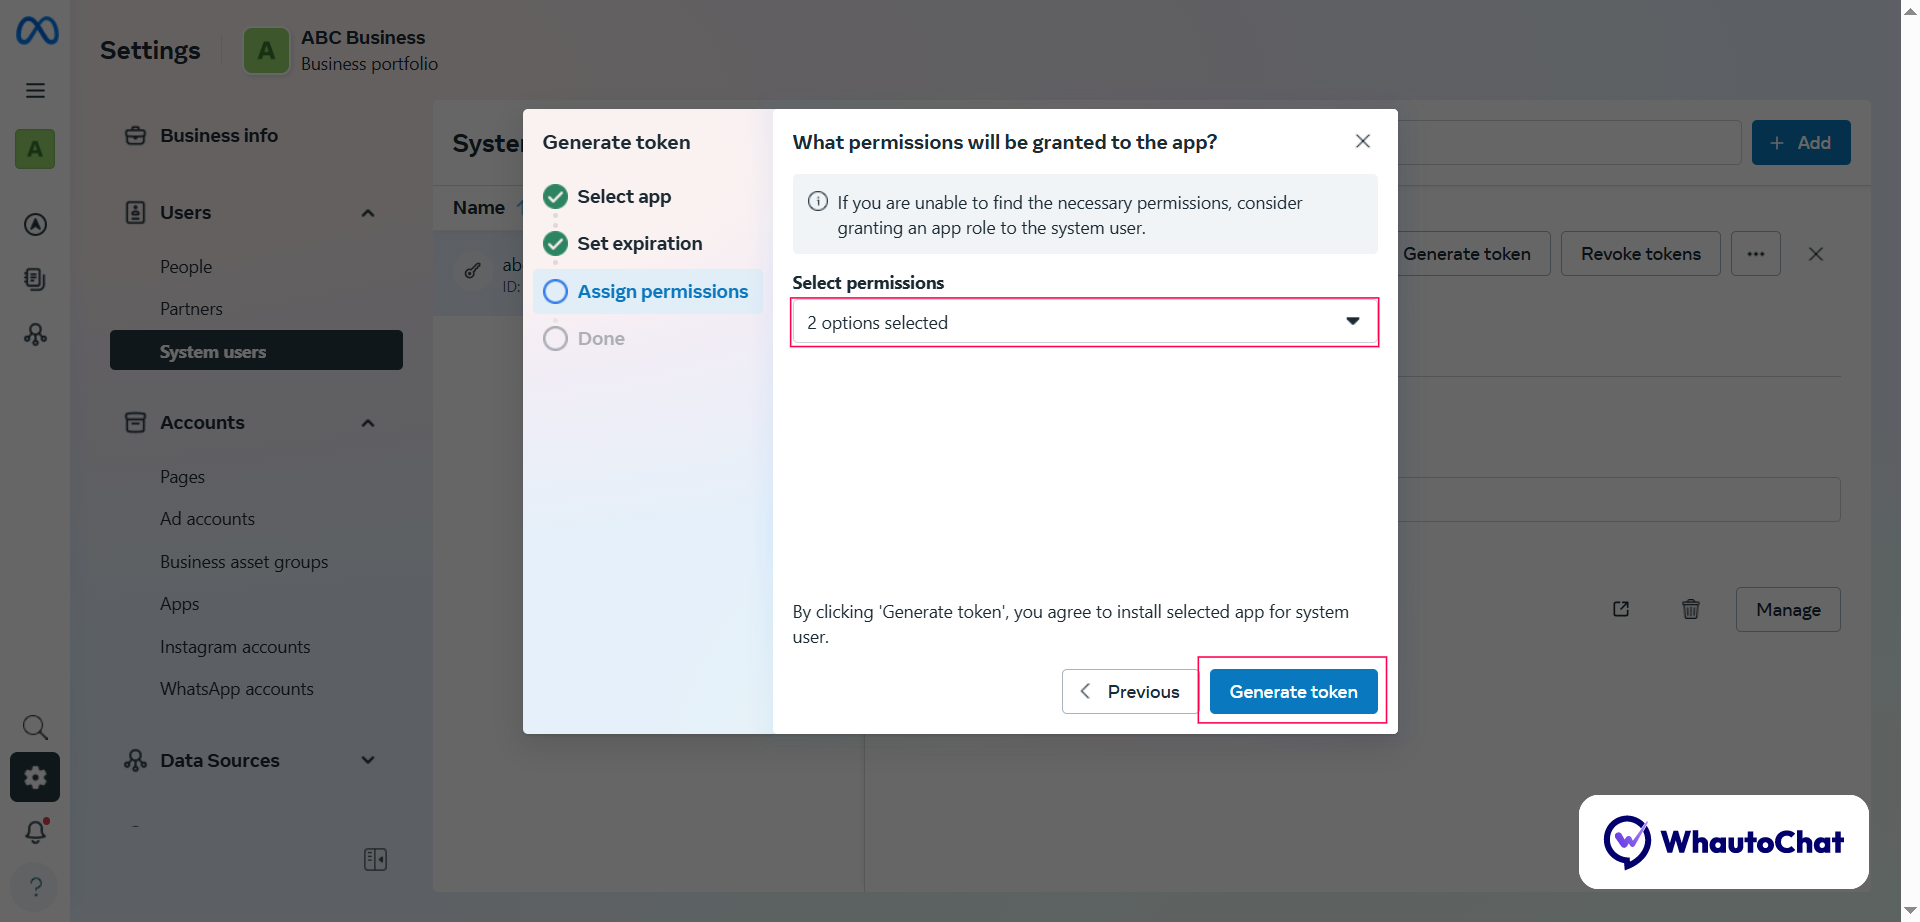
- Select below mentioned 3 Permissions:
- whatsapp_business_management
- Whatsapp_business_messaging
- business_management
- Click Generate Token
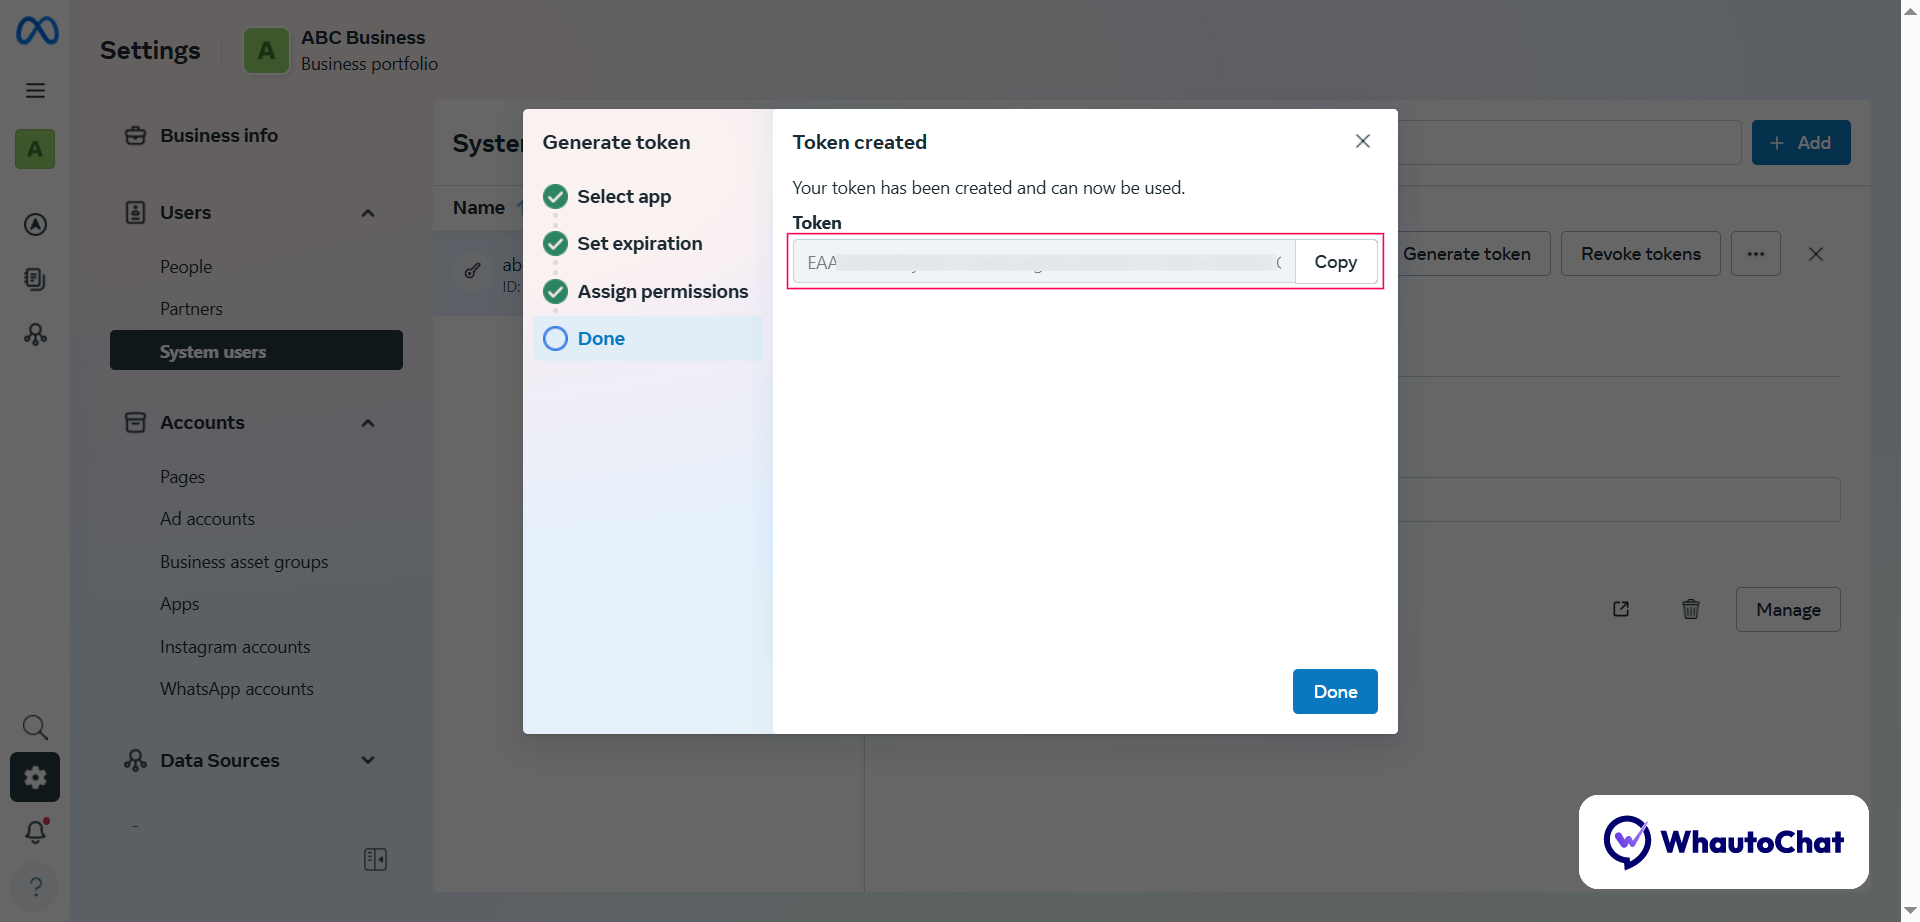
- 🔐 Copy the generated Token → paste into WHATSAPP_APP_TOKEN
- Update your (web-server.env) file with this value.
🧪 Step 8: Set WhatsApp Verify Token
- The Verify Token can be any random string.
- To generate one quickly, visit:👉 https://www.random.org/strings
- You’ll see a list of randomly generated strings.
- Copy any one of them and update it in your WhatsApp configuration list.
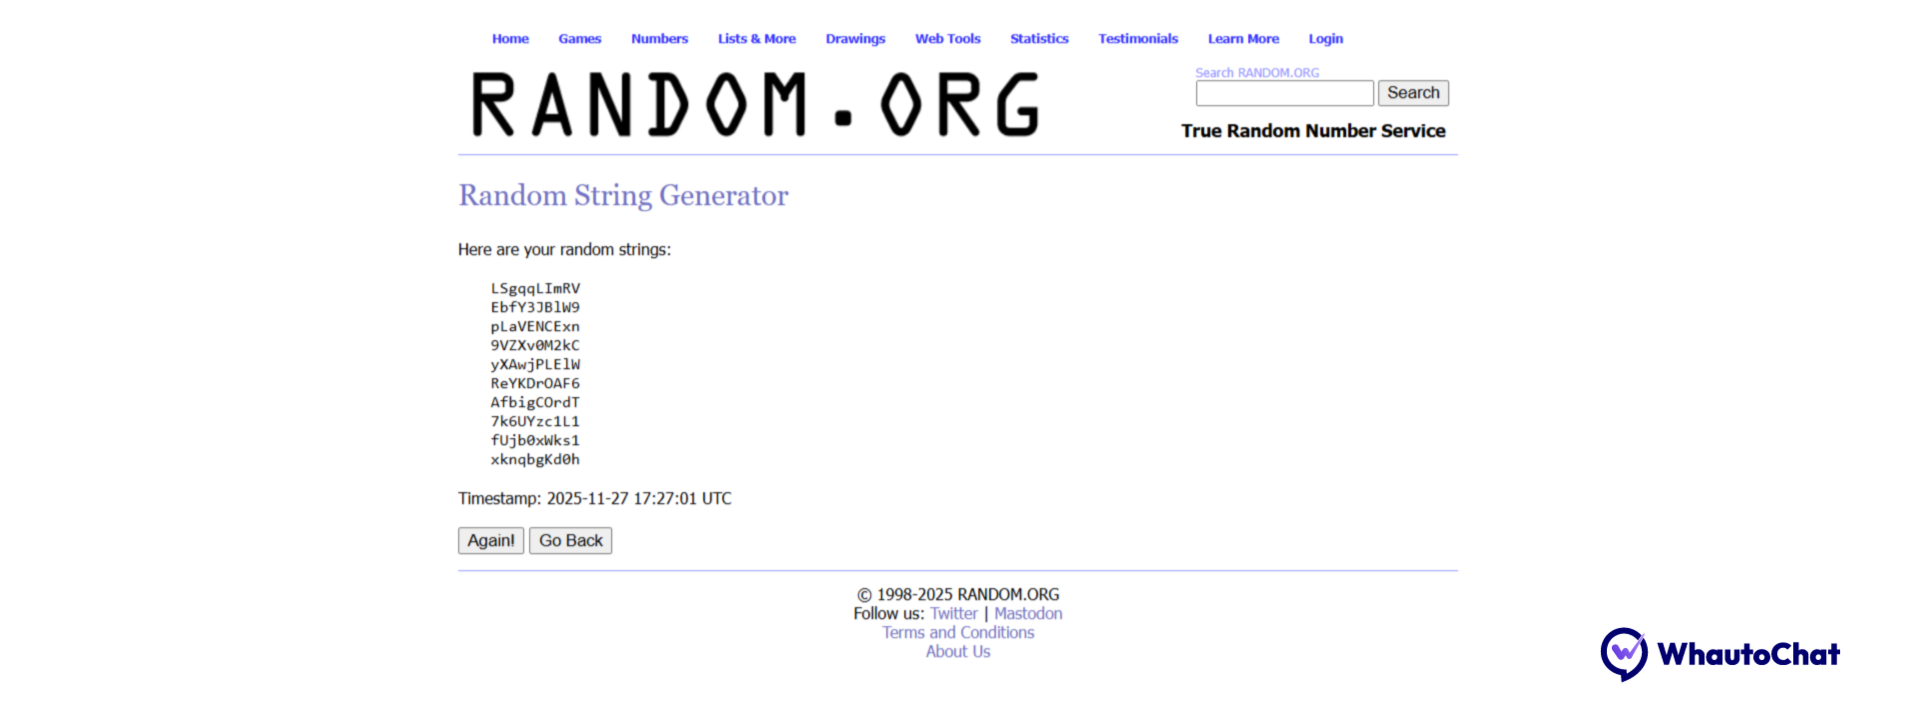 Example: 2AqYO0vP0M
→ paste into WHATSAPP_VERIFY_TOKEN
Example: 2AqYO0vP0M
→ paste into WHATSAPP_VERIFY_TOKEN
✅ Step 9: Update Your .env File
Here’s how your final configuration should look:
WhatsApp Integration
WHATSAPP_APP_ID="112233445566778"
WHATSAPP_APP_SECRET="a1b2c3d4e5f6g7h8i9j0"
WHATSAPP_CONFIGURATION_ID="9988776655443322"
WHATSAPP_APP_TOKEN="EAAJZCZA2wZA1cUBABAZCZA3UZBvE4fWQ4BbZA1ZCZAUZBZCwZCmIvW8uZAJZChq4ZAzA2ZAedFZBG0UQZDZD"
WHATSAPP_VERIFY_TOKEN="2AqYO0vP0M"
🔹 After App Installation
Post-Installation Configuration: Finalize Your Setup
💬 WhatsApp Webhook Configuration (Reseller SaaS License)
⚠️ Important: Webhook configuration is mandatory and must be done only after installing the app. If skipped, WhatsApp incoming/outgoing messages will not work.
🔧 Step-by-Step Guide
✅ Step 1: Open Your Meta Developer App
- Visit https://developers.facebook.com
- Log in to the Facebook account used for your Meta app setup
- Click My Apps (top-right corner)
- Select your existing Meta App (e.g., ABC Business)
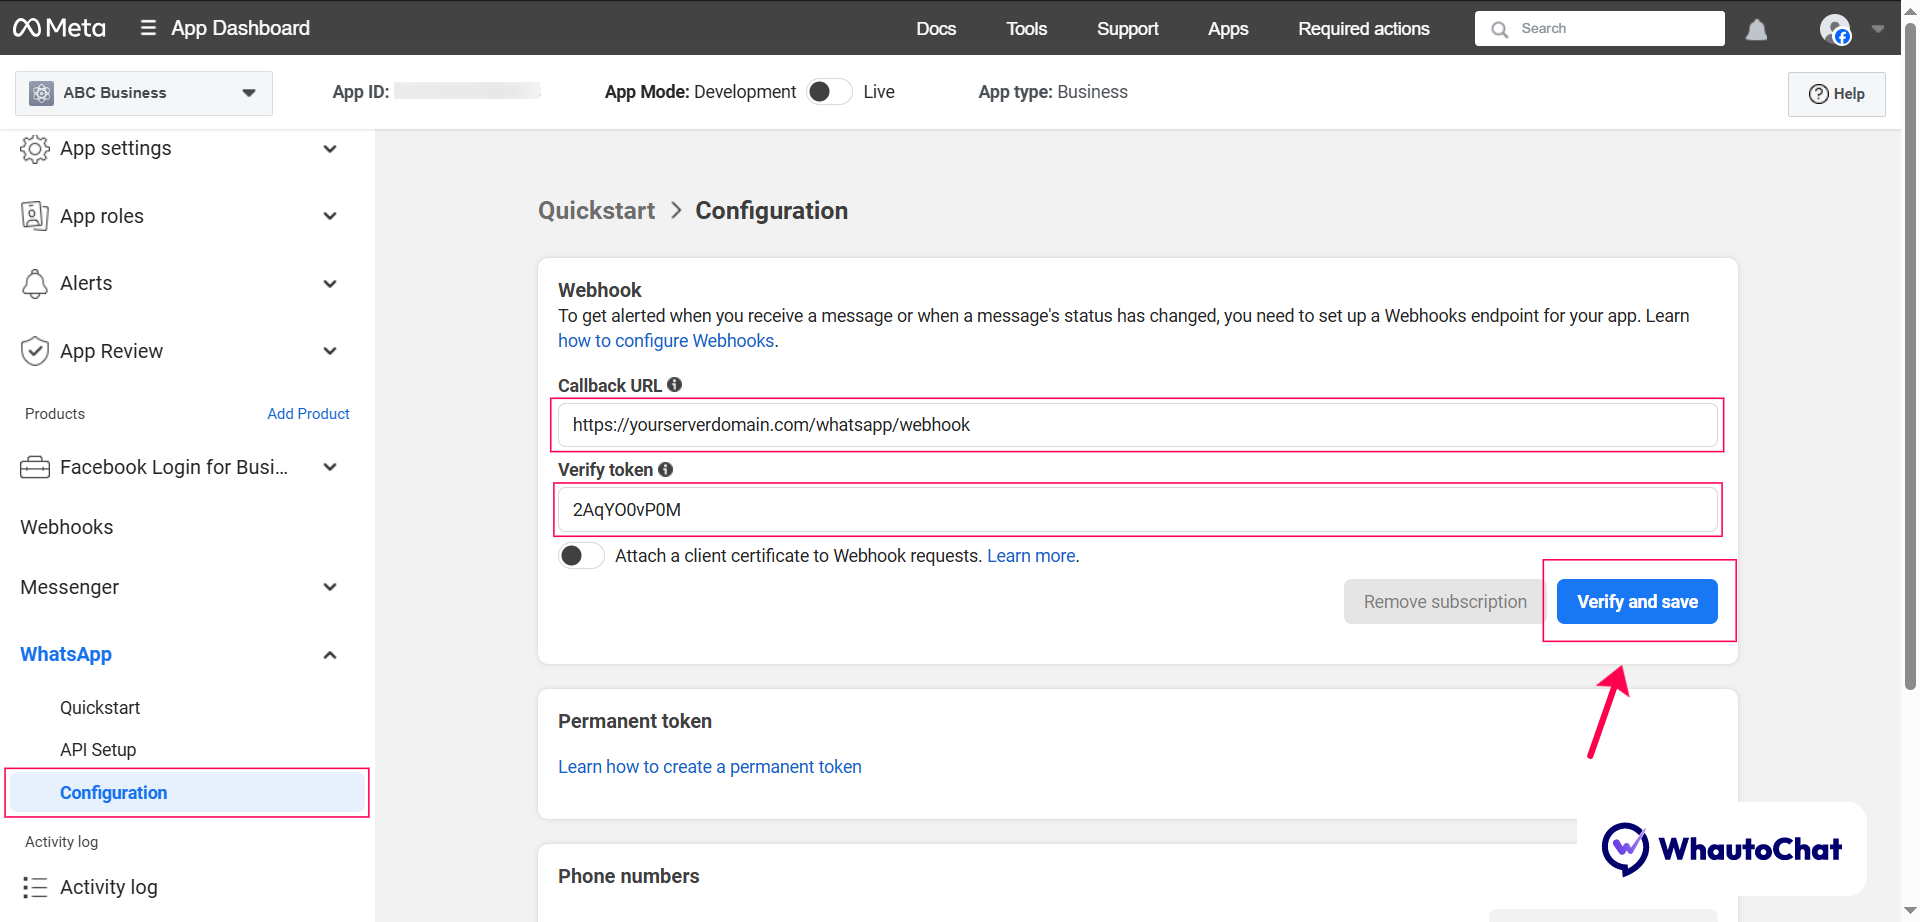
⚙️ Step 2: Configure Webhook for WhatsApp
- In the WhatsApp menu:
- Go to the Configuration section
- In the Webhook Configuration Modal:
- Callback URL: https://yourserverdomain.com/whatsapp/webhook
Replace yourserverdomain with the domain you configured during license installation.
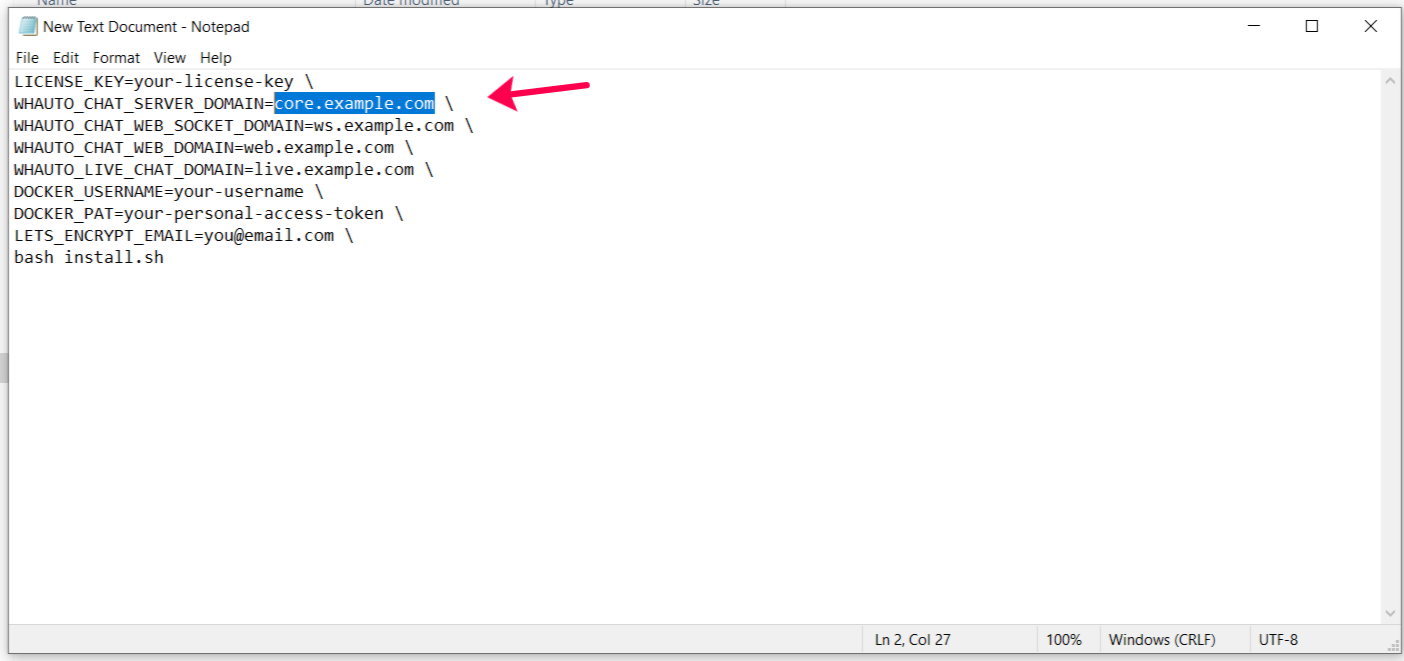
Example: https://core.example.com/whatsapp/webhook
- Verify Token: Use the token from your .env file — WHATSAPP_VERIFY_TOKEN Example: 2AqYO0vP0M
- Click Verify and Save
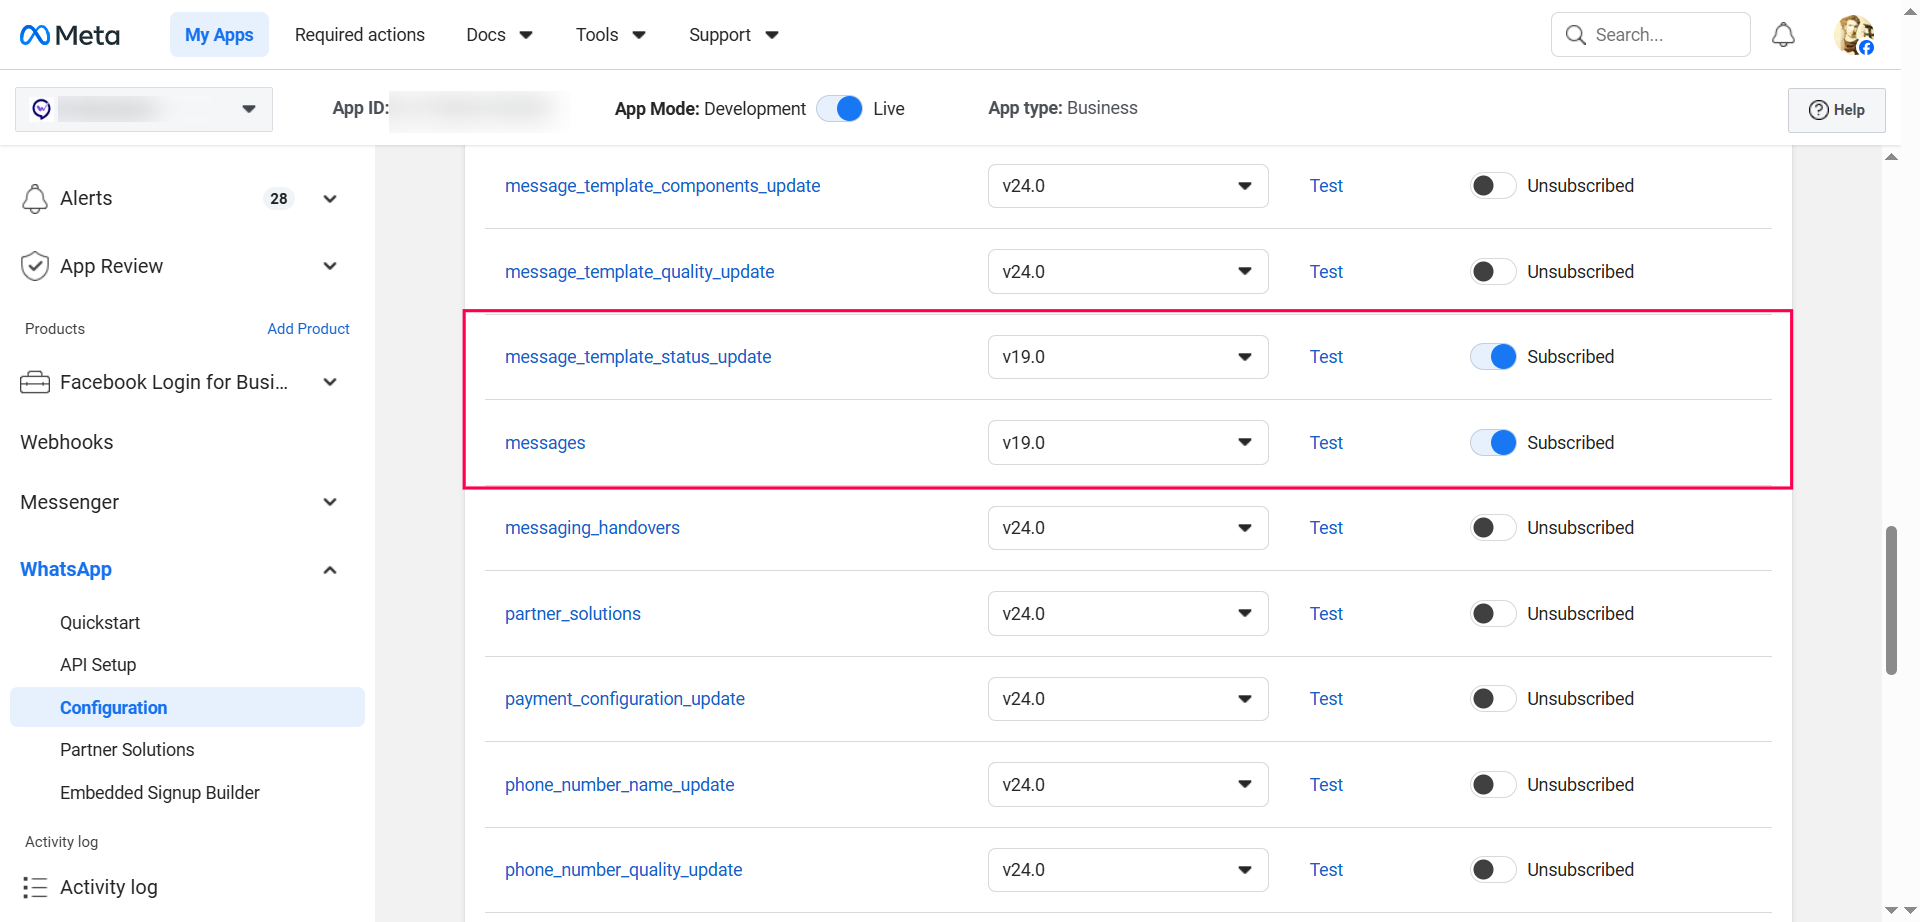
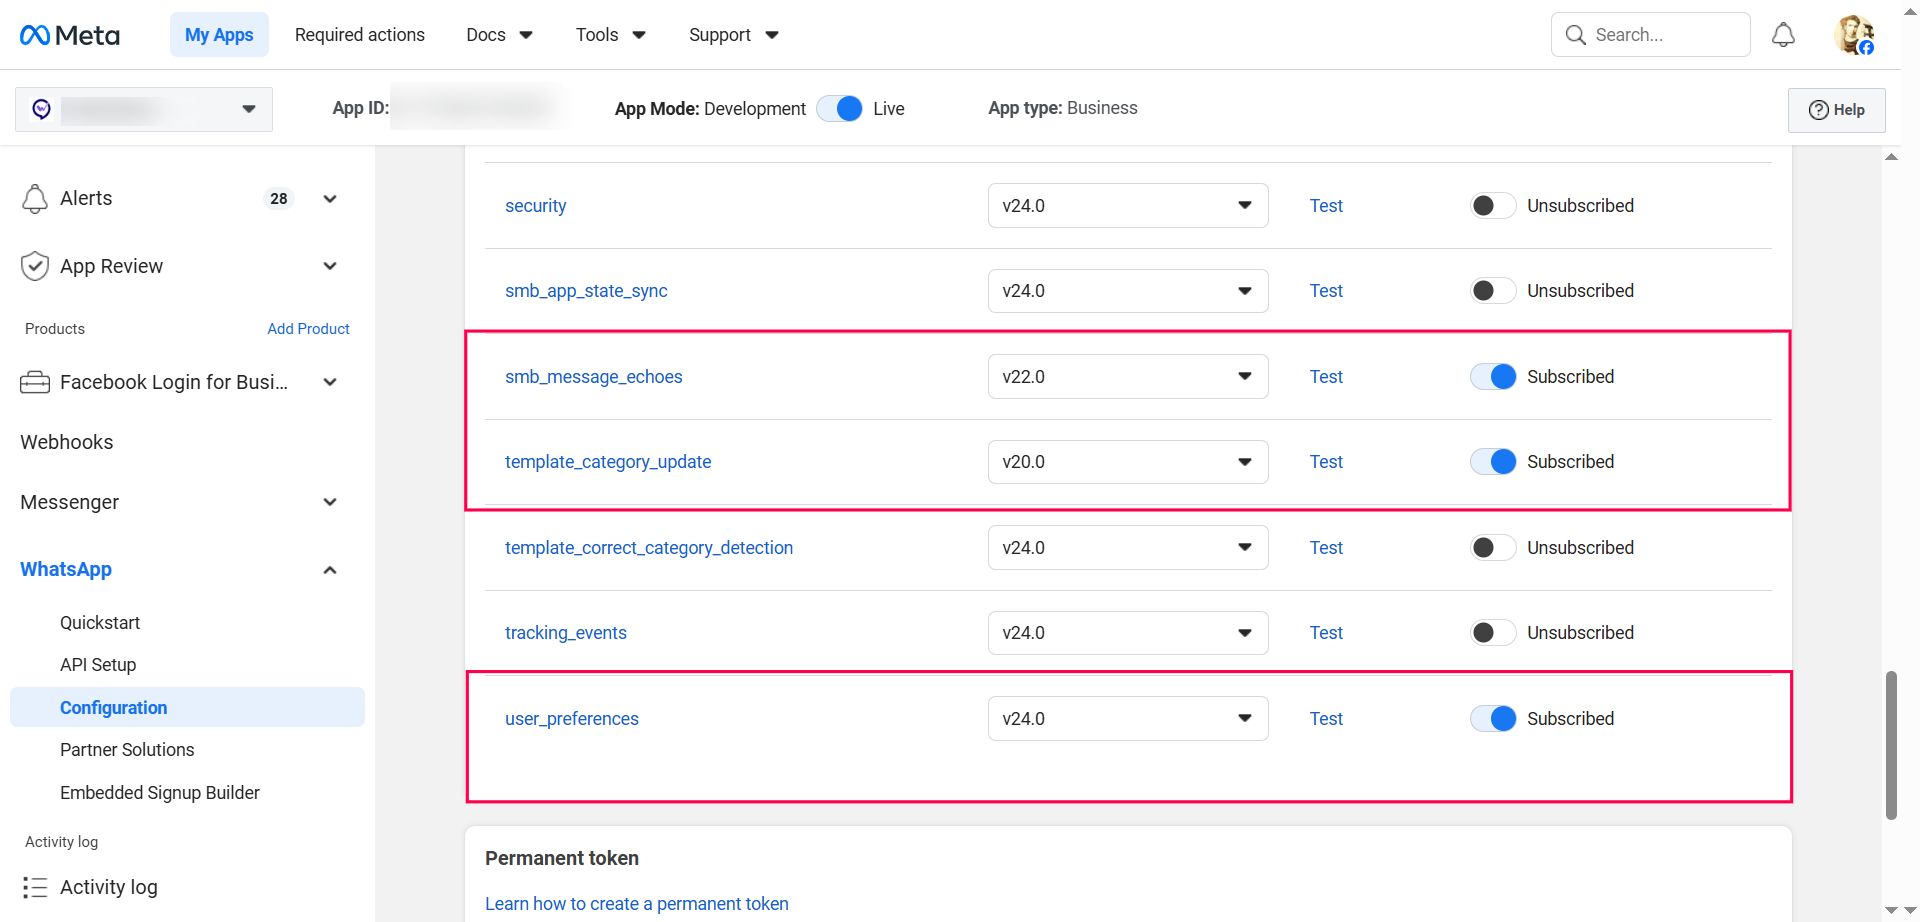
📡 Step 3: Subscribe to Webhook Fields
- Enable the Subscribed toggle for the following 5 webhook fields:
- message_template_status_update
- messages
- smb_message_echoes
- template_category_update
- user_preferences
✅ Step 4: Finalize Setup in WhautoChat
- Go to your self-hosted Installed WhautoChat app
- Complete the WhatsApp Integration
- Send a test message to verify the webhook connection
Additional Resources
For advanced features or troubleshooting, refer to your WhatsApp API provider's documentation or WhautoChat support.